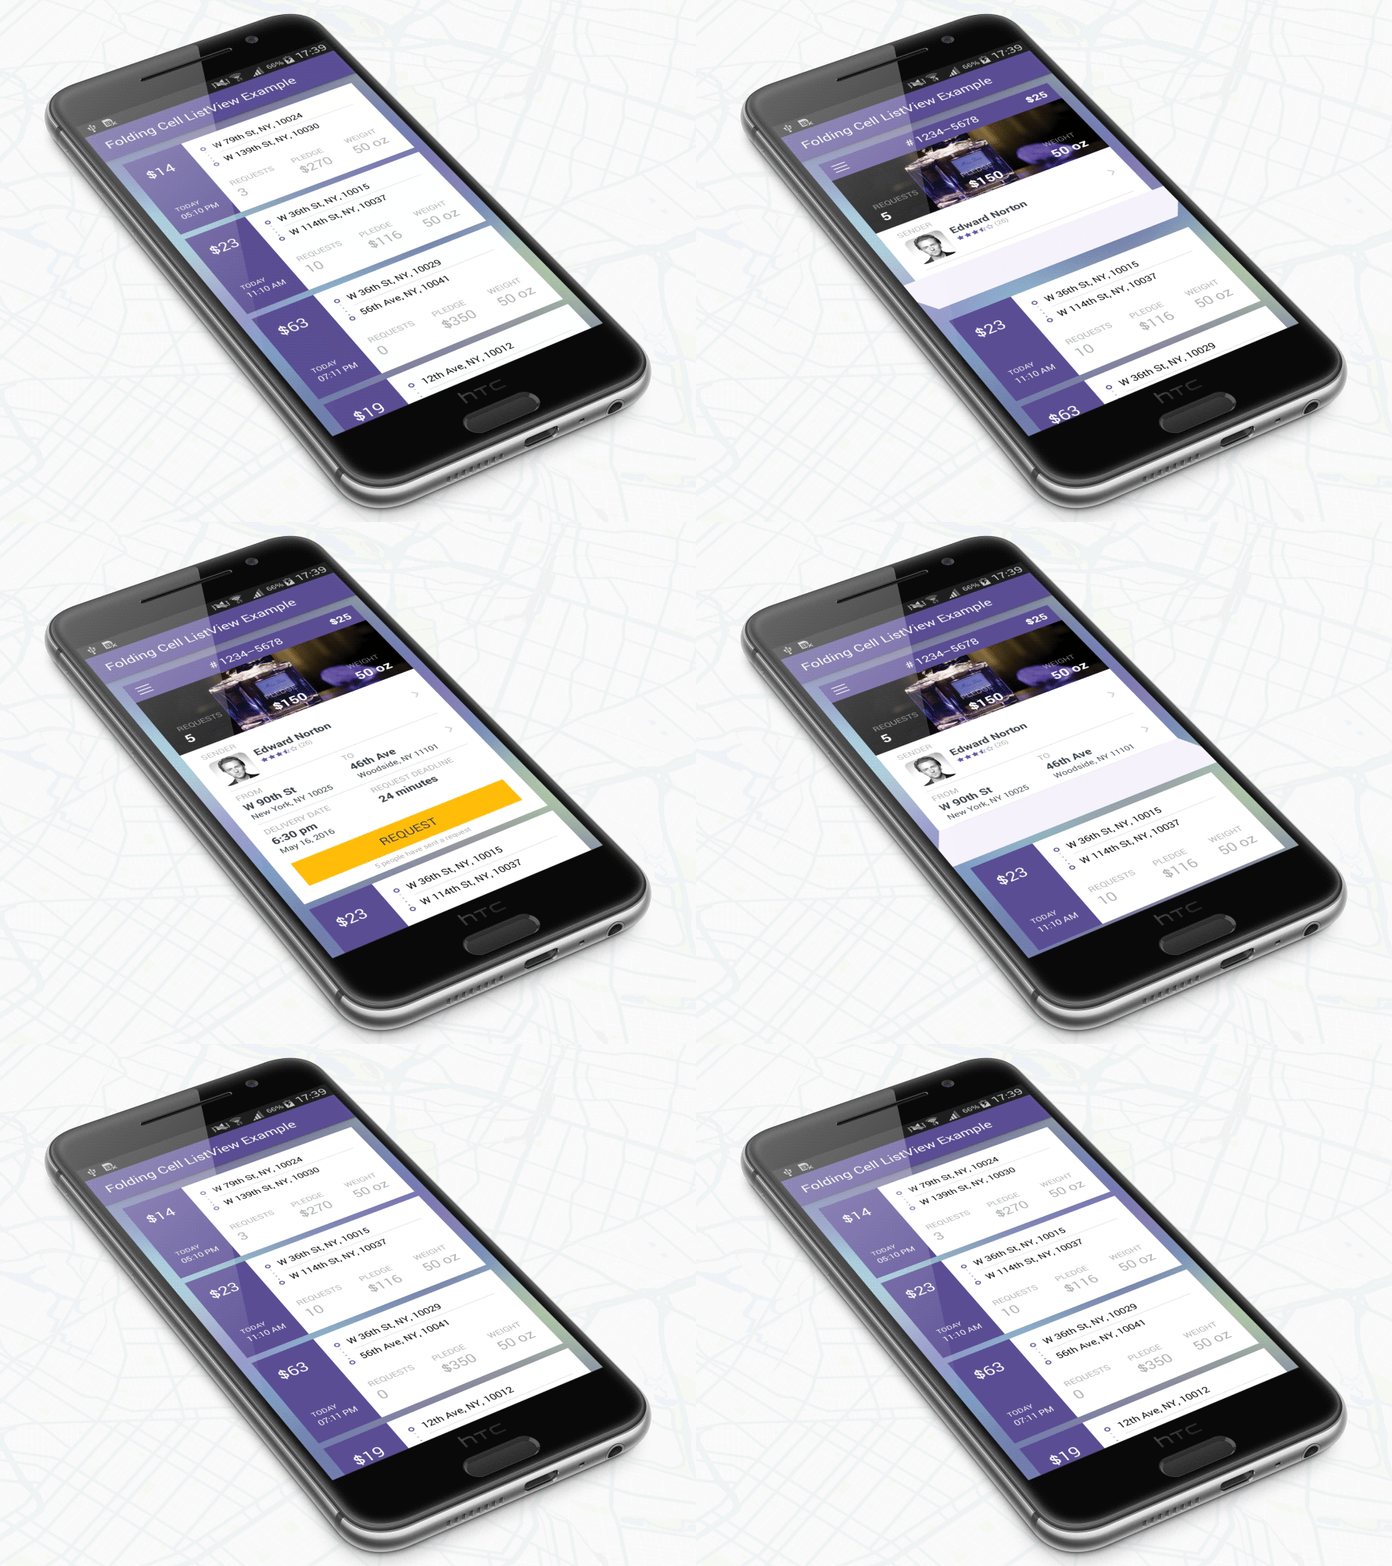

號
只需從此處下載套件並將其新增至您的專案類路徑中,或僅使用 Maven 儲存庫:
搖籃:
' com.ramotion.foldingcell:folding-cell:1.2.3 '科學技術試驗:
libraryDependencies += " com.ramotion.foldingcell " % " folding-cell " % " 1.2.3 "行家:
< dependency >
	< groupId >com.ramotion.foldingcell</ groupId >
	< artifactId >folding-cell</ artifactId >
	< version >1.2.3</ version >
</ dependency >
號
號
com.ramotion.foldingcell.FoldingCell新增至您的佈局< com .ramotion.foldingcell.FoldingCell
xmlns : android = " http://schemas.android.com/apk/res/android "
android : id = " @+id/folding_cell "
android : layout_width = " match_parent "
android : layout_height = " wrap_content " >
</ com .ramotion.foldingcell.FoldingCell> 2. 在儲存格中新增兩個子元素。第一個子視圖(內容視圖)總是表示展開狀態佈局,第二個子視圖(標題視圖)表示折疊狀態佈局。當然,這些佈局可以包含任意數量的子元素,並且它們可以具有任意複雜性,但要正常工作,存在一些限制:內容視圖高度必須至少是標題視圖高度的2 倍,並且每個元素的高度這些佈局必須設定為android:layout_height="wrap_content" 。如果您想要在dp中設定精確的高度,您可以在內容檢視或標題檢視內的您自己的版面配置中設定子元素的高度。此外,您需要使用android:visibility="gone"隱藏內容視圖佈局。 號
< com .ramotion.foldingcell.FoldingCell
xmlns : android = " http://schemas.android.com/apk/res/android "
android : id = " @+id/folding_cell "
android : layout_width = " match_parent "
android : layout_height = " wrap_content " >
< FrameLayout
android : id = " @+id/cell_content_view "
android : layout_width = " match_parent "
android : layout_height = " wrap_content "
android : background = " @android:color/holo_green_dark "
android : visibility = " gone " >
< TextView
android : layout_width = " match_parent "
android : layout_height = " 250dp " />
</ FrameLayout >
< FrameLayout
android : id = " @+id/cell_title_view "
android : layout_width = " match_parent "
android : layout_height = " wrap_content " >
< TextView
android : layout_width = " match_parent "
android : layout_height = " 100dp "
android : background = " @android:color/holo_blue_dark " />
</ FrameLayout >
</ com .ramotion.foldingcell.FoldingCell>3.快完成了!還剩兩步!為了獲得正確的動畫,您需要在折疊單元的根元素上設定兩個屬性:
android:clipChildren="false"
android:clipToPadding="false"
4.最後一步!將 onClickListener 新增至MainActivity.java中的折疊單元以切換動畫:
@ Override
protected void onCreate ( Bundle savedInstanceState ) {
super . onCreate ( savedInstanceState );
setContentView ( R . layout . activity_main );
// get our folding cell
final FoldingCell fc = ( FoldingCell ) findViewById ( R . id . folding_cell );
// attach click listener to folding cell
fc . setOnClickListener ( new View . OnClickListener () {
@ Override
public void onClick ( View v ) {
fc . toggle ( false );
}
});
} 5. 額外步驟 - 自訂儲存格設定。目前,有三個主要參數 - 動畫時間、背面顏色和附加翻轉次數。如果前兩者不會引起問題,那麼第三個需要一些解釋。它是第一次(主)翻轉後要執行的翻轉計數。預設值為0 (自動選擇)。還有第四個附加參數 - 相機高度,它控制 3D 效果的等級(深度)。有兩種方法可以更改單元格設定: 從具有res-auto命名空間xmlns:folding-cell="http://schemas.android.com/apk/res-auto"的 xml 佈局檔:
folding-cell:animationDuration="1000"
folding-cell:backSideColor="@color/bgBackSideColor"
folding-cell:additionalFlipsCount="2"
folding-cell:cameraHeight="30"
或來自代碼:
 // get our folding cell
final FoldingCell fc = ( FoldingCell ) findViewById ( R . id . folding_cell );
// set custom parameters
fc . initialize ( 1000 , Color . DKGRAY , 2 );
// or with camera height parameter
fc . initialize ( 30 , 1000 , Color . DKGRAY , 2 );
您可以在此儲存庫中找到此範例以及其他更複雜的範例

Folding Cell 是在 MIT 許可下發布的。有關詳細信息,請參閱許可證。
該庫是我們精選的最佳 UI 開源專案的一部分
如果您在專案中使用開源程式庫,請確保註明並反向連結至 www.ramotion.com
在我們的 Android 應用程式中嘗試這個 UI 元件和更多類似的元件。如果有興趣請聯絡我們。