MongoFlix - MongoDB Atlas 搜尋、MongoDB 應用服務、GraphQL 等的互動式示範。
這就是我們要建造的!
還可以在應用程式服務上作為靜態網站使用!
您當然可以克隆存儲庫並在本地運行項目npm install && npm run build 。或者,您可以在瀏覽器中開啟該項目,而無需在電腦上進行任何安裝。
在 StackBlitz 上即時開啟專案:
複製檔案.env.local.example-add-app-id-here並將其命名為: .env.local 。您需要將<APP_ID>值變更為 MongoDB App Services 應用程式的應用程式 ID,該應用程式將在稍後的步驟中建立。如果您的 MongoDB App Services 應用程式有不同的基本 URL,您也必須更新NEXT_PUBLIC_REALM_BASE_URL值。該值將取決於 MongoDB App Services 應用程式的部署區域。
要完成演示,您需要建立 MongoDB Atlas 叢集並將範例資料集載入到叢集中。請在 MongoDB Atlas 上建立帳戶並按照說明進行操作。如果這是您第一次使用 Atlas,您將需要建立一個組織和一個專案。完成帳戶設定後,您將看到Atlas UI 。如果您沒有任何集群,請按一下「建置資料庫」按鈕。
在以下對話方塊中選擇「共享」並按一下「建立」 。以下畫面將提供配置集群的介面。
如果您選擇法蘭克福以外的區域,則需要更新.env.local中應用程式中的端點以符合該區域。
以下是集群的設定:
AWS, Frankfurt (eu-central-1)MO Sandbox (Shared RAM, 512 MB Storage)Cluster0 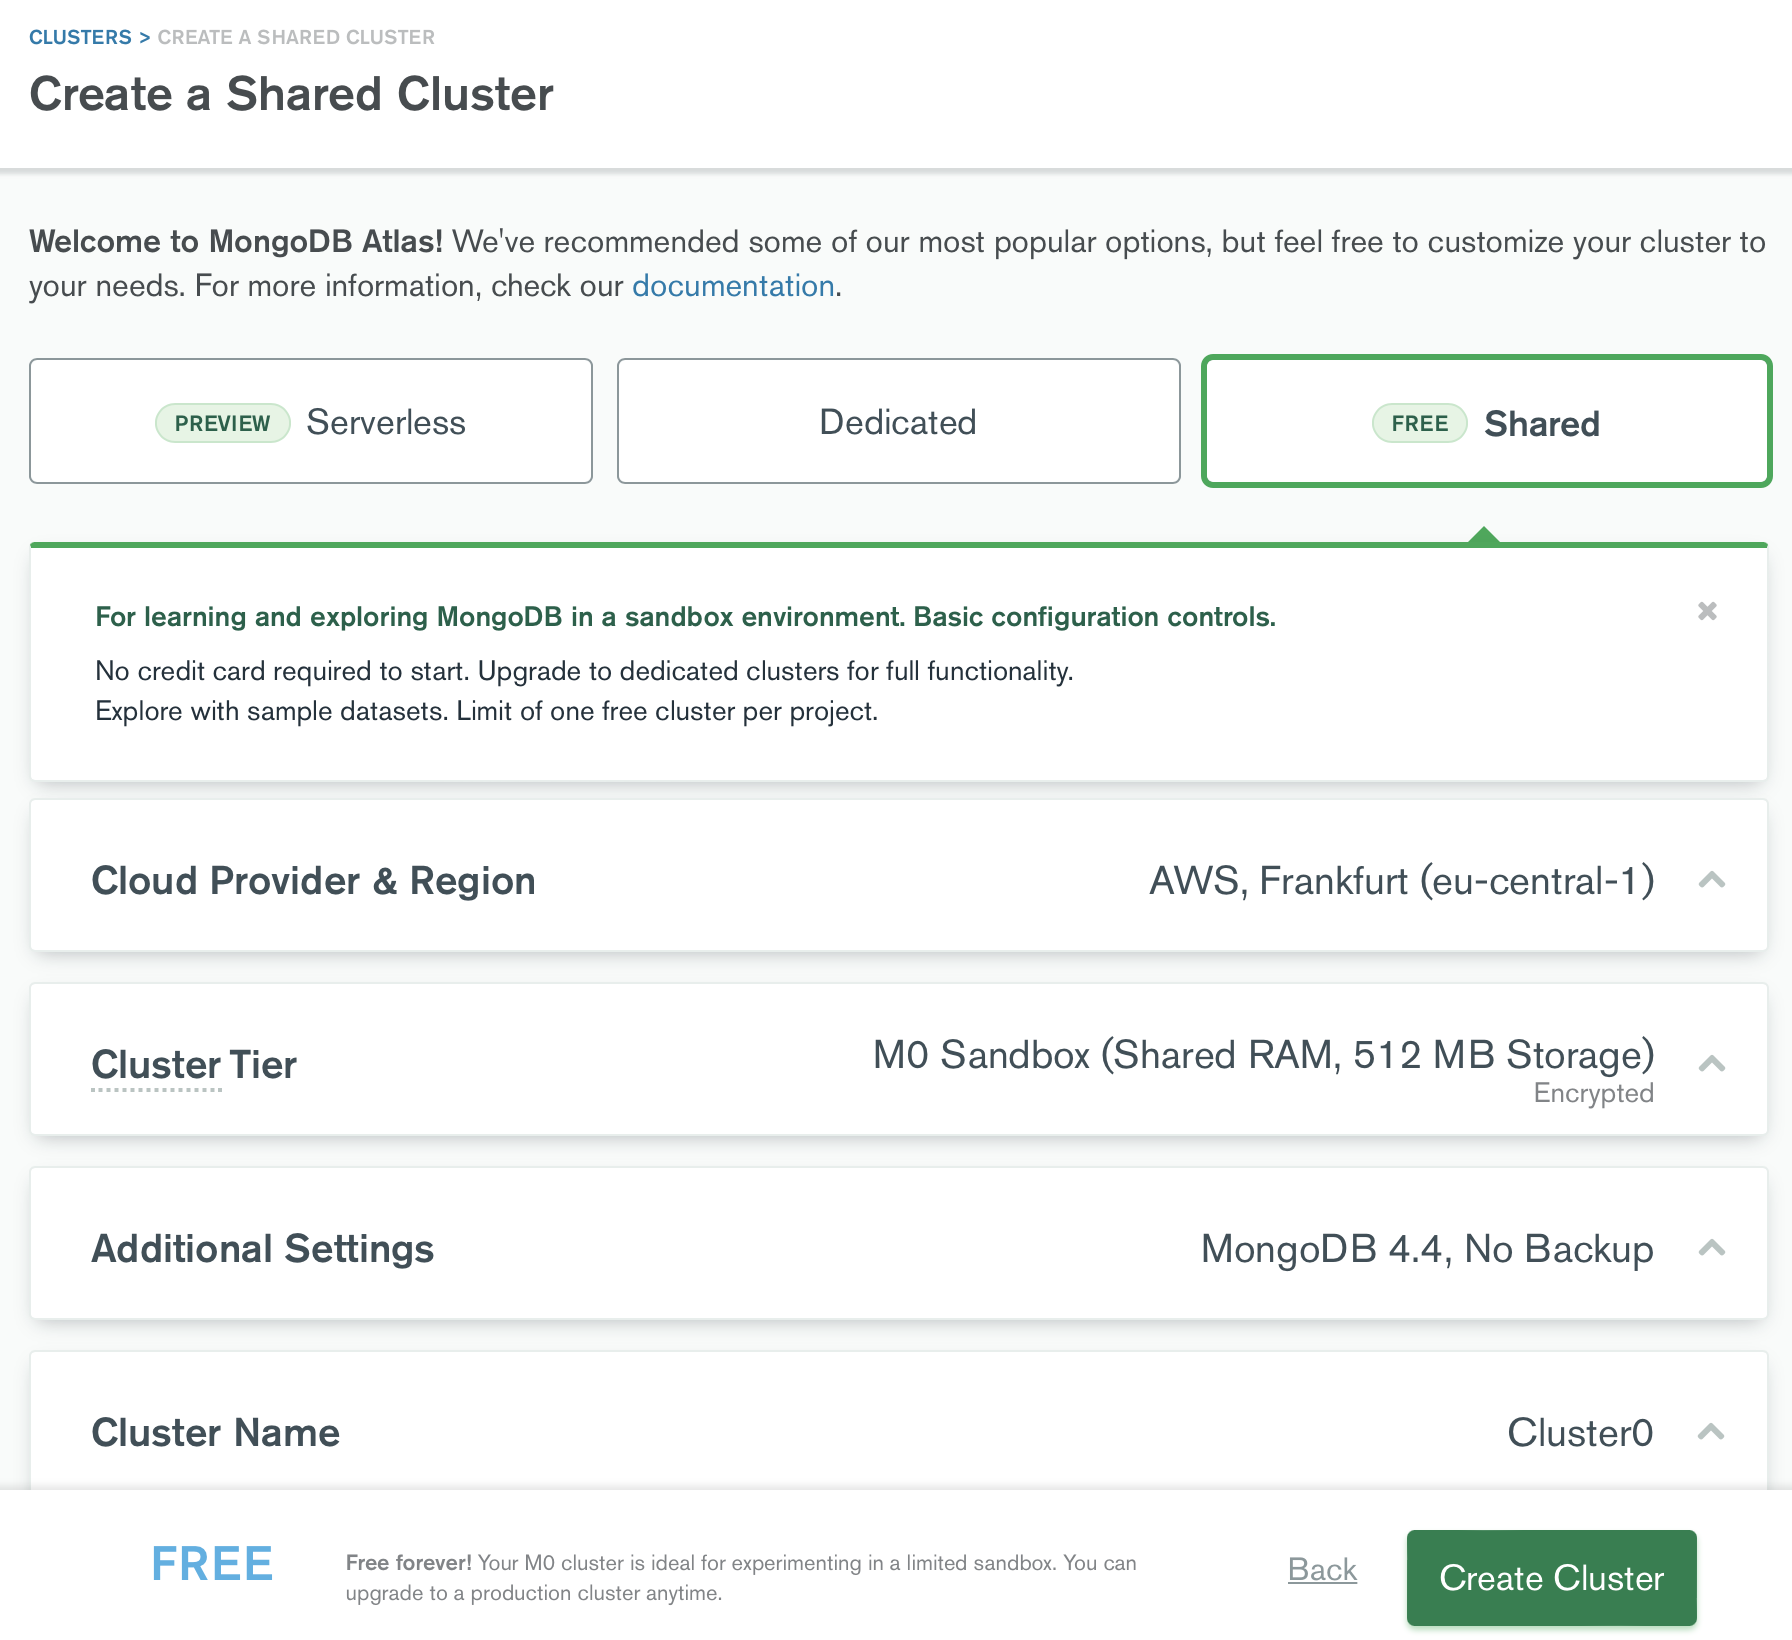
將叢集部署到您選擇的區域後,您需要將範例資料集載入到叢集中。點擊集群卡頂部標題中的三點選單。按一下載入範例資料集。點擊疊加層中的“載入樣本資料集”按鈕開始該過程。 (大約需要5-10分鐘。☕️?)
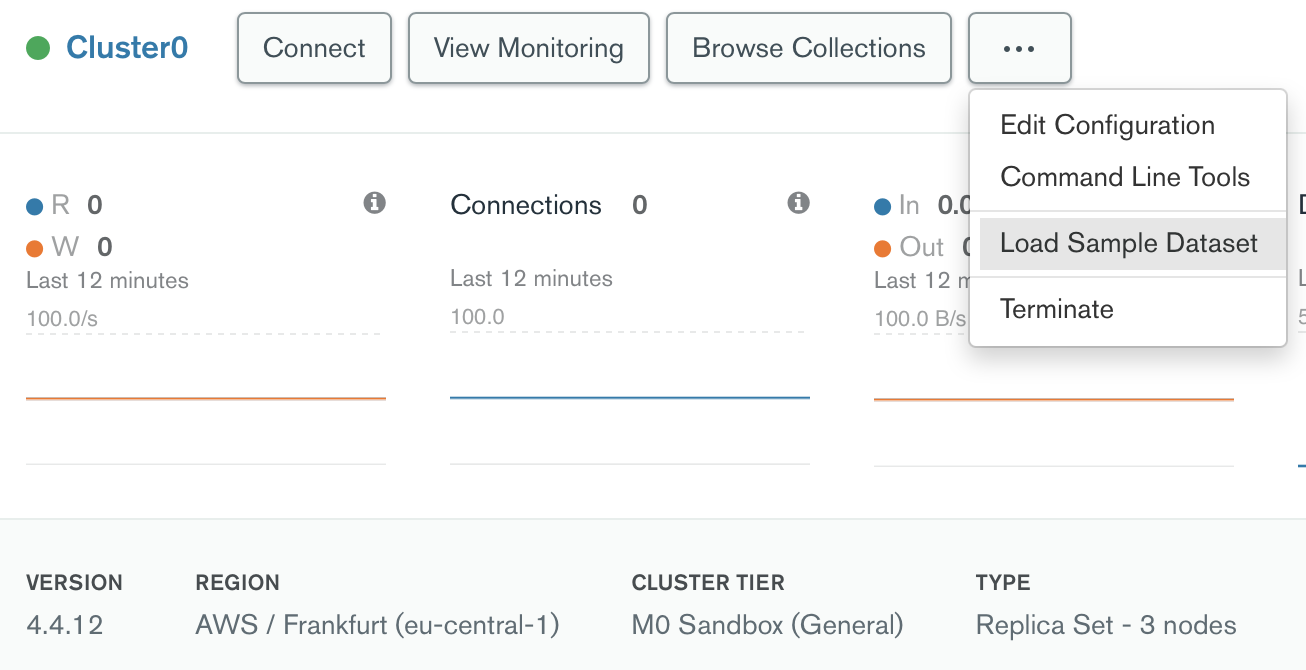
按一下叢集名稱將其開啟。在Atlas上的叢集中,按一下「搜尋」標籤。按一下「建立搜尋索引」按鈕以建立索引。
sample_mflix並選擇movies 。default並貼上以下 JSON。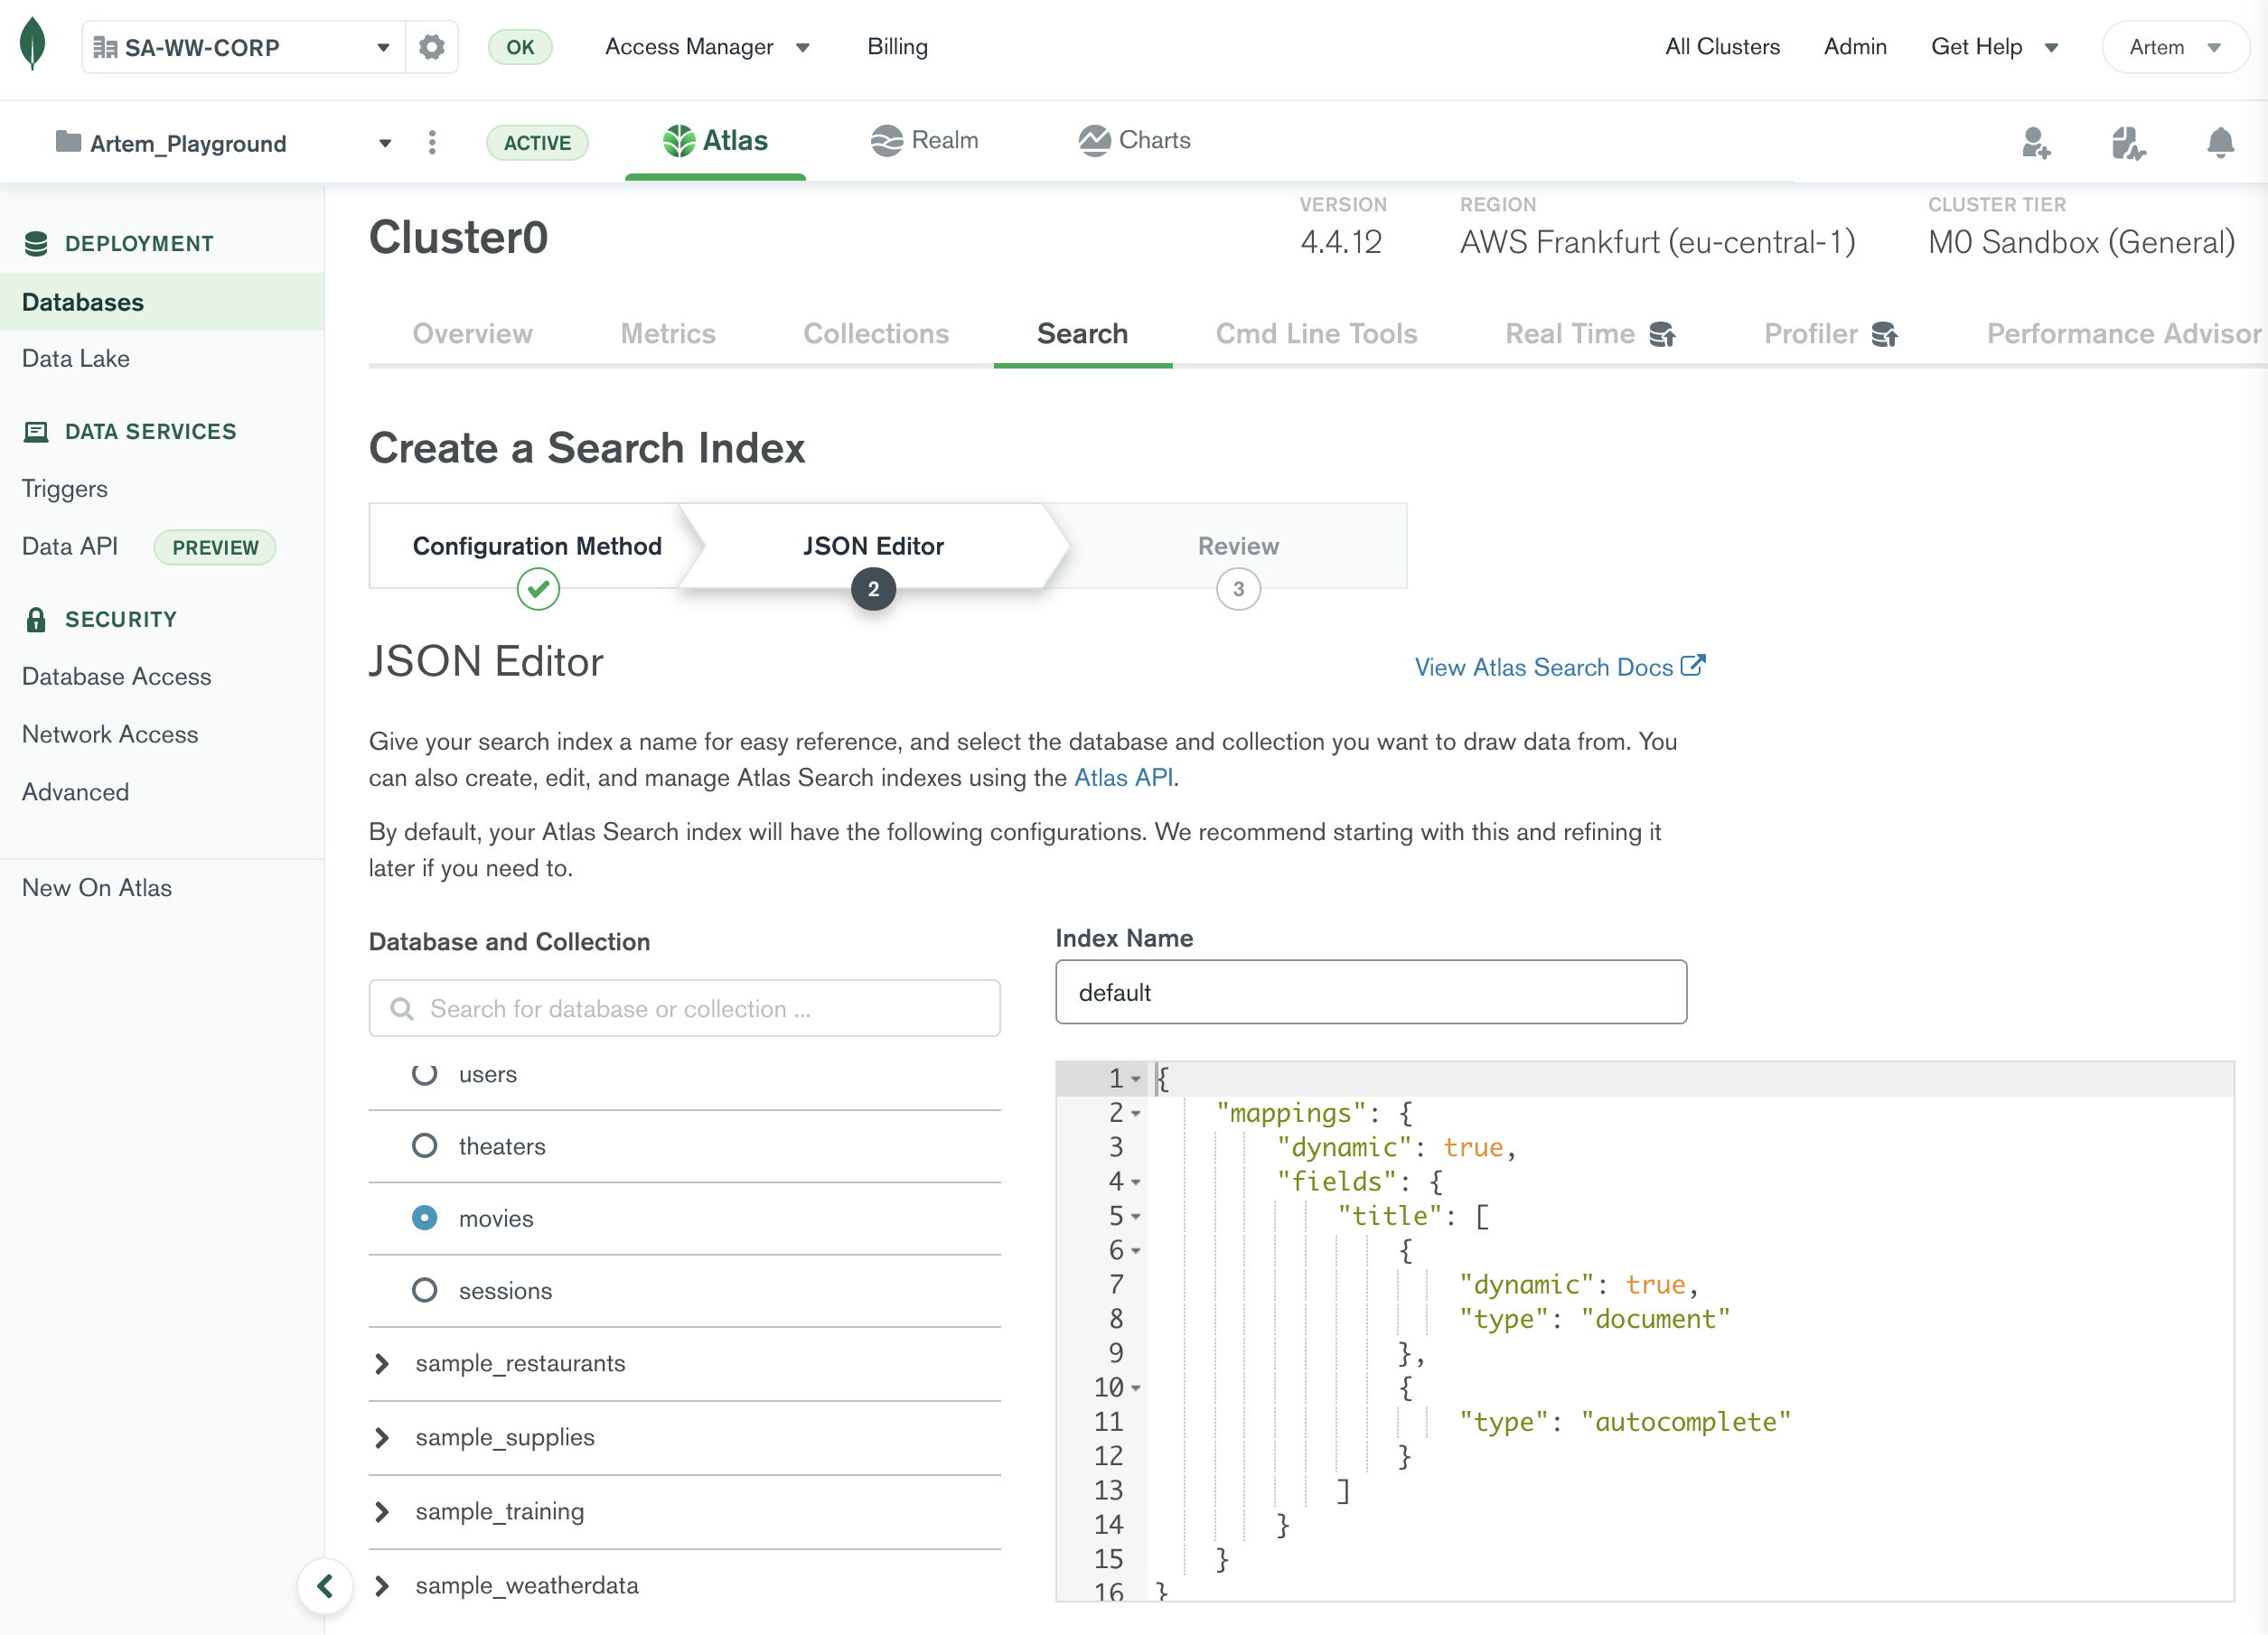
{
    "mappings" : {
        "dynamic" : true ,
        "fields" : {
            "title" : [
                {
                    "dynamic" : true ,
                    "type" : " document "
                },
                {
                    "type" : " autocomplete "
                }
            ]
        }
    }
}索引建立應該需要不到一分鐘的時間。讓我們測試一下,以驗證它是否有效。仍然在「搜尋」標籤中,按一下新建立的索引旁邊的「查詢」按鈕。輸入以下查詢以查找在任何文字值中包含文字time的所有影片。
{ "$search" : { "text" : " time travel " } }在Atlas UI 中,按一下頂部的「應用程式服務」標籤。如果您是第一次使用應用程式服務,您將看到一個包含附加說明的對話方塊。您可以安全地選擇“建立您自己的應用程式” ,然後按一下“下一步” 。該資訊應自動填入。為簡單起見,請確保使用相同的名稱。
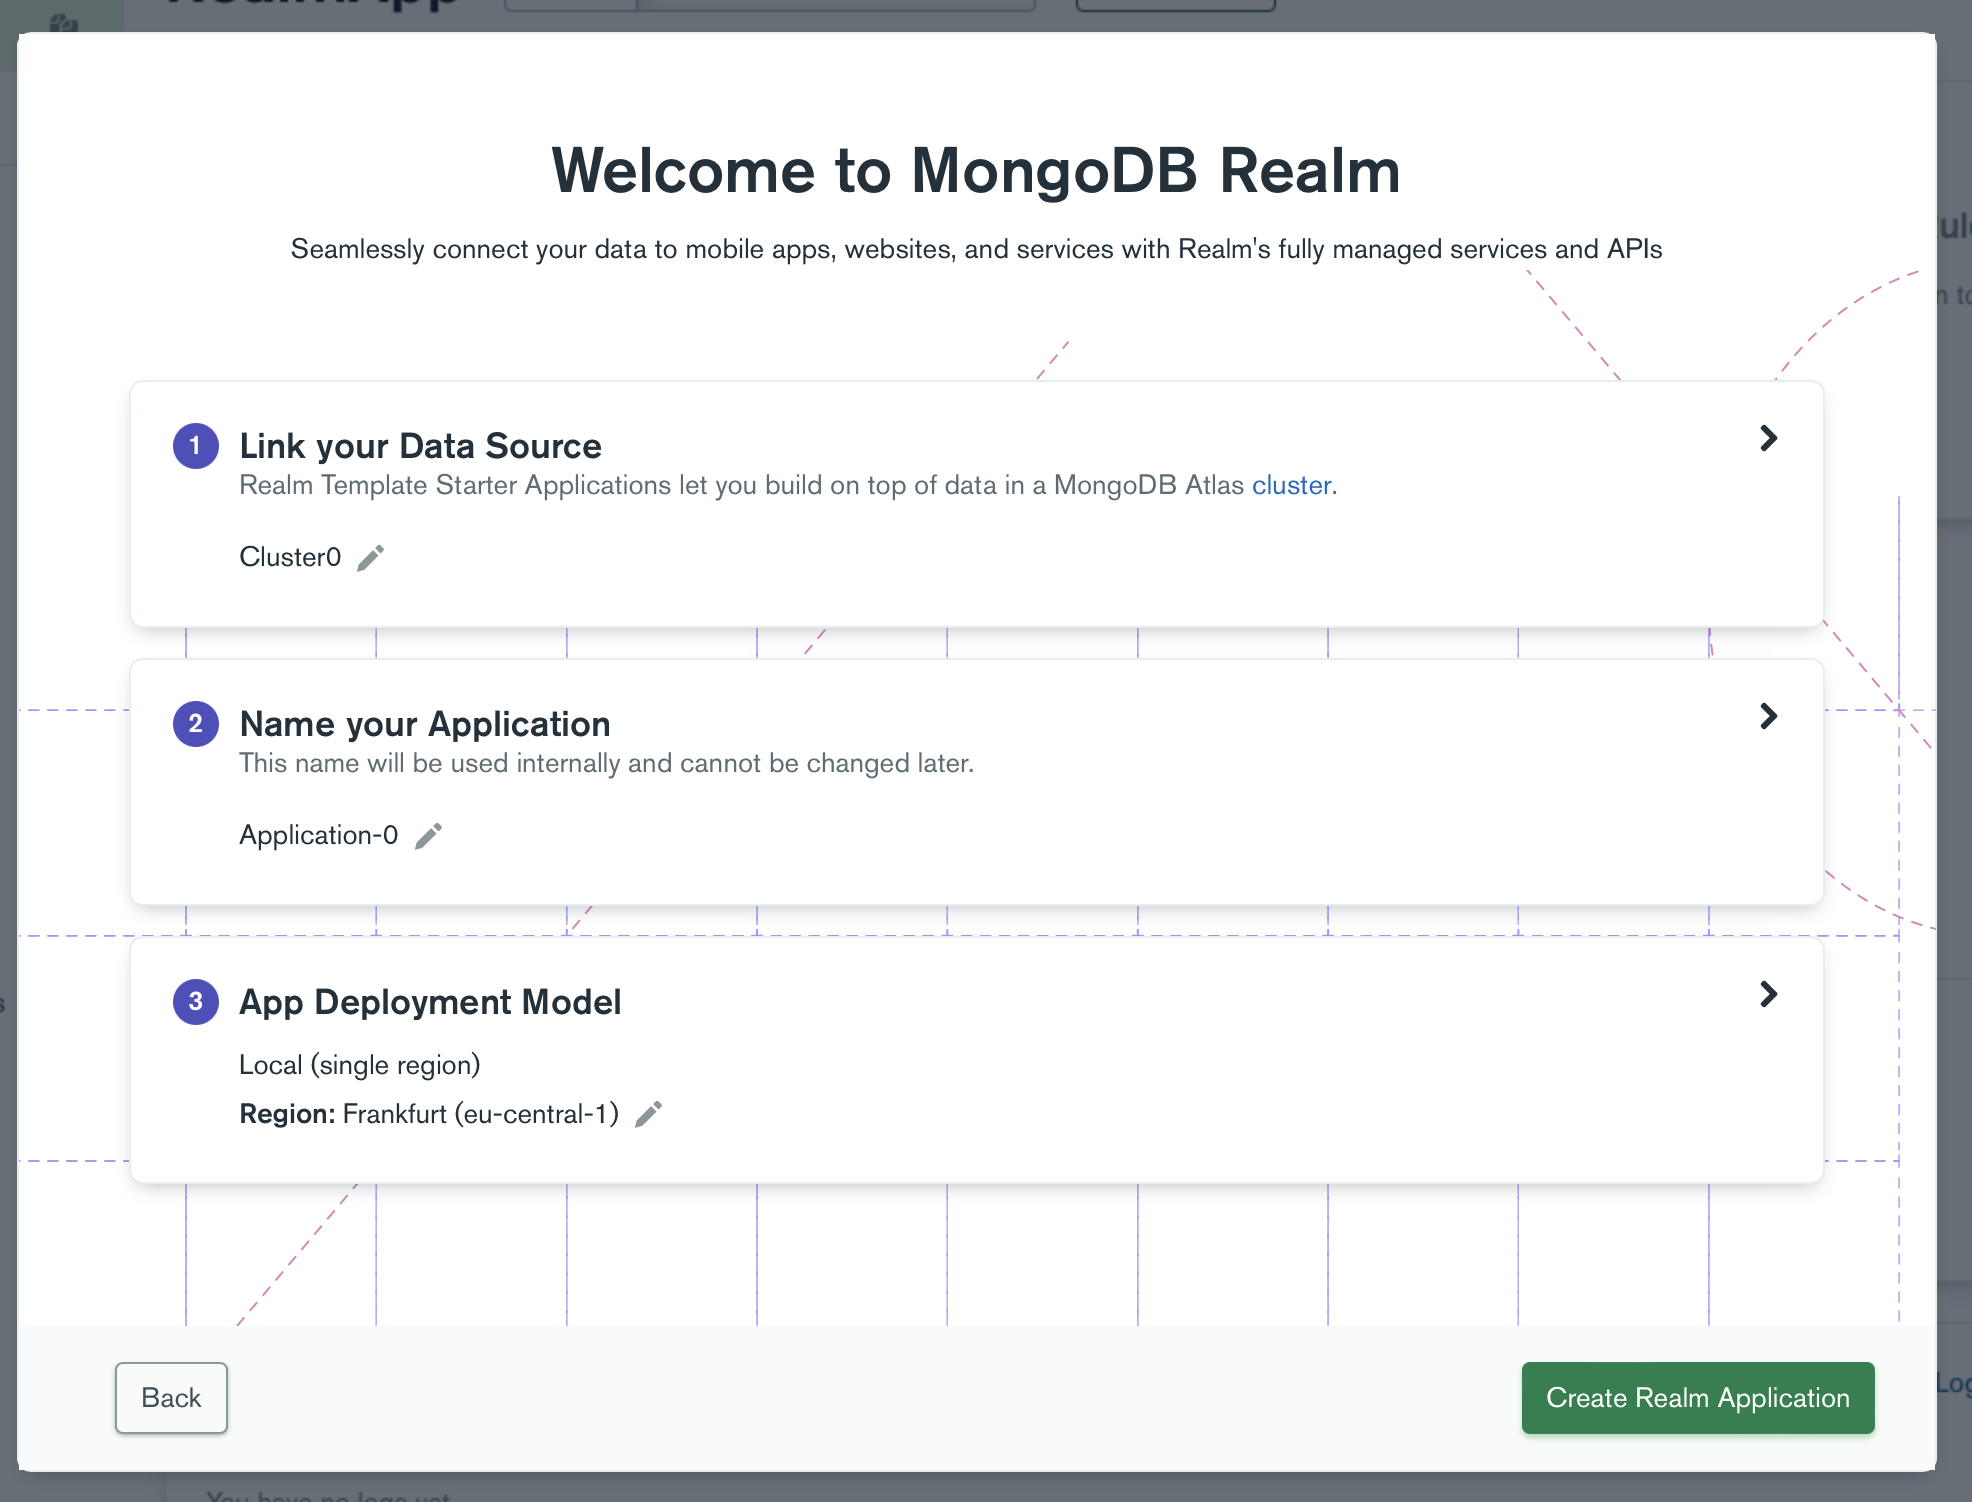
在以下對話方塊中,設定應用程式服務應用程式的名稱,將其連接到新建立的叢集並選擇本機(單區域)部署模型。最好使用最接近集群區域的區域。
若要建立應用程序,請按一下建立應用程式服務應用程式。
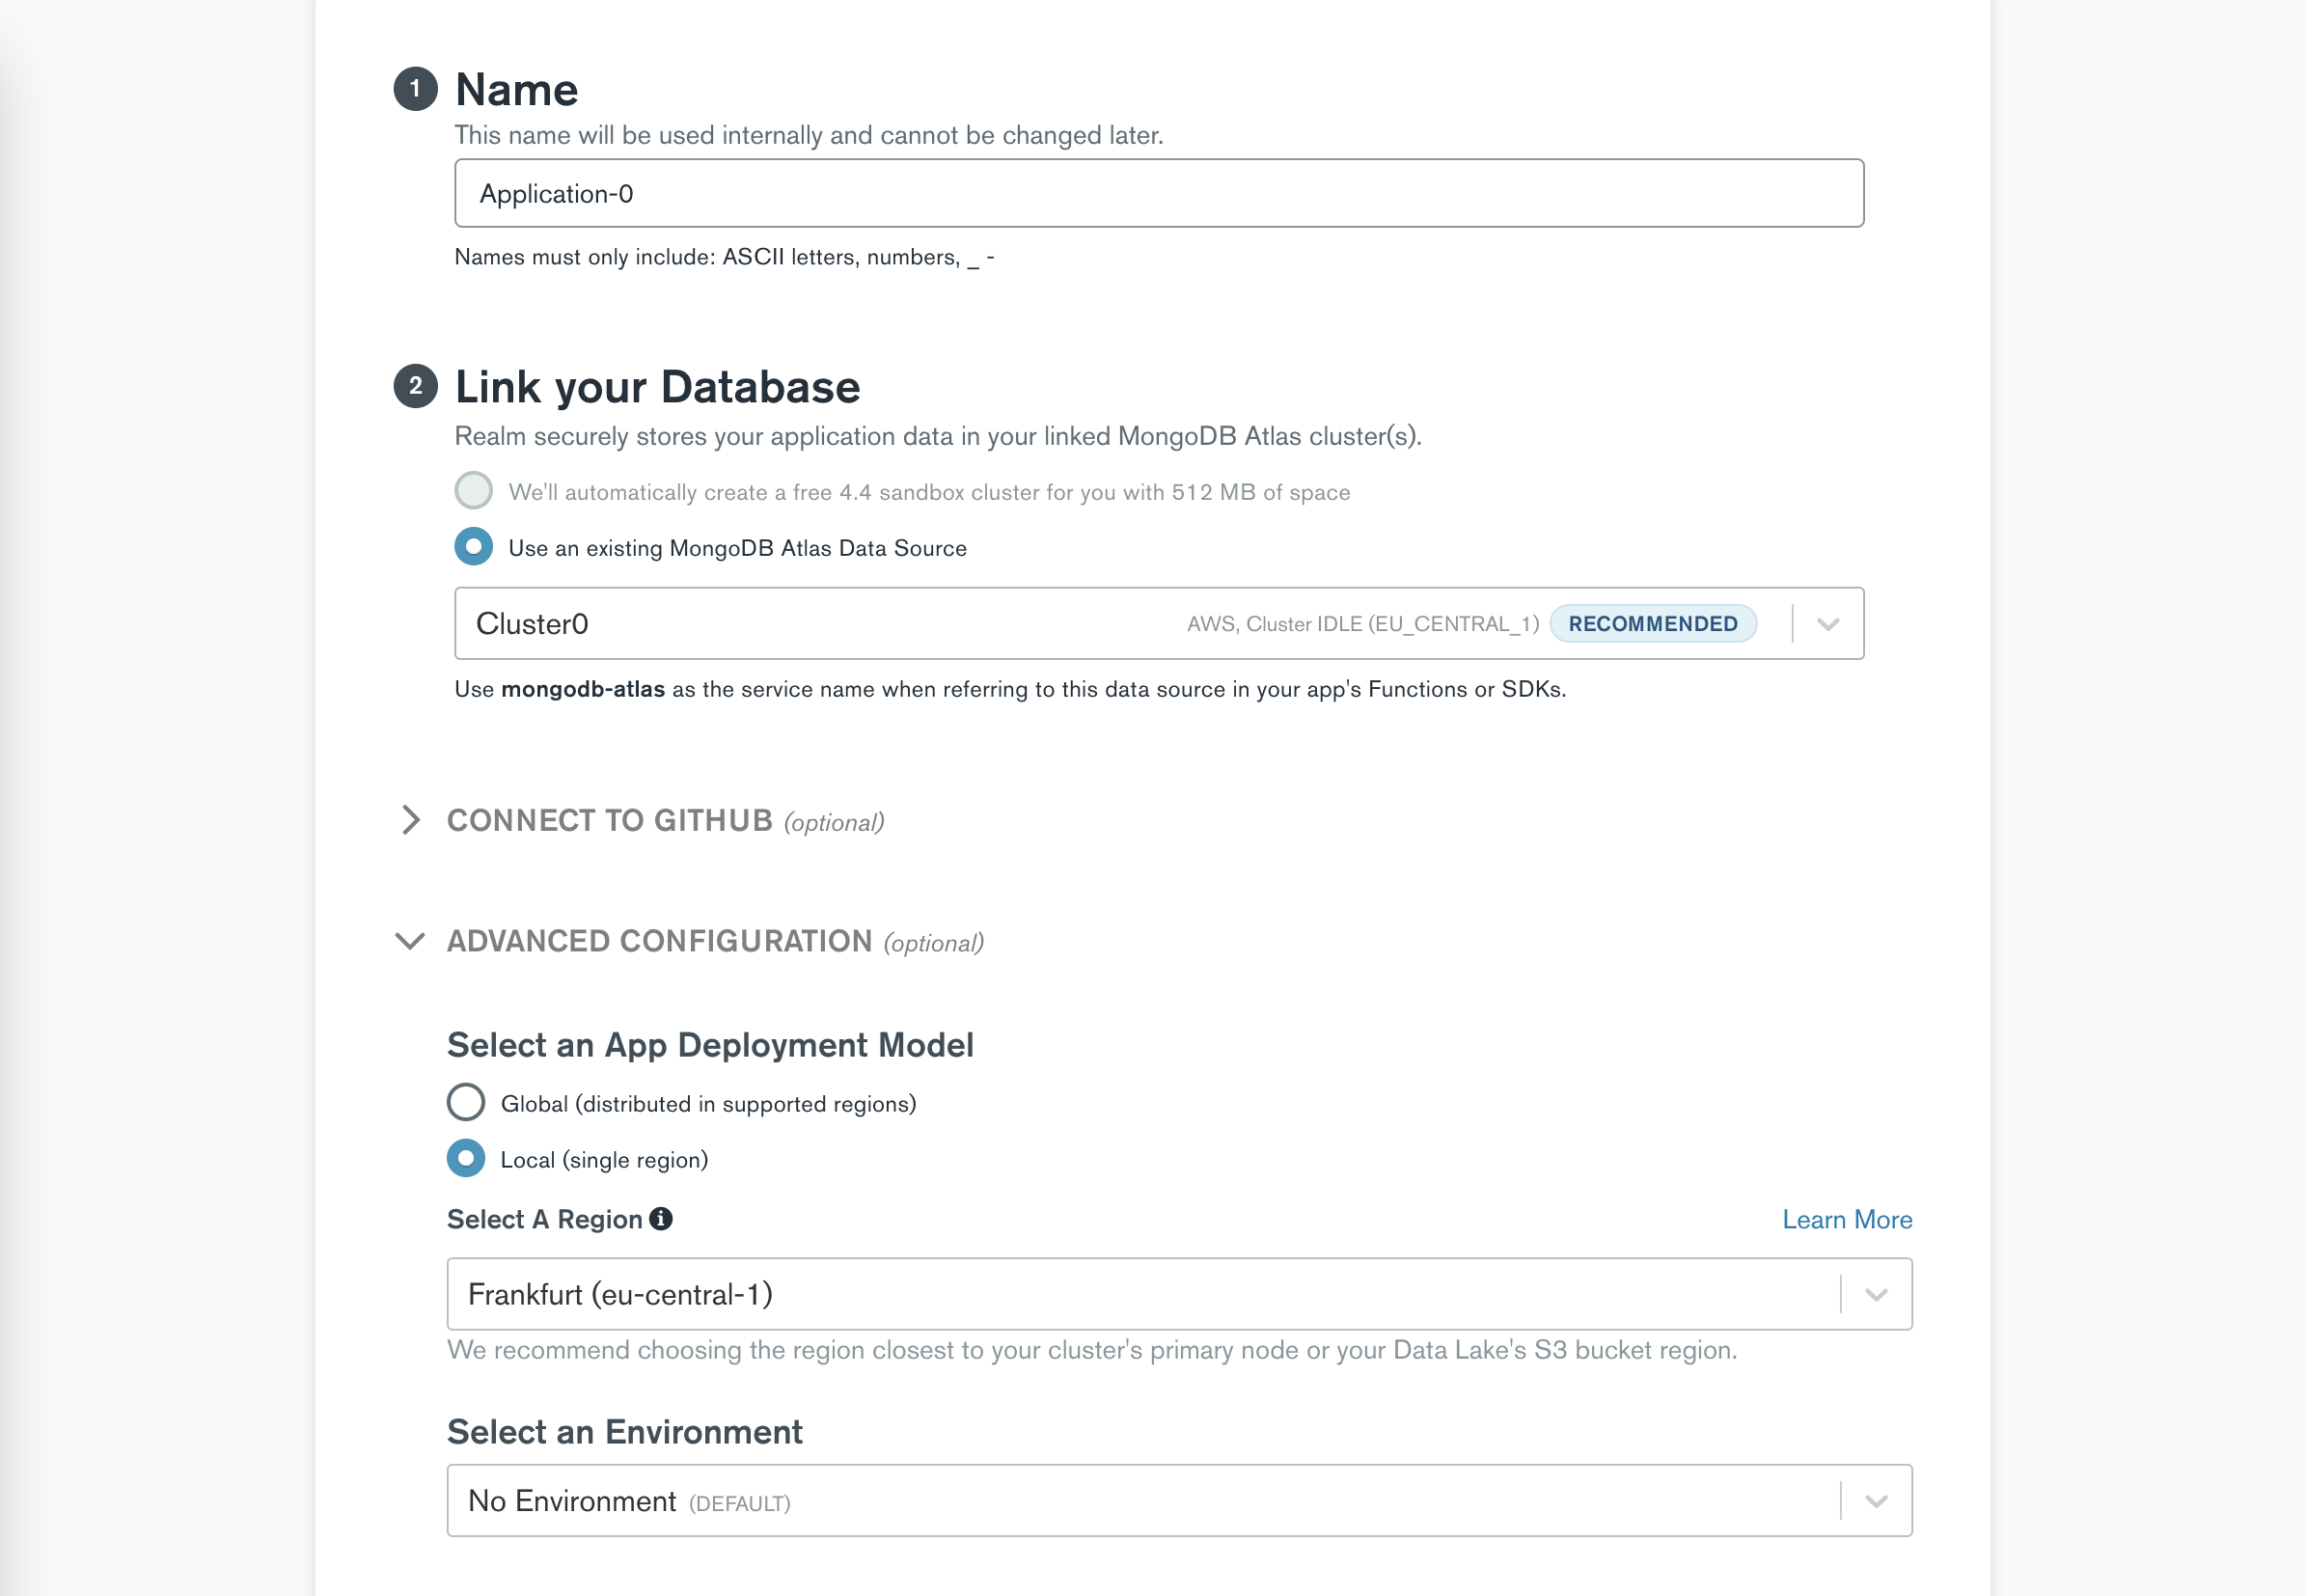
提示:現在建立應用程式後,您可以更新.env.local檔案以包含應用程式服務應用程式中的應用程式 ID值。

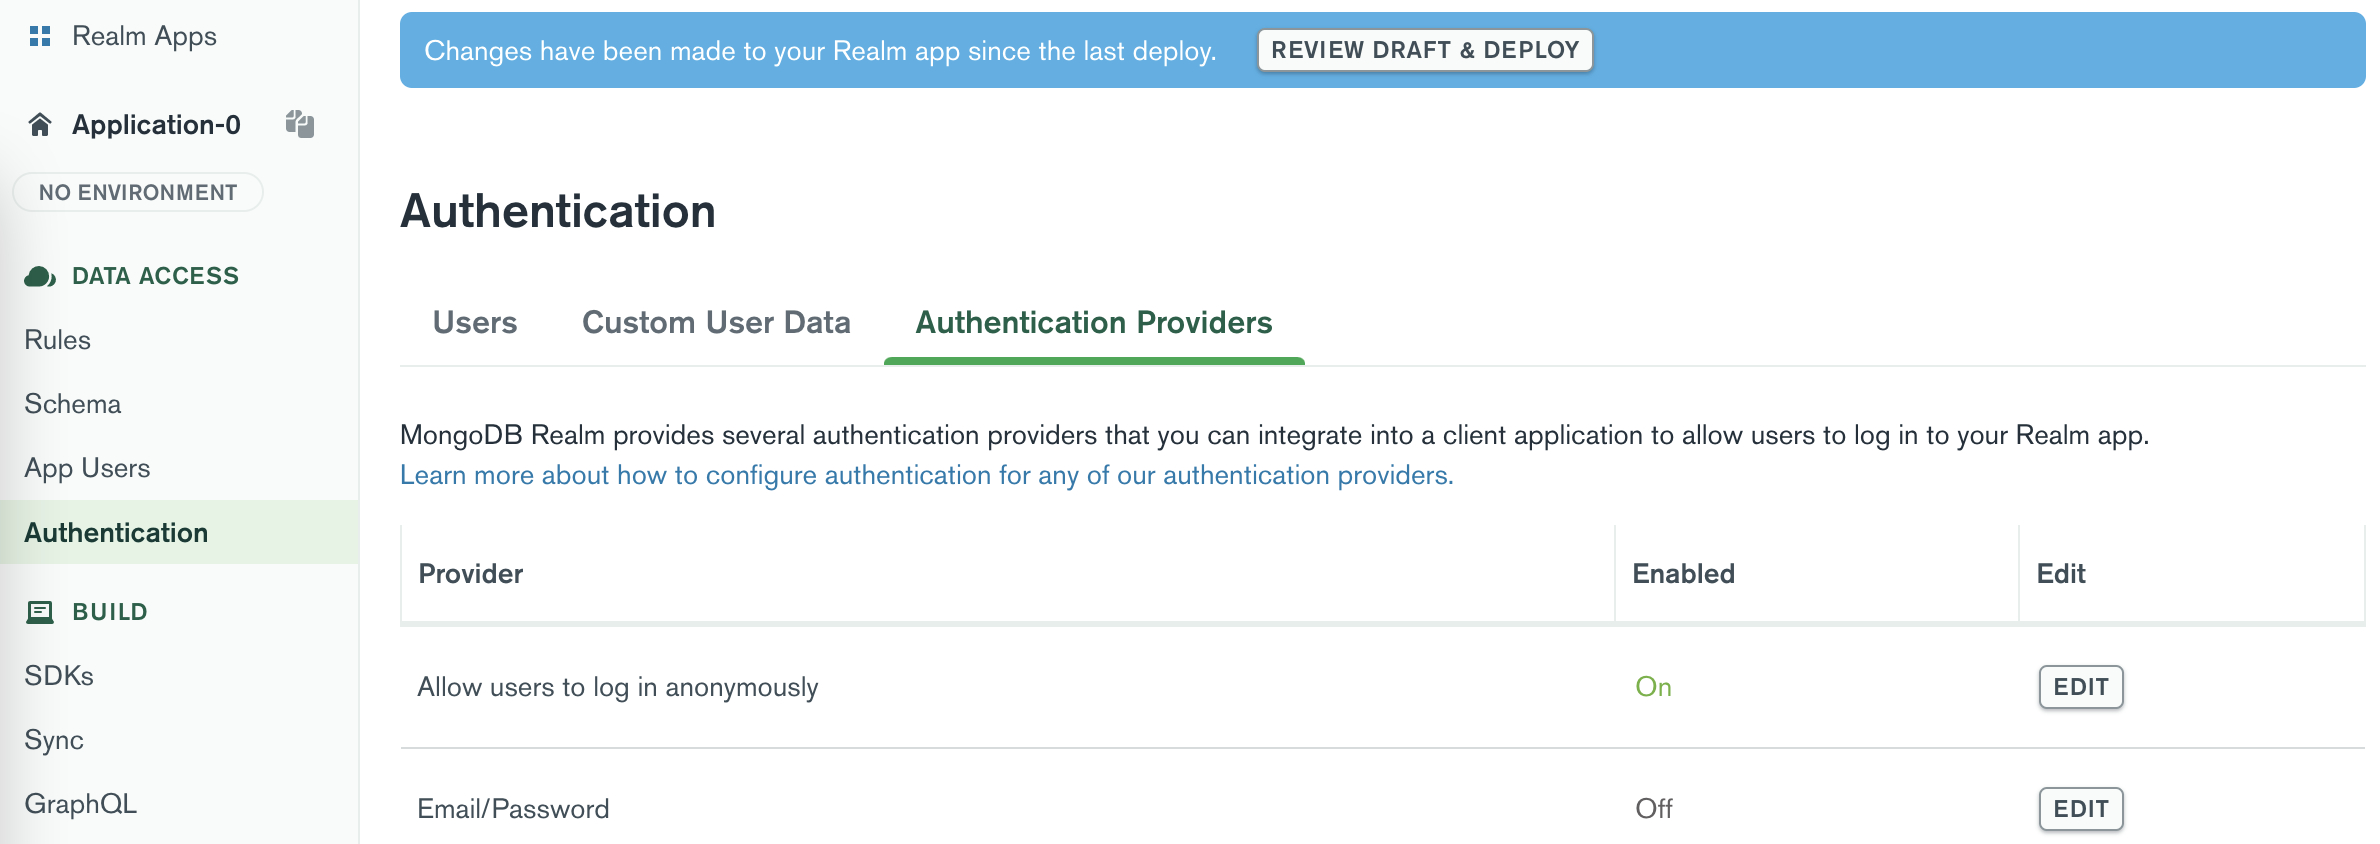
在 Atlas UI 左側欄的「資料存取」中,按一下「身份驗證」 。如您所見,應用程式服務提供了許多身份驗證方法,我們將在此演示中使用匿名。按一下「編輯」按鈕並將此身份驗證方法的核取方塊設為「開」 。
在 Atlas UI 左側欄的「資料存取」中,按一下「規則」 。規則為您提供了多種方法來限制和配置每個集合和使用者角色的資料訪問,深入到文件層級。對於此演示,我們將允許所有使用者僅read電影集合中的所有文件。應用程式服務為許多場景提供了模板,我們將使用使用者只能讀取所有資料模板。

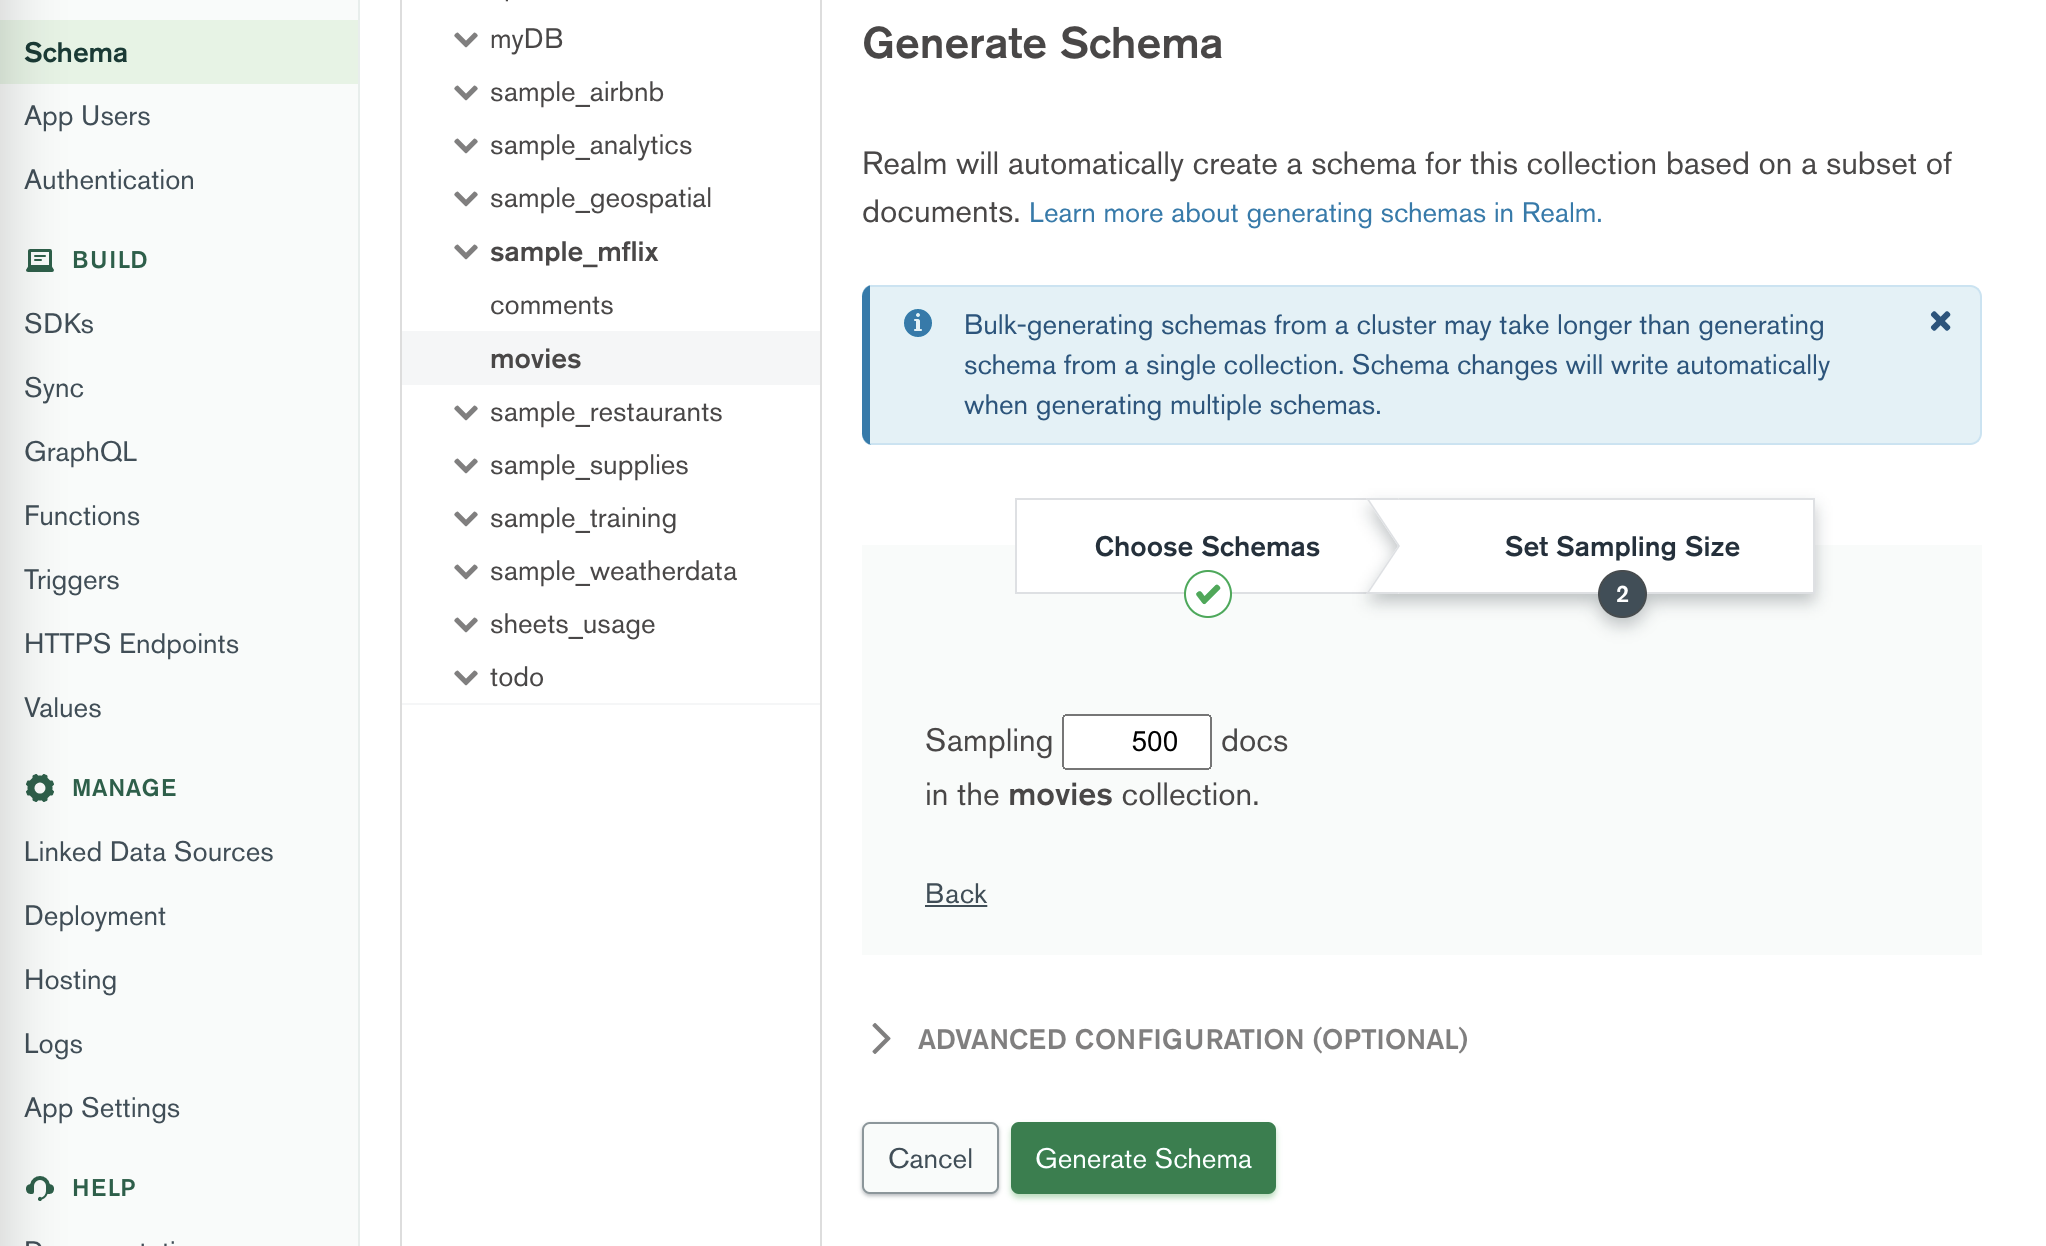
在 Atlas UI 左側欄的「資料存取」中,按一下「架構」 。架構定義資料庫中每個集合中文件的資料結構和類型。選擇sample_mflix資料庫中的電影集合。點選生成架構按鈕。僅選擇影片集合,將取樣大小保留為預設值,然後按一下「產生架構」按鈕。這也將產生GraphQL模式的所有必需類型和查詢。可以立即使用它透過應用程式服務管理的 GraphQL 端點存取資料。
點擊頁面頂部的“查看草稿和部署”按鈕並部署您的變更。


提示:現在產生架構後,您可以更新.env.local檔案以包含應用程式服務應用程式中的以下基本 URL。

讓我們測試一下 GraphQL 的實際運作原理。在GraphQL標籤的 GraphQL 編輯器中貼上以下程式碼片段以測試產生的方案。
 query {
    movie ( query : { title : " The Godfather " }) {
        _id
        title
        metacritic
        num_mflix_comments
        fullplot
    }
}現在有了正確的規則和架構,我們就可以開始為應用程式建立函數了。對於第一個功能,我們將建立一個函數,該函數將傳回與標題搜尋字詞相符的電影清單。它將使用我們在上一個步驟中建立的動態索引以及自動完成功能。這使我們能夠在前端應用程式的搜尋欄中提供電影傾斜度的自動完成和模糊搜尋。
在 Atlas UI 左側欄的Build中,按一下Functions 。函數提供了一種在整合來自連接的叢集的資料的應用服務上執行伺服器端邏輯的方法。使用聚合框架,即使沒有驅動程序,您也可以創建非常強大的聚合。
點擊“建立新函數”按鈕並輸入autocompleteTitle作為函數的名稱。
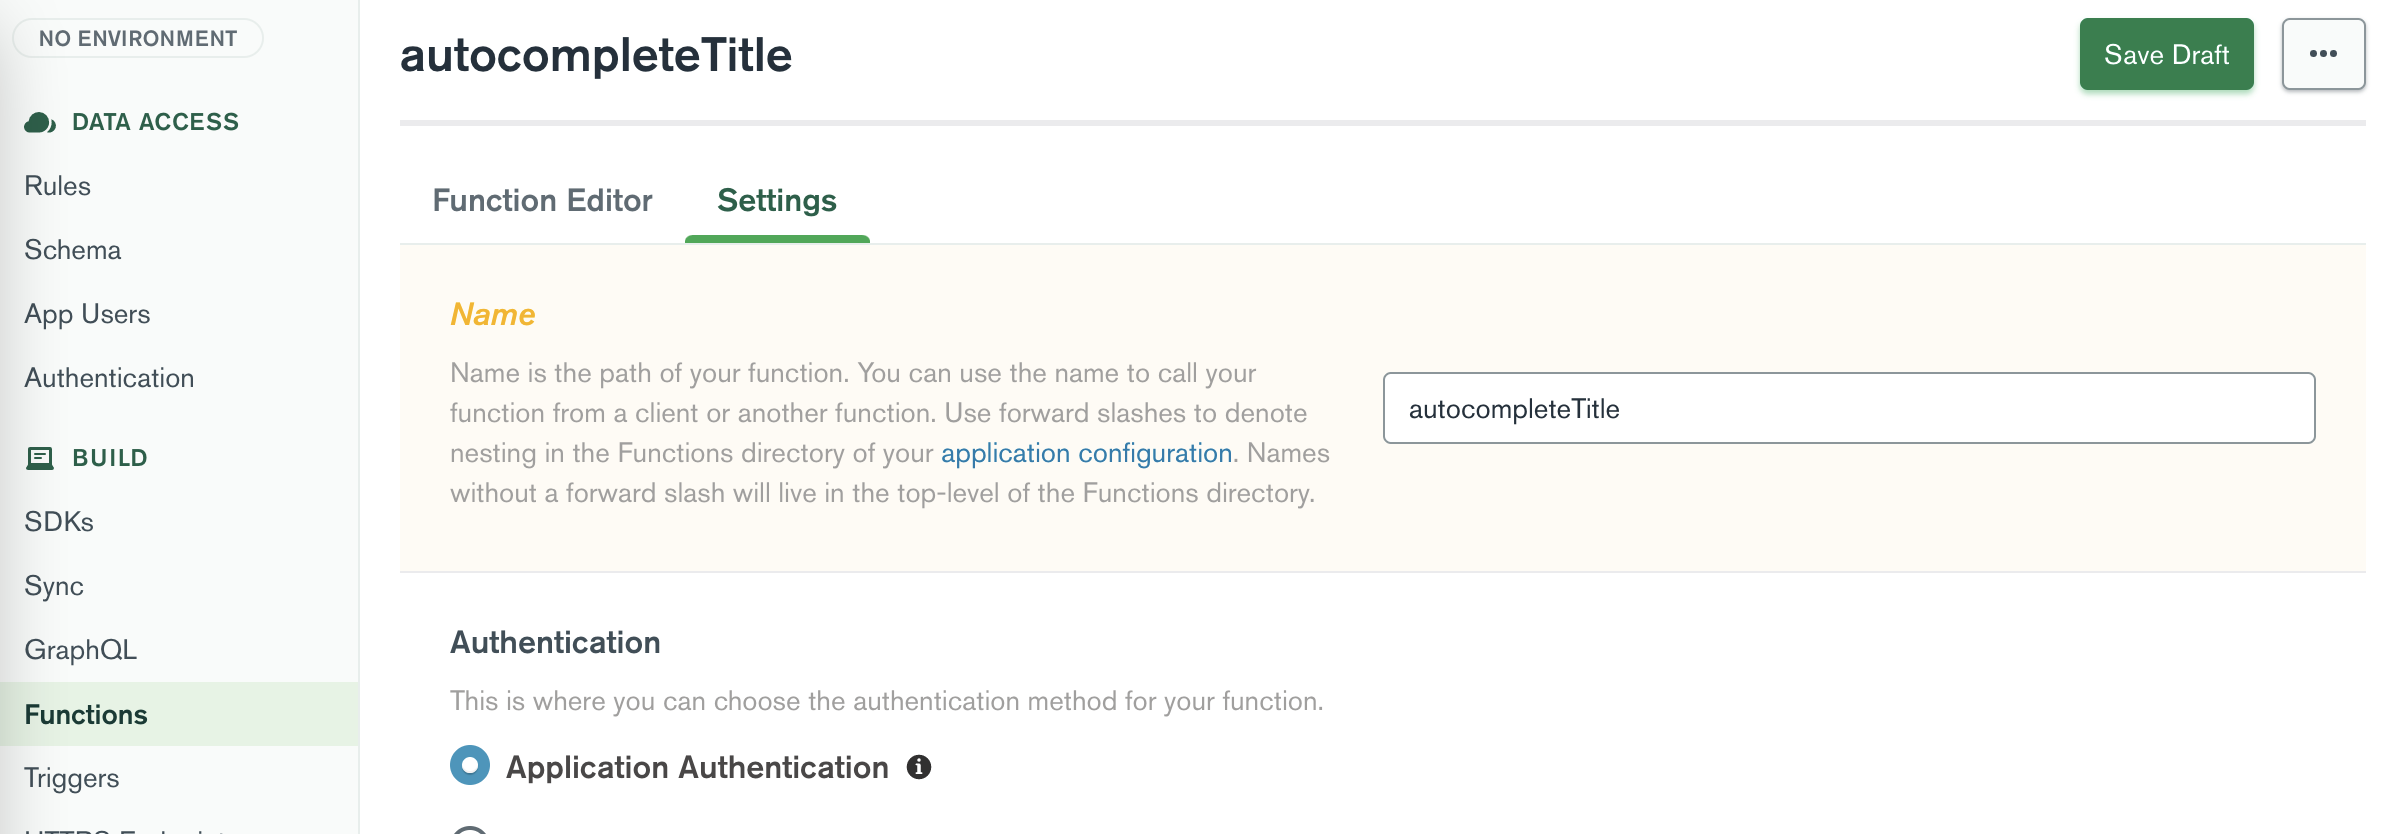
現在點選「函數編輯器」標籤。
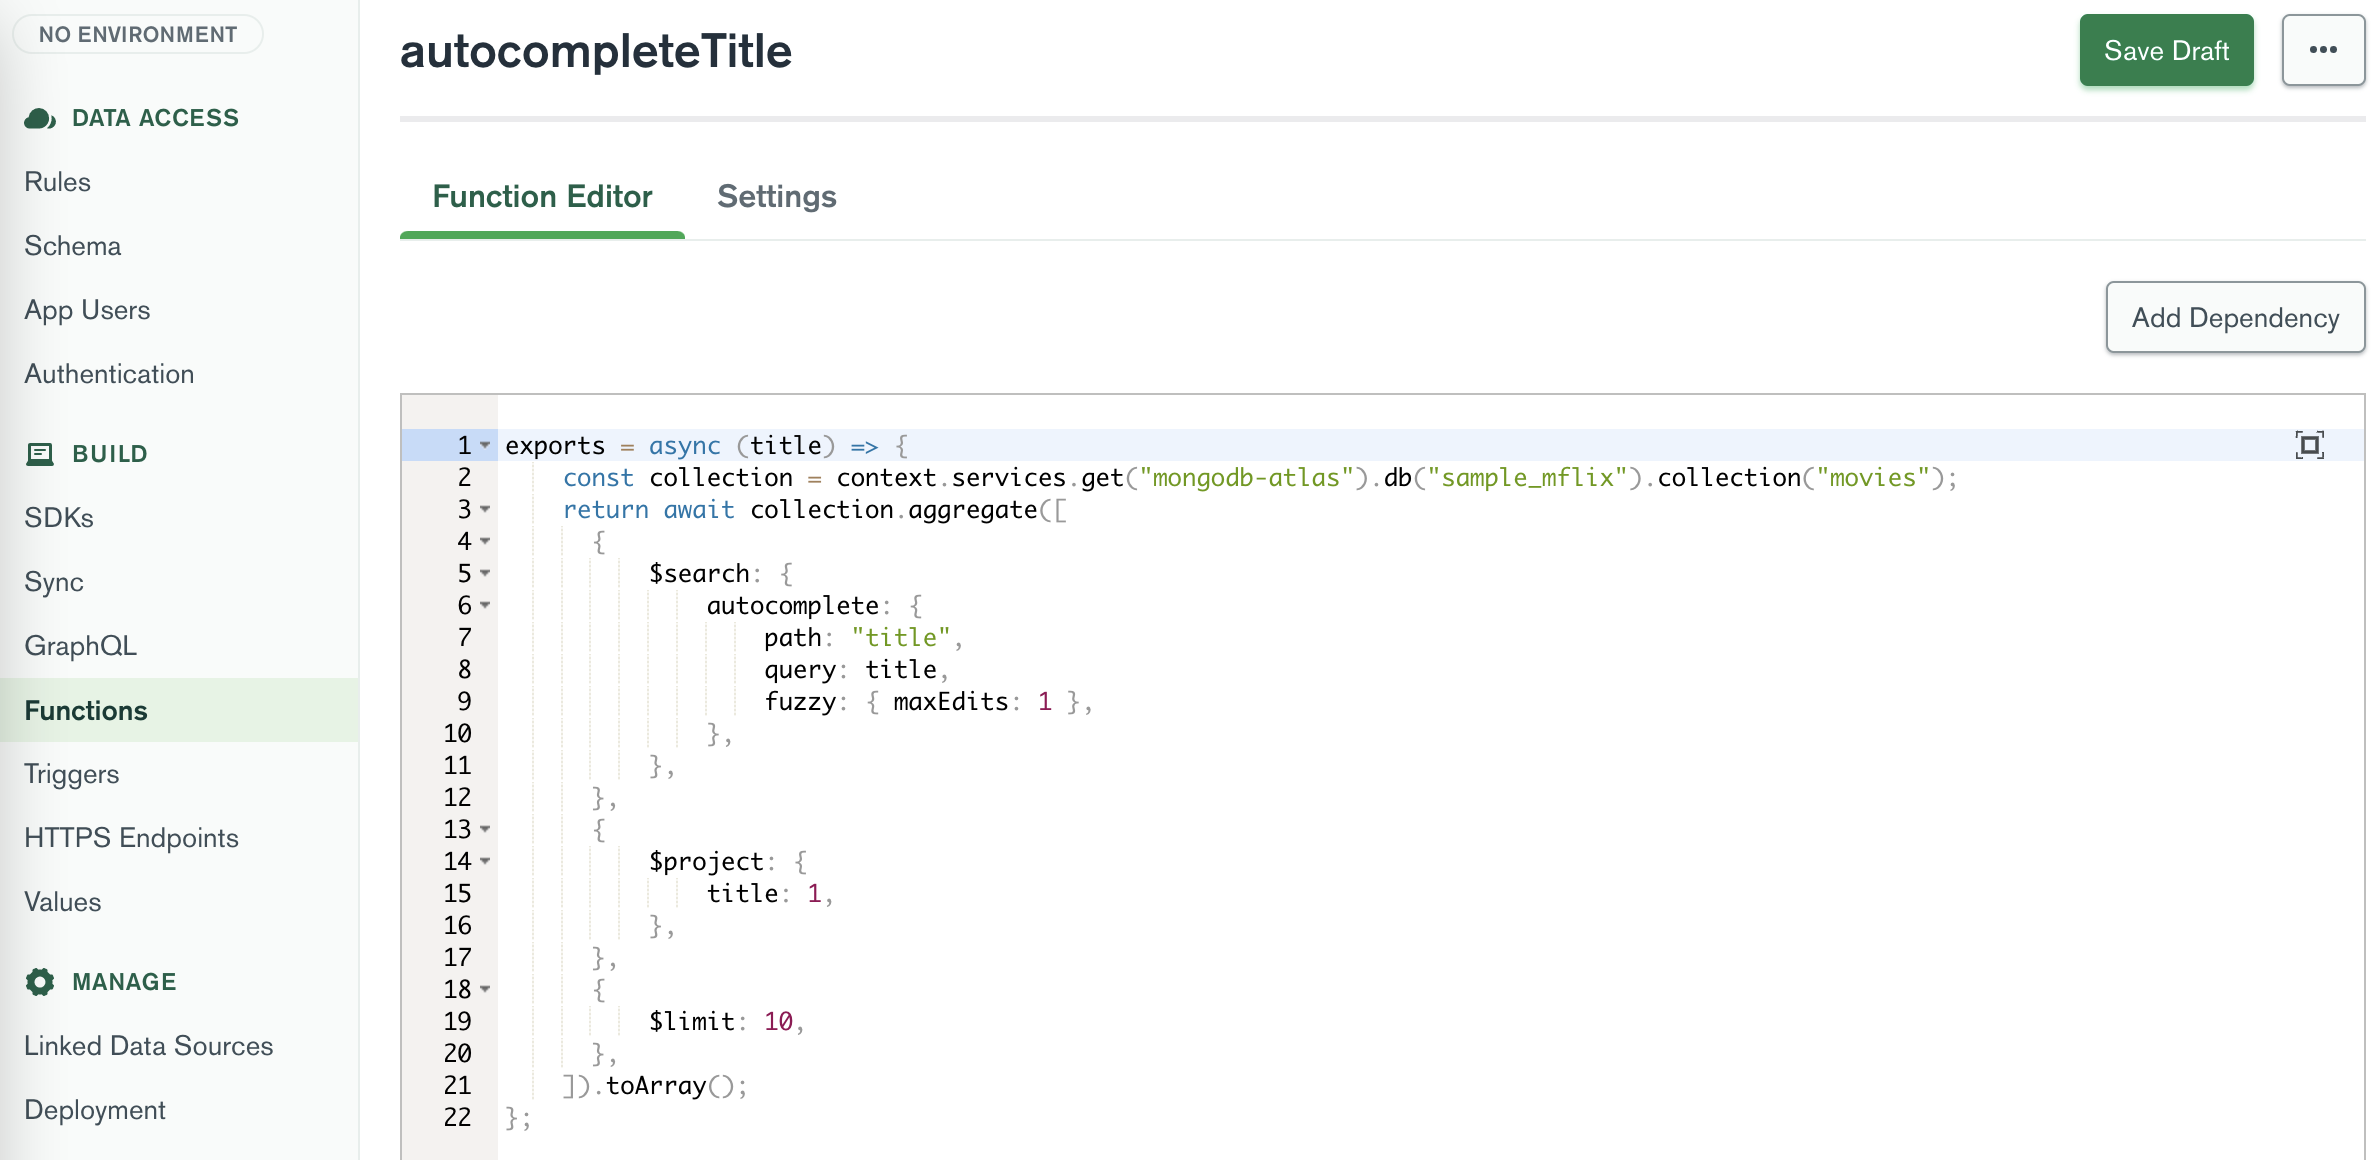
將以下程式碼貼到函數編輯器中:
 exports = async ( title ) => {
    const collection = context . services . get ( "mongodb-atlas" ) . db ( "sample_mflix" ) . collection ( "movies" ) ;
    return await collection
        . aggregate ( [
            {
                $search : {
                    autocomplete : {
                        path : "title" ,
                        query : title ,
                        fuzzy : { maxEdits : 1 } ,
                    } ,
                } ,
            } ,
            {
                $project : {
                    title : 1 ,
                } ,
            } ,
            {
                $limit : 10 ,
            } ,
        ] )
        . toArray ( ) ;
} ;點擊“儲存草稿”按鈕儲存函數。
我們希望在 GraphQL 模式中使用自動完成功能。為此,我們需要建立一個自訂解析器。自訂解析器可讓我們為 GraphQL 架構定義自訂查詢和突變,並由在應用程式服務上建立的函數支援。
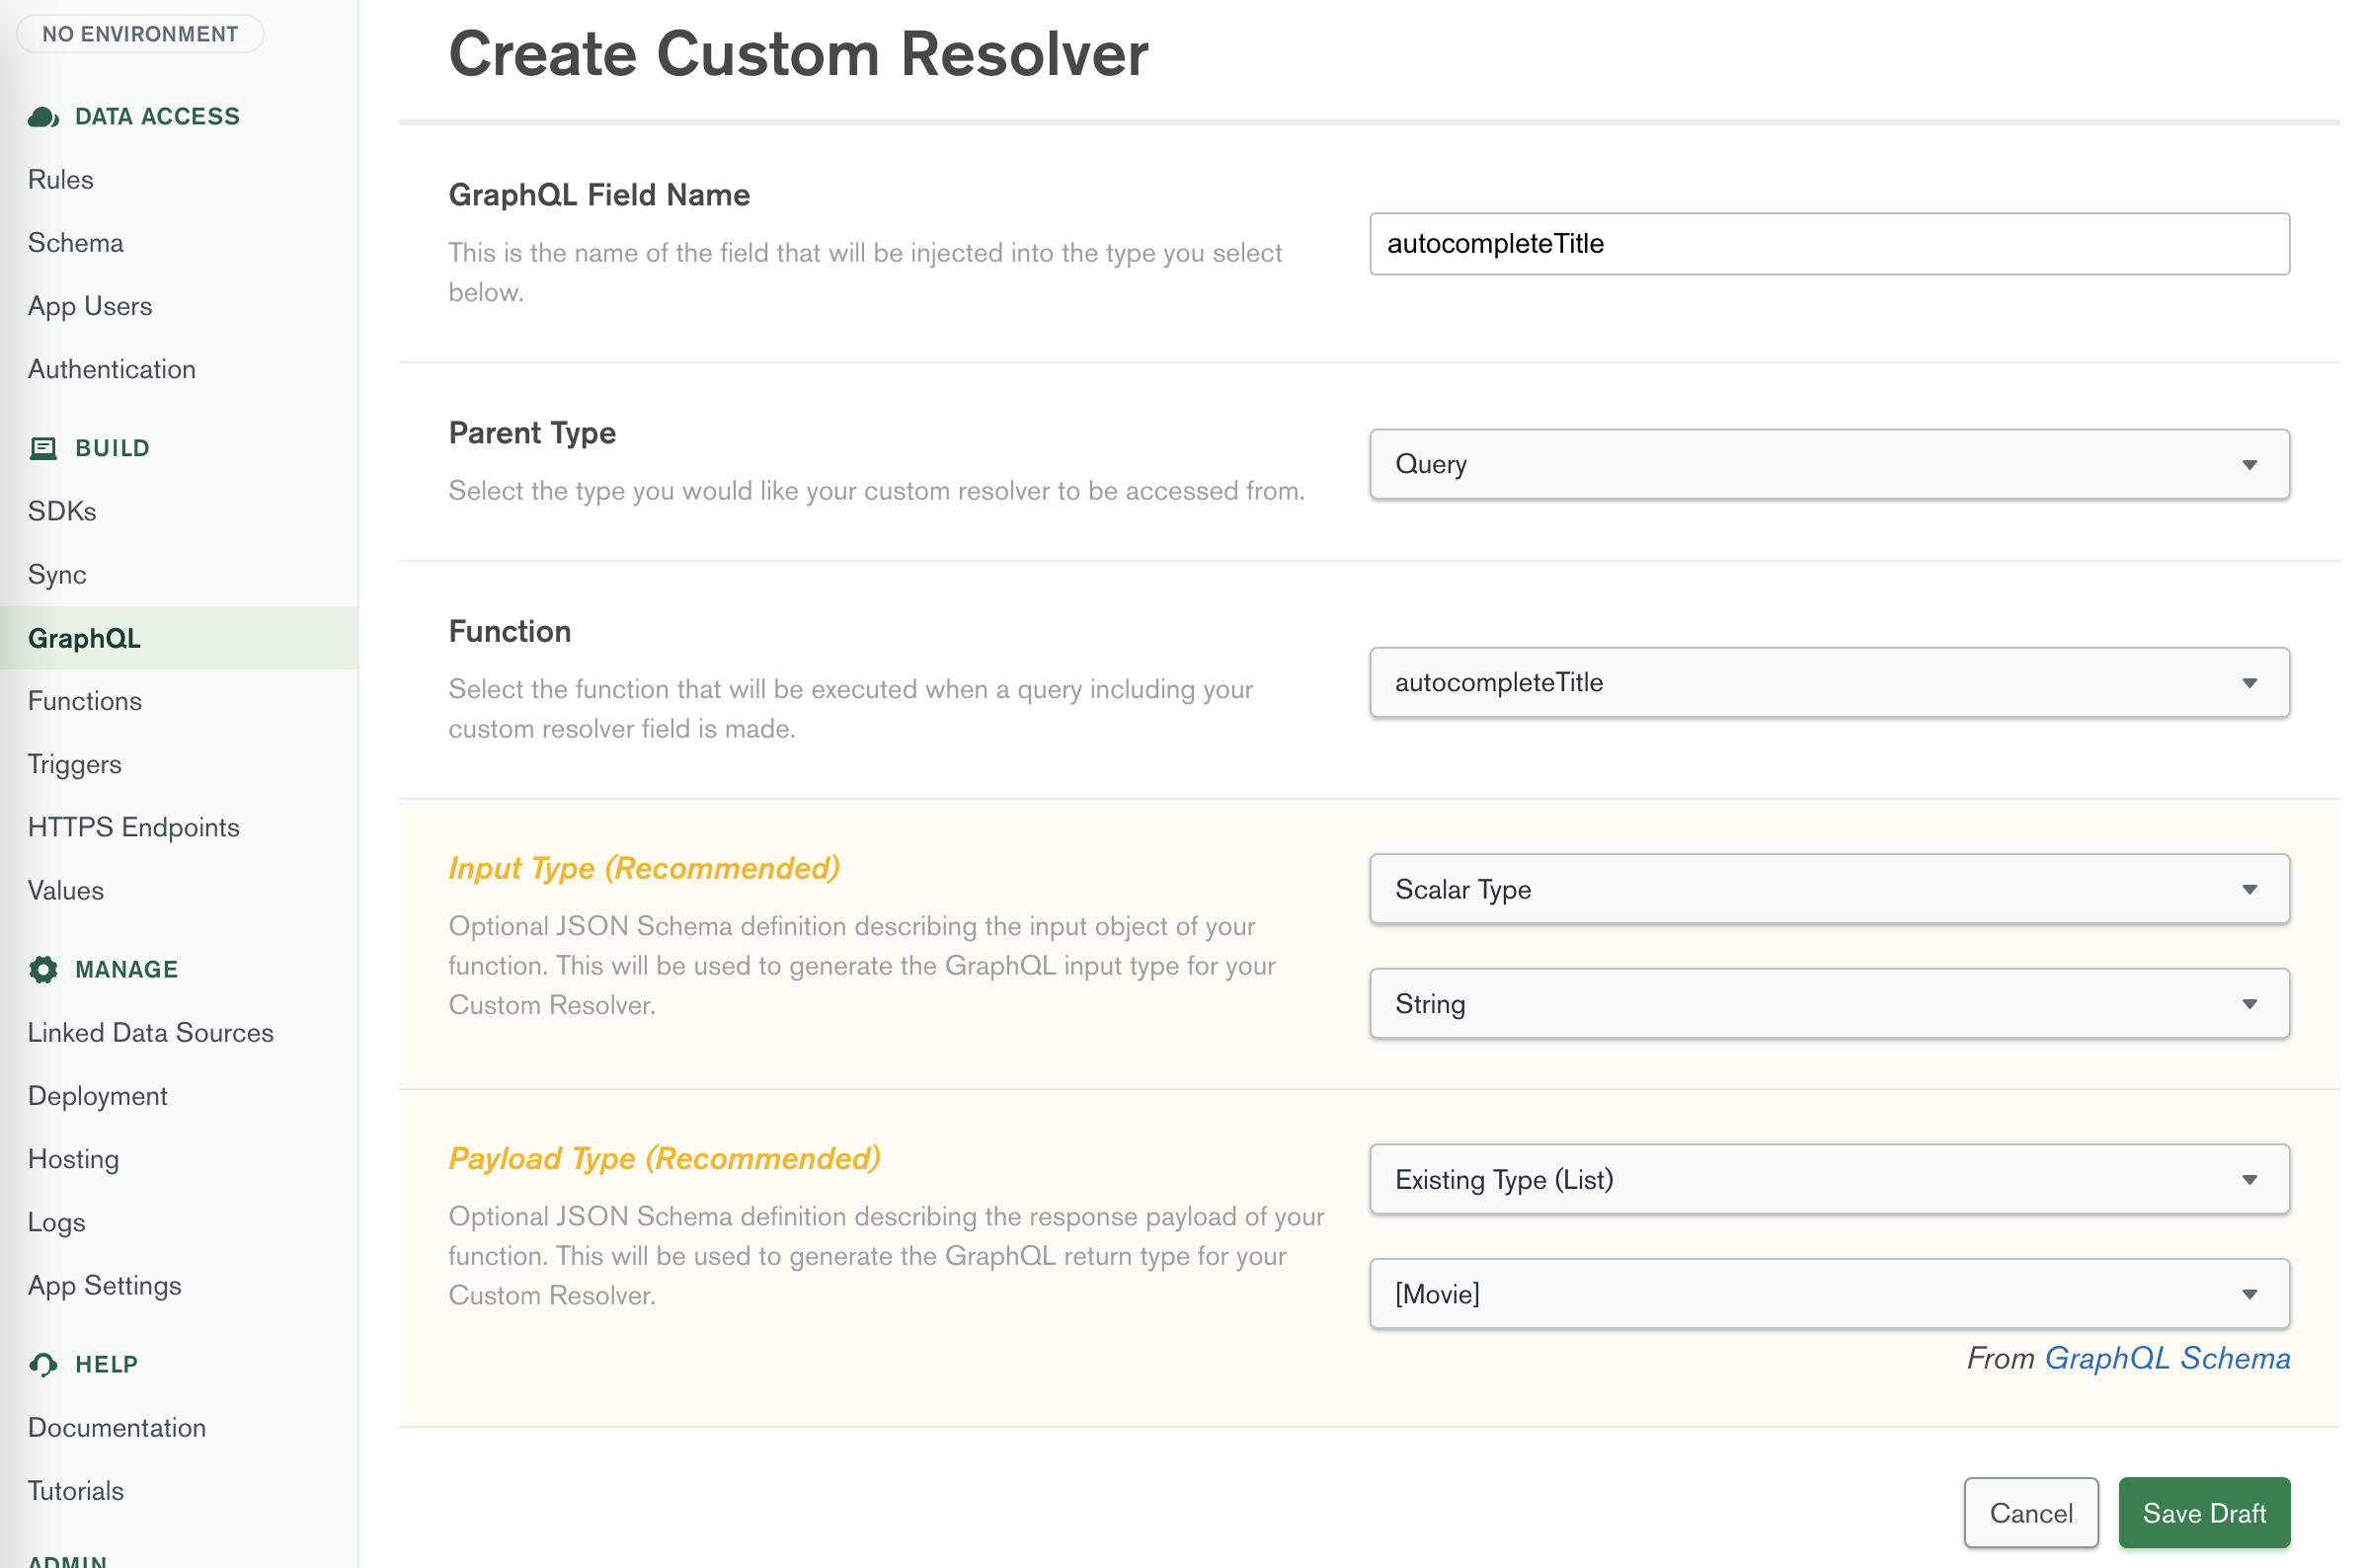
在 Atlas UI 左側欄的Build中,按一下GraphQL 。按一下自訂解析器選項卡,然後按一下新增自訂解析器按鈕。對於GraphQL 欄位名稱,輸入autocompleteTitle ,對於父類型,選擇Query ,對於函數名稱,選擇新建立的函數autocompleteTitle 。
輸入類型定義將作為此解析器的輸入傳送至 GraphQL API 的資料類型。傳回類型定義 API 傳回的資料類型。我們將發送一個字串作為輸入,並期望電影物件列表作為輸出。
Scalar Type 、 String Existing Type (List) , [Movie]按一下「儲存草稿」按鈕儲存自訂解析器。
點擊頁面頂部的“查看草稿和部署”按鈕並部署您的變更。
現在,完成第一個功能設定後,請花時間測試應用程序,在搜尋列中輸入一些電影標題並查看自動完成結果。
現在,有了自動完成功能,我們可以建立一個用於突出顯示和評分的新功能。此函數將傳回與搜尋字詞相符的電影列表,其中包含標題、所選類型以及特定電影的製作國家。此外,它將傳回結果的突出顯示和搜尋分數。突出顯示包含標題和繪圖字串中的確切子字串,其中包含匹配的搜尋字詞。這將使我們能夠在前端 UI 中突出顯示找到的搜尋詞。
與先前的函數類似,我們將建立一個用於亮點和評分的新函數。
在 Atlas UI 左側欄的Build中,按一下Functions 。點擊“建立新函數”按鈕並輸入filteredMovies作為函數的名稱。
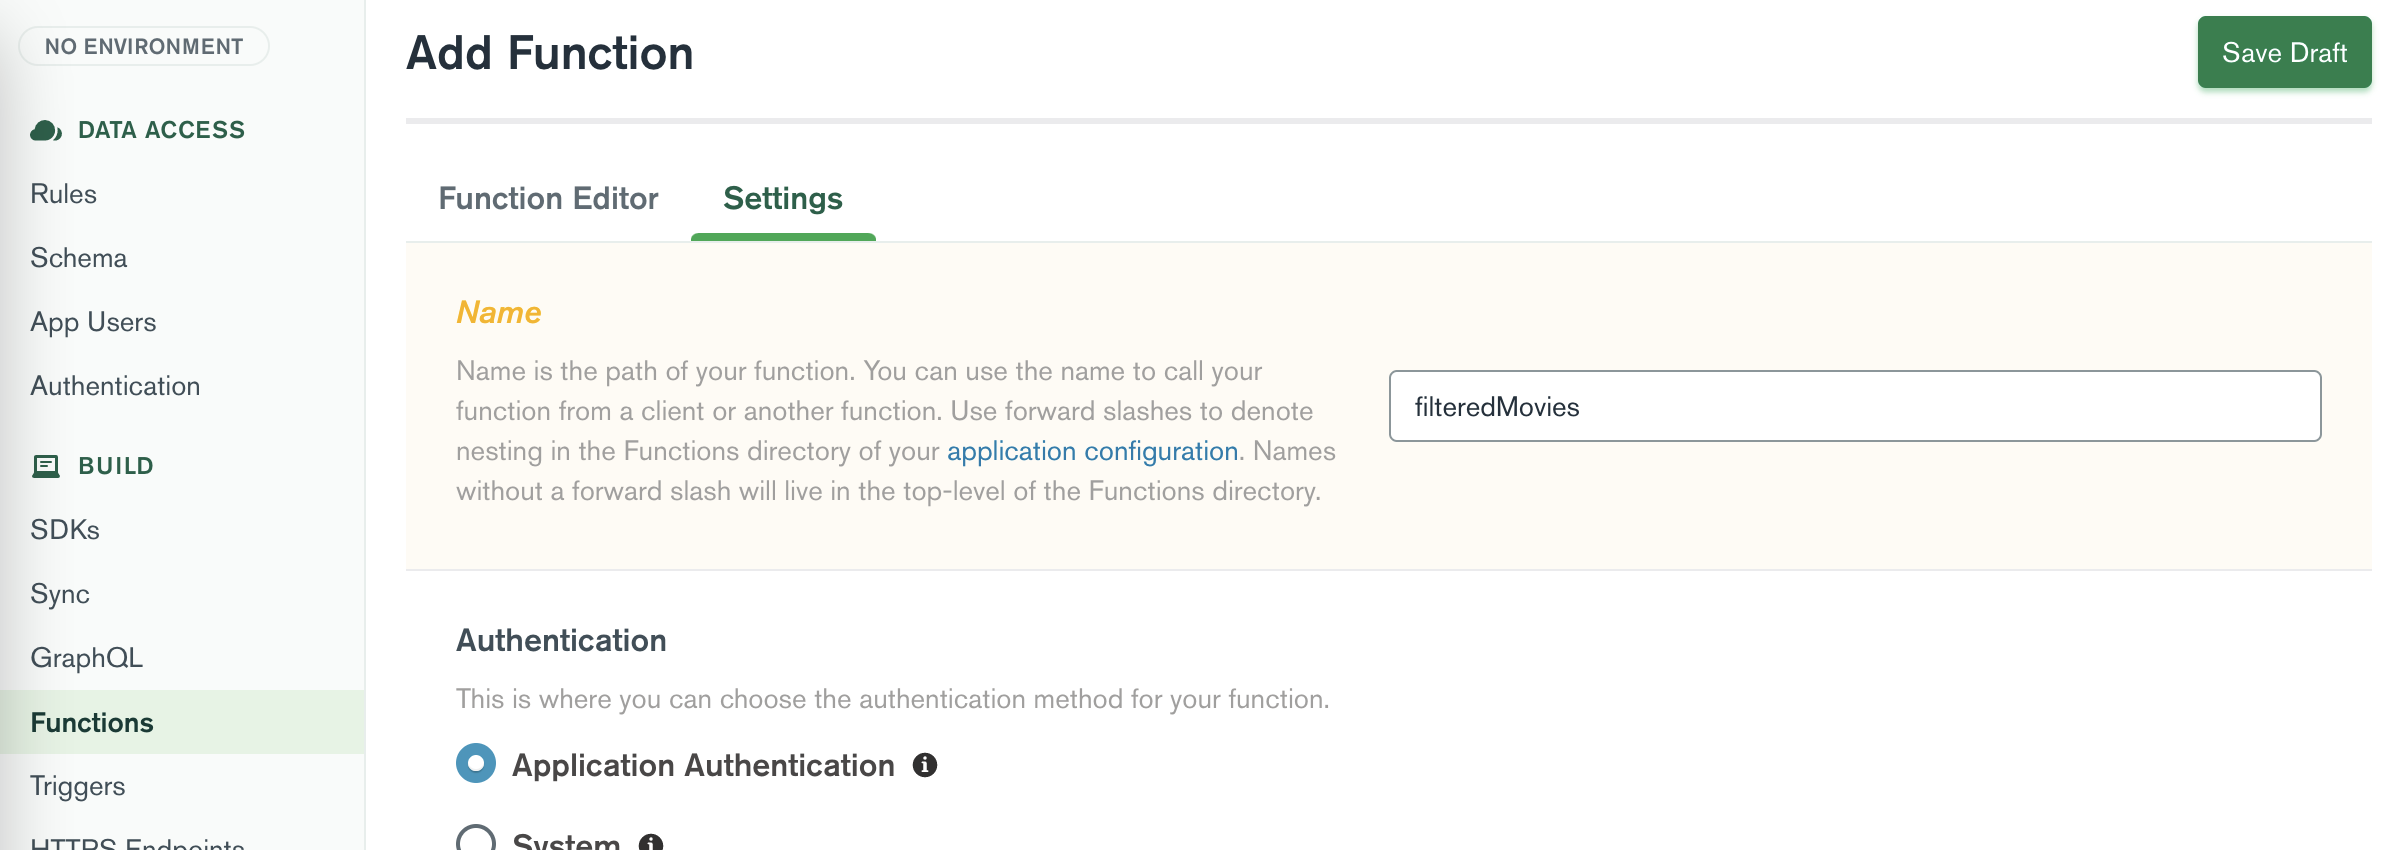
現在點選「函數編輯器」標籤。
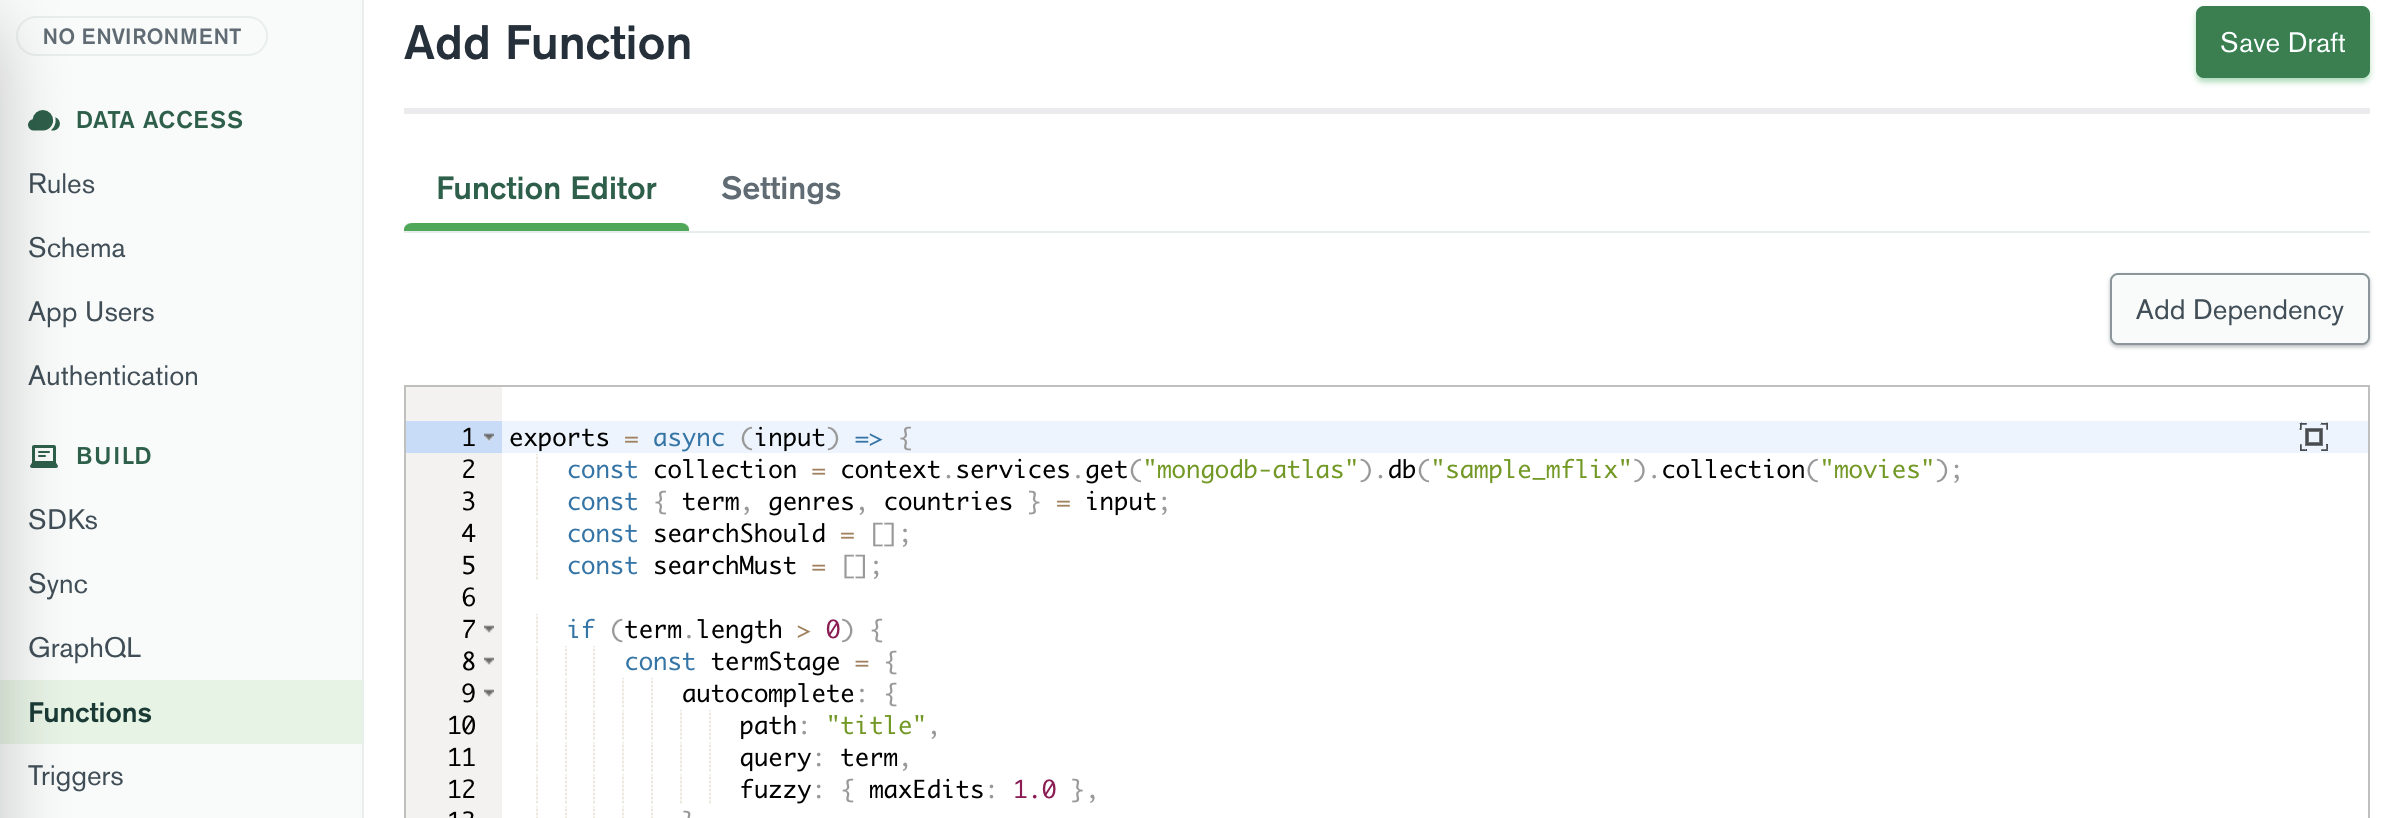
將以下程式碼貼到函數編輯器中:
 exports = async ( input ) => {
    const collection = context . services . get ( "mongodb-atlas" ) . db ( "sample_mflix" ) . collection ( "movies" ) ;
    const { term , genres , countries } = input ;
    const searchShould = [ ] ;
    const searchMust = [ ] ;

    if ( term . length > 0 ) {
        const termStage = {
            autocomplete : {
                path : "title" ,
                query : term ,
                fuzzy : { maxEdits : 1.0 } ,
                score : {
                    boost : {
                        path : "imdb.rating" ,
                        undefined : 1 ,
                    } ,
                } ,
            } ,
        } ;
        searchMust . push ( termStage ) ;

        const plotStage = {
            text : {
                query : term ,
                path : "plot" ,
            } ,
        } ;
        searchShould . push ( plotStage ) ;
    }

    if ( genres . length > 0 ) {
        const genresStage = {
            text : {
                query : genres ,
                path : "genres" ,
            } ,
        } ;
        searchMust . push ( genresStage ) ;
    }

    if ( countries . length > 0 ) {
        const countryStage = {
            text : {
                query : countries ,
                path : "countries" ,
            } ,
        } ;
        searchMust . push ( countryStage ) ;
    }

    const searchQuery = [
        {
            $search : {
                compound : {
                    should : searchShould ,
                    must : searchMust ,
                } ,
                highlight : { path : [ "title" , "genres" , "countries" , "plot" ] } ,
            } ,
        } ,
        {
            $project : {
                _id : 1 ,
                title : 1 ,
                poster : 1 ,
                cast : 1 ,
                directors : 1 ,
                plot : 1 ,
                fullplot : 1 ,
                year : 1 ,
                genres : 1 ,
                countries : 1 ,
                imdb : 1 ,
                score : { $meta : "searchScore" } ,
                highlights : { $meta : "searchHighlights" } ,
            } ,
        } ,
        { $limit : 20 } ,
    ] ;

    return await collection . aggregate ( searchQuery ) . toArray ( ) ;
} ;在 Atlas UI 左側欄的Build中,按一下GraphQL 。按一下自訂解析器選項卡,然後按一下新增自訂解析器按鈕。對於GraphQL 欄位名稱,輸入filteredMovies ,對於父類型,選擇查詢,對於函數名稱,選擇新建立的函數filteredMovies 。
我們將發送一個字串作為輸入,並期望一個自訂電影物件列表,其中包含每部電影的分數和亮點作為輸出。
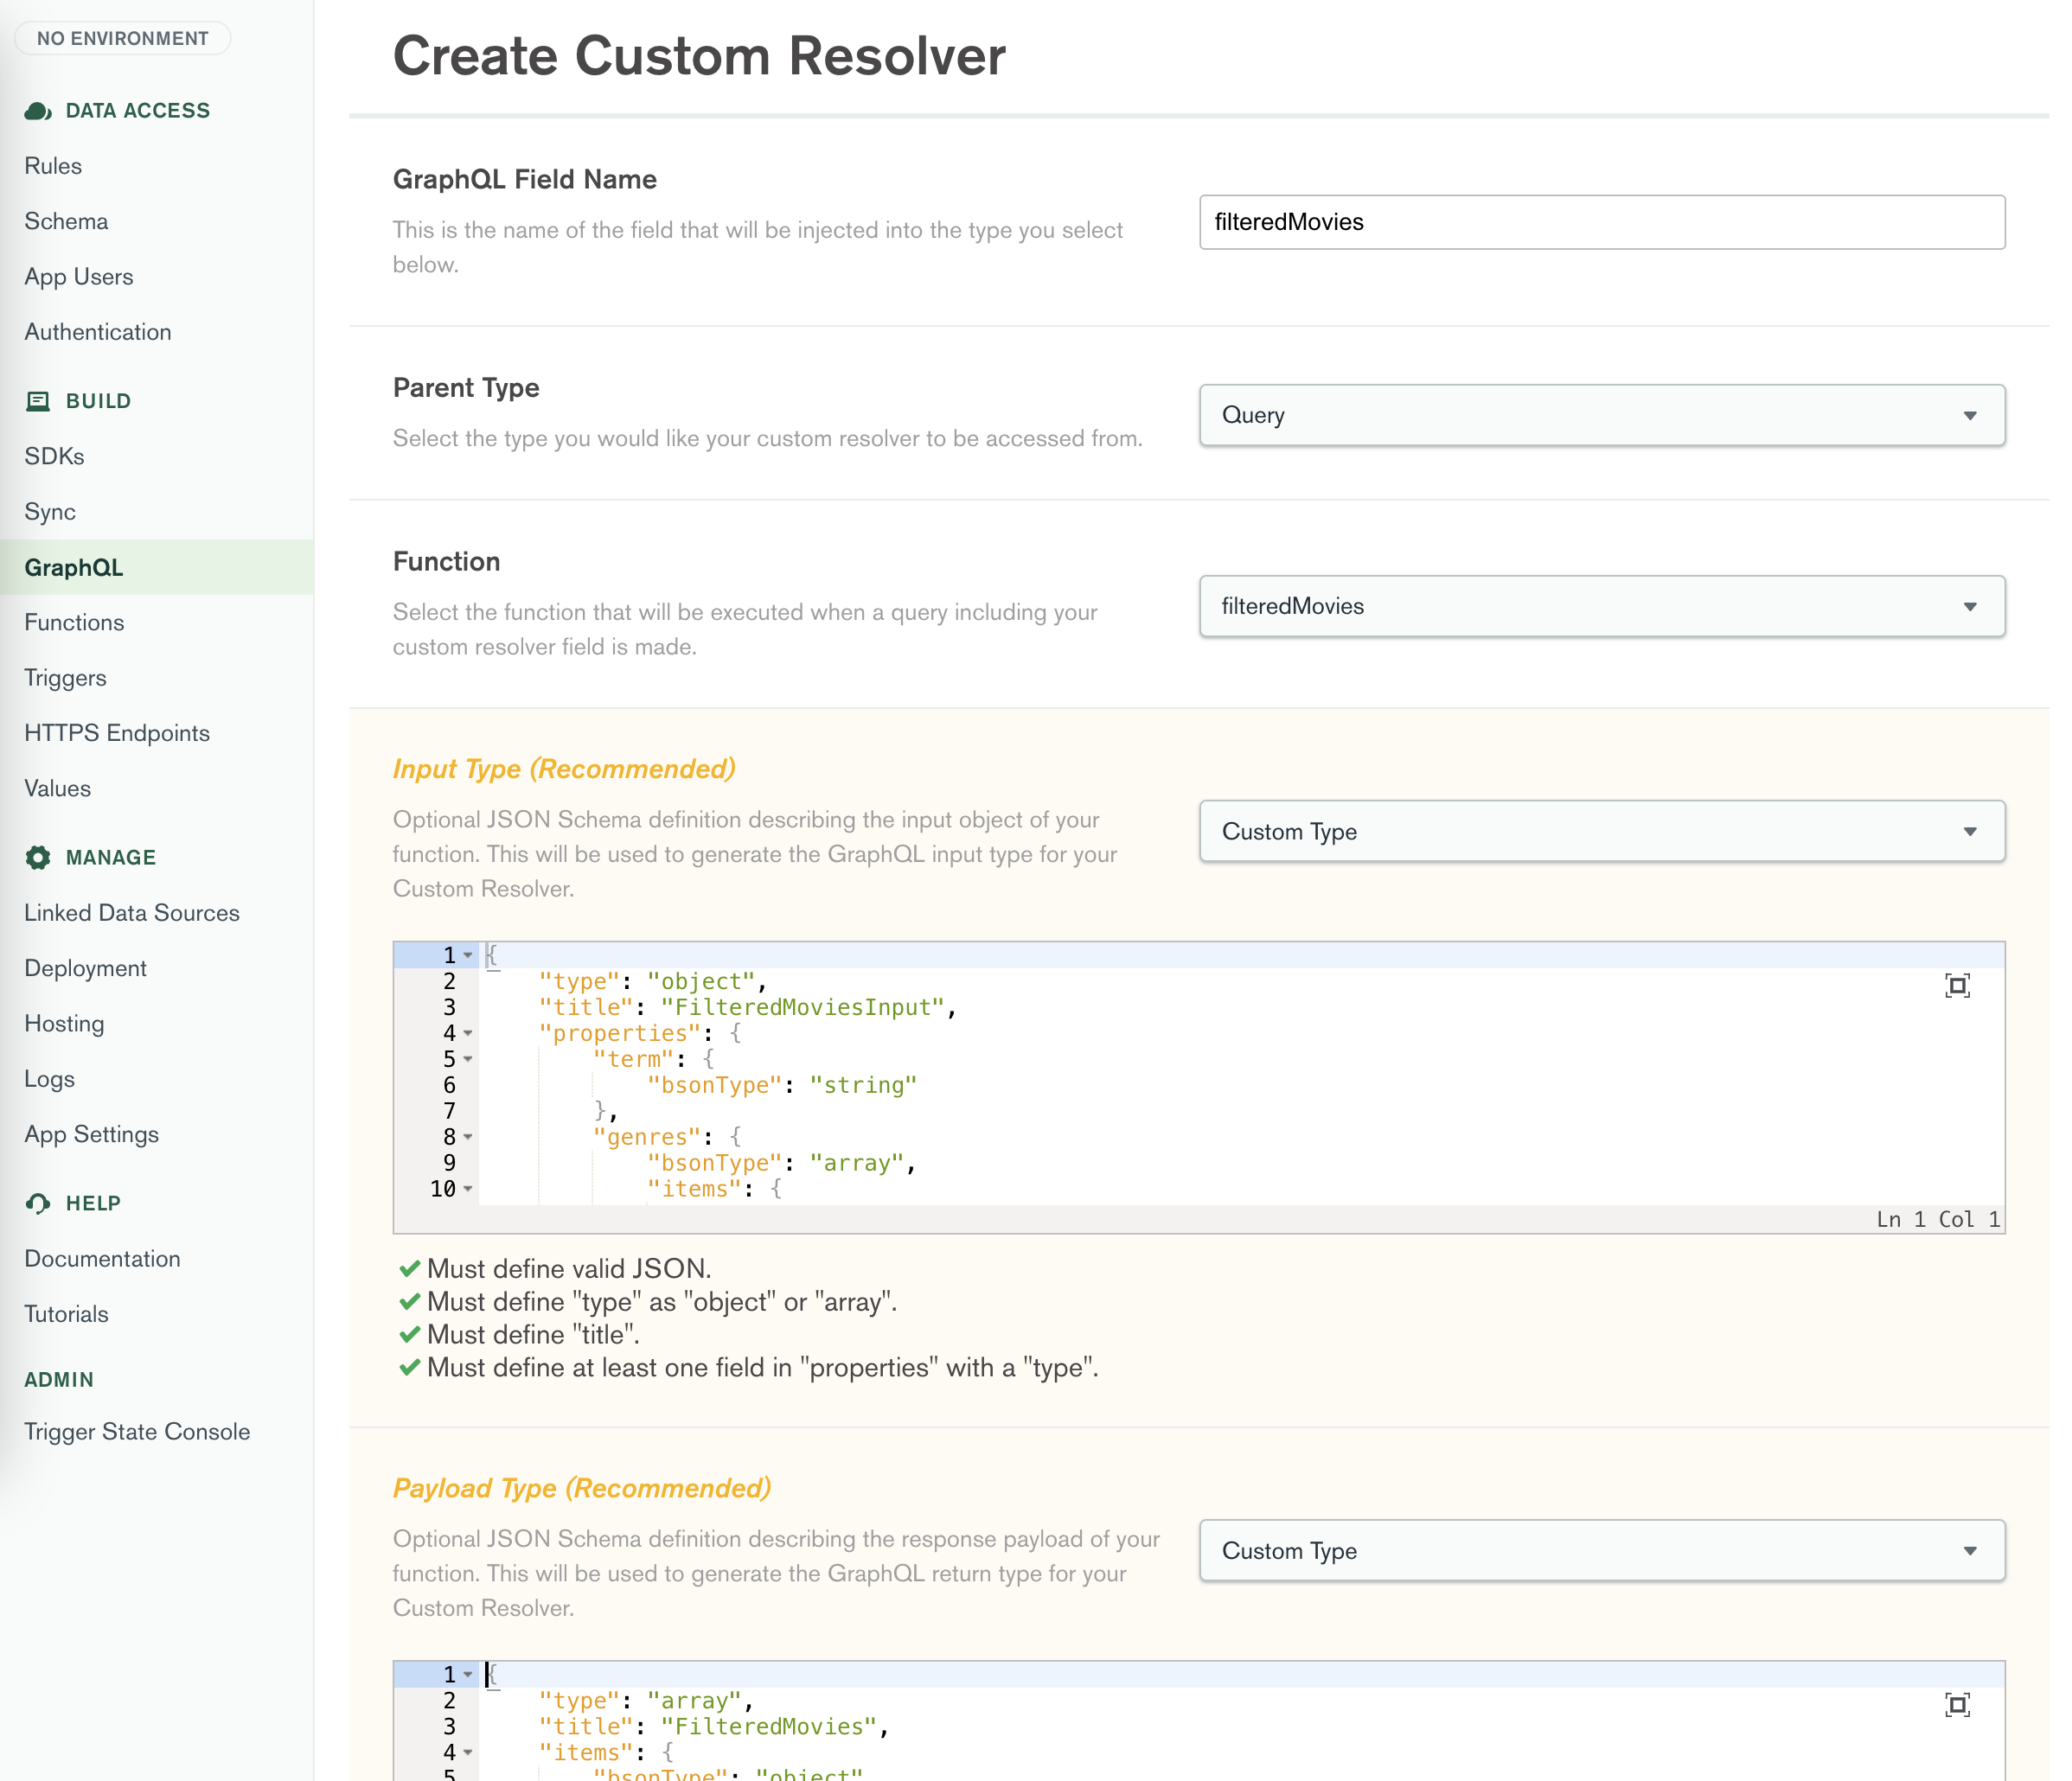
Custom Type {
"type" : " object " ,
"title" : " FilteredMoviesInput " ,
"properties" : {
"term" : {
"bsonType" : " string "
},
"genres" : {
"bsonType" : " array " ,
"items" : {
"bsonType" : " string "
}
},
"countries" : {
"bsonType" : " array " ,
"items" : {
"bsonType" : " string "
}
}
}
}Custom Type {
"items" : {
"bsonType" : " object " ,
"properties" : {
"_id" : {
"bsonType" : " objectId "
},
"cast" : {
"bsonType" : " array " ,
"items" : {
"bsonType" : " string "
}
},
"countries" : {
"bsonType" : " array " ,
"items" : {
"bsonType" : " string "
}
},
"directors" : {
"bsonType" : " array " ,
"items" : {
"bsonType" : " string "
}
},
"fullplot" : {
"bsonType" : " string "
},
"genres" : {
"bsonType" : " array " ,
"items" : {
"bsonType" : " string "
}
},
"highlights" : {
"bsonType" : " array " ,
"items" : {
"bsonType" : " object " ,
"properties" : {
"path" : {
"bsonType" : " string "
},
"score" : {
"bsonType" : " double "
},
"texts" : {
"bsonType" : " array " ,
"items" : {
"bsonType" : " object " ,
"properties" : {
"type" : {
"bsonType" : " string "
},
"value" : {
"bsonType" : " string "
}
}
}
}
}
}
},
"imdb" : {
"bsonType" : " object " ,
"properties" : {
"id" : {
"bsonType" : " int "
},
"rating" : {
"bsonType" : " double "
},
"votes" : {
"bsonType" : " int "
}
}
},
"plot" : {
"bsonType" : " string "
},
"poster" : {
"bsonType" : " string "
},
"score" : {
"bsonType" : " double "
},
"title" : {
"bsonType" : " string "
},
"year" : {
"bsonType" : " int "
}
}
},
"title" : " FilteredMovies " ,
"type" : " array "
}按一下「儲存草稿」按鈕儲存自訂解析器。
點擊頁面頂部的“查看草稿和部署”按鈕並部署您的變更。
現在,透過突出顯示功能設置,花時間測試應用程序,在結果列表中的搜尋欄滾動中輸入一些電影標題,並驗證模糊匹配的搜尋字詞在匹配時在電影標題和簡短情節中突出顯示。
Facets 開啟了許多強大的用例來將搜尋結果分組。以下功能示範如何執行 Atlas 搜尋查詢來取得按電影集合中每部電影的類型值分組的結果,包括每個群組的計數。
在Atlas集群的「搜尋」標籤中,為電影集合建立一個名為facets和以下 JSON 的新索引。
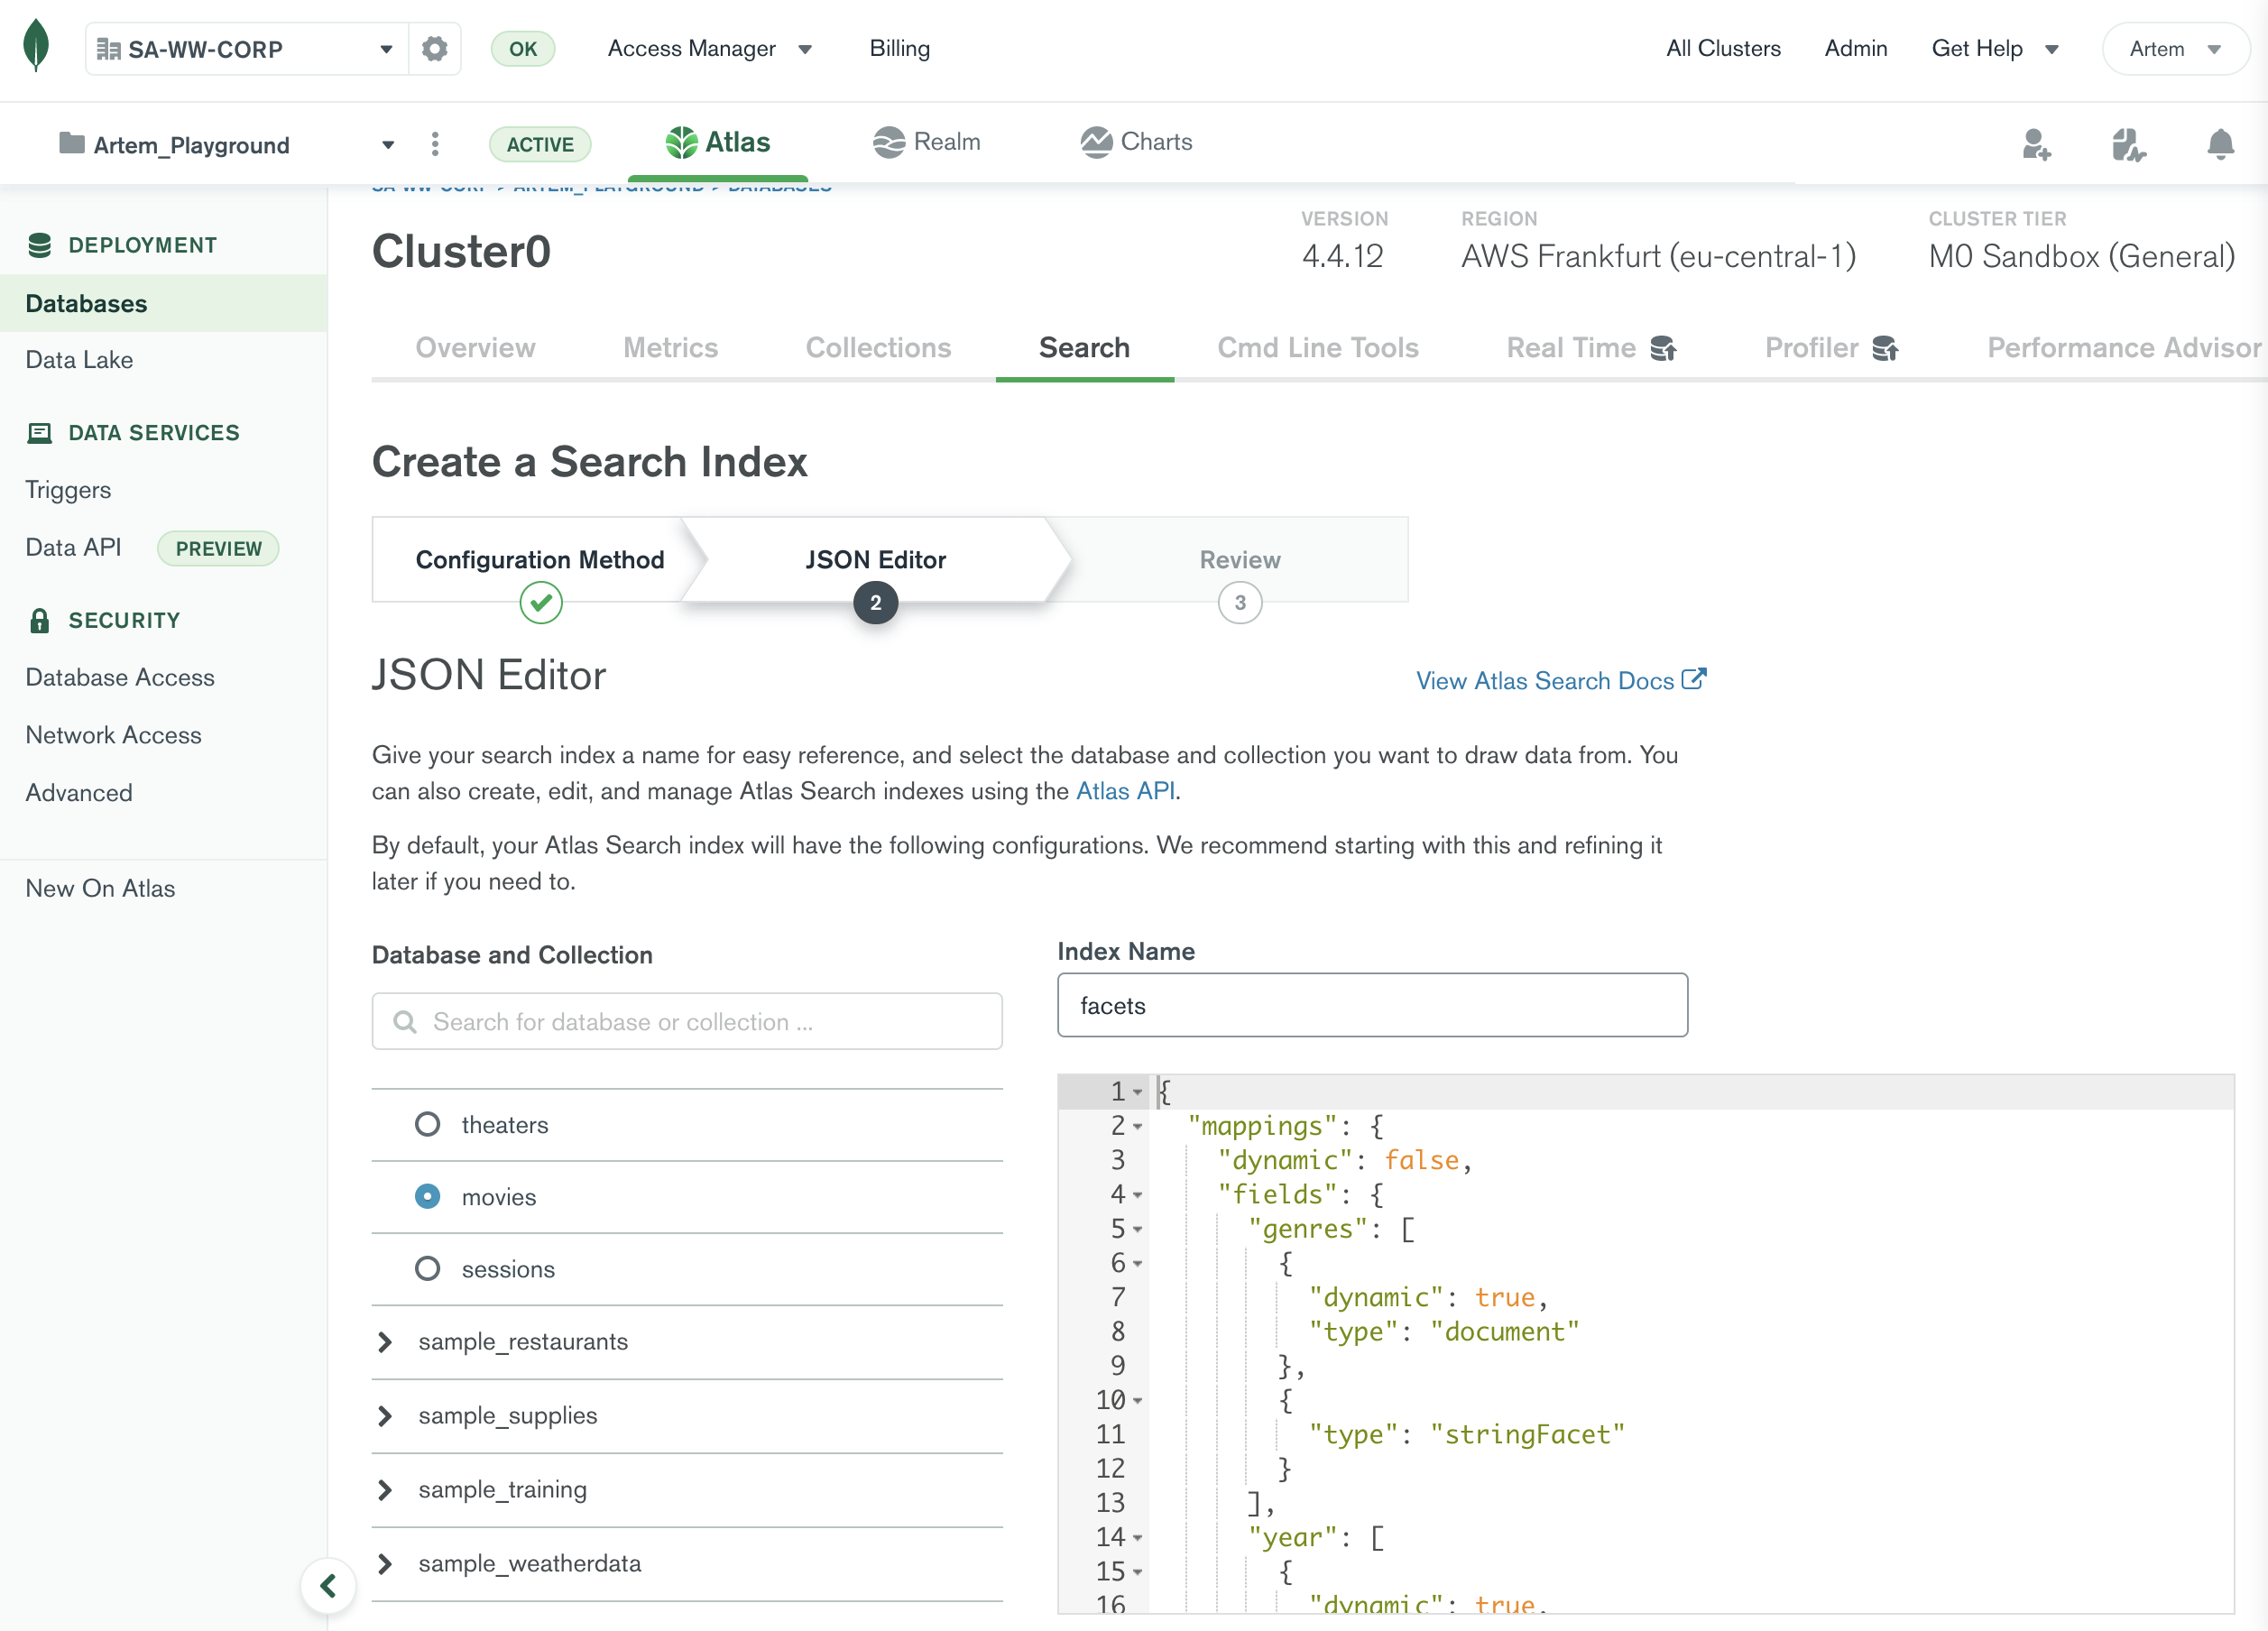
{
    "mappings" : {
        "dynamic" : false ,
        "fields" : {
            "genres" : [
                {
                    "dynamic" : true ,
                    "type" : " document "
                },
                {
                    "type" : " stringFacet "
                }
            ],
            "year" : [
                {
                    "dynamic" : true ,
                    "type" : " document "
                },
                {
                    "representation" : " int64 " ,
                    "type" : " number "
                }
            ]
        }
    }
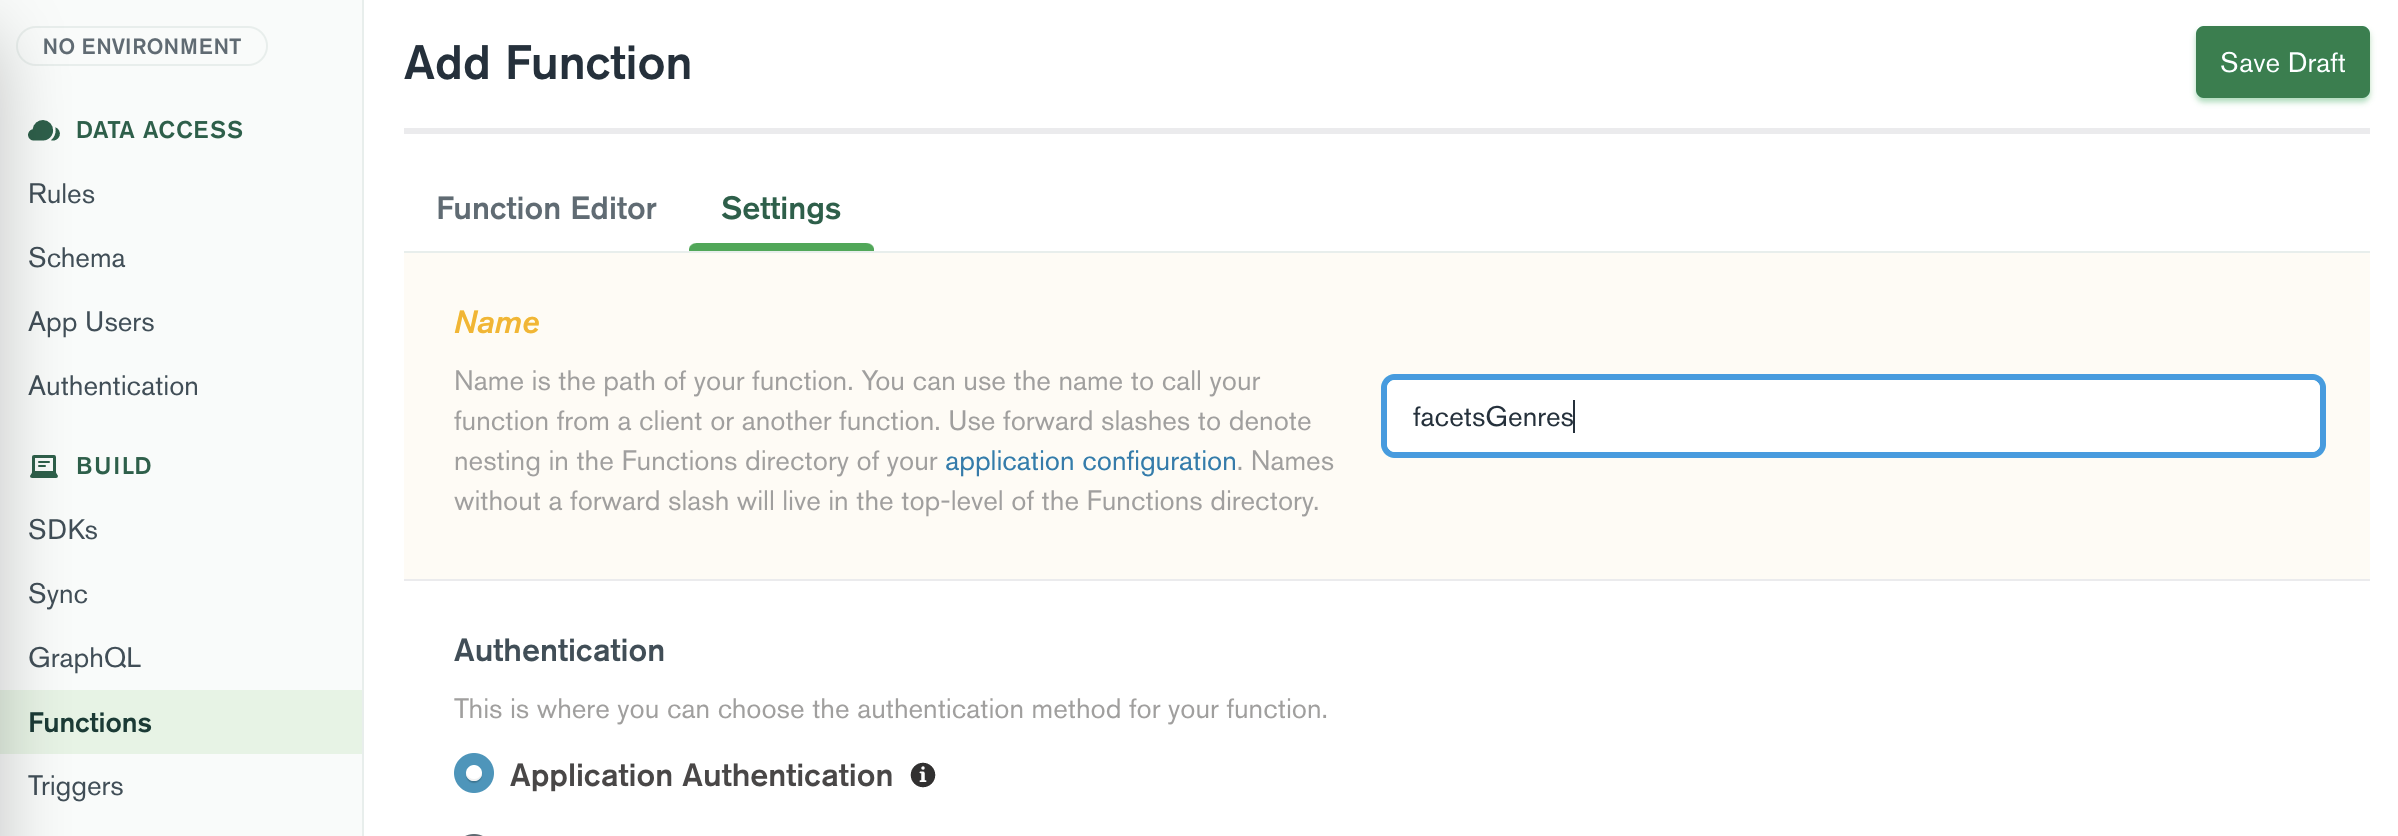
}現在建立了索引,在Atlas UI 中點擊「應用程式服務」標籤。按一下 UI 中的Application-0 。在 Atlas UI 左側欄的Build中,按一下Functions 。點擊“建立新函數”按鈕並輸入facetsGenres作為函數的名稱。
現在點選「函數編輯器」標籤。
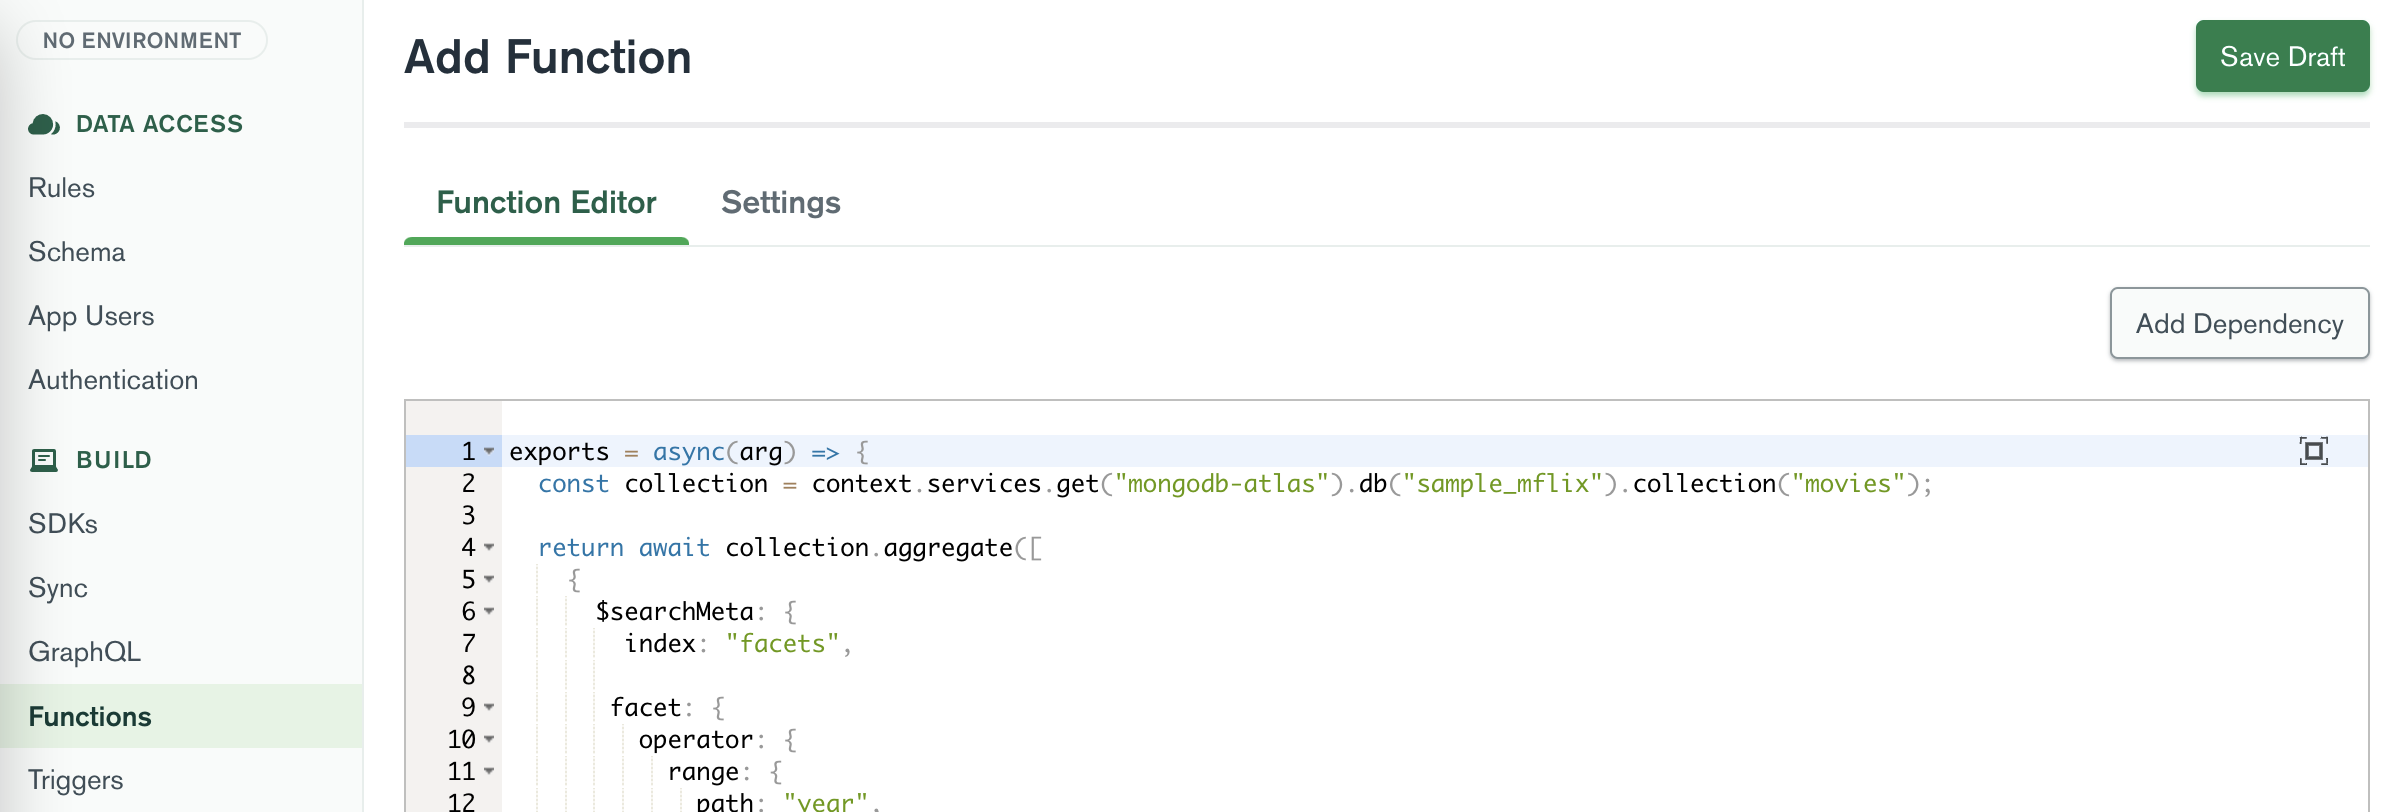
將以下程式碼貼到函數編輯器中:
 exports = async ( arg ) => {
    const collection = context . services . get ( "mongodb-atlas" ) . db ( "sample_mflix" ) . collection ( "movies" ) ;

    return await collection
        . aggregate ( [
            {
                $searchMeta : {
                    index : "facets" ,
                    facet : {
                        operator : {
                            range : {
                                path : "year" ,
                                gte : 1900 ,
                            } ,
                        } ,
                        facets : {
                            genresFacet : {
                                type : "string" ,
                                path : "genres" ,
                            } ,
                        } ,
                    } ,
                } ,
            } ,
        ] )
        . toArray ( ) ;
} ;在 Atlas UI 左側欄的Build中,按一下GraphQL 。按一下自訂解析器選項卡,然後按一下新增自訂解析器按鈕。對於GraphQL 欄位名稱,輸入facetsGenres ,對於父類型,選擇查詢,對於函數名稱,選擇新建立的函數facetsGenres 。
我們不會向此查詢發送輸入,並期望表示每個流派的方面的自定義對象列表,其中包含每個流派的電影數量。
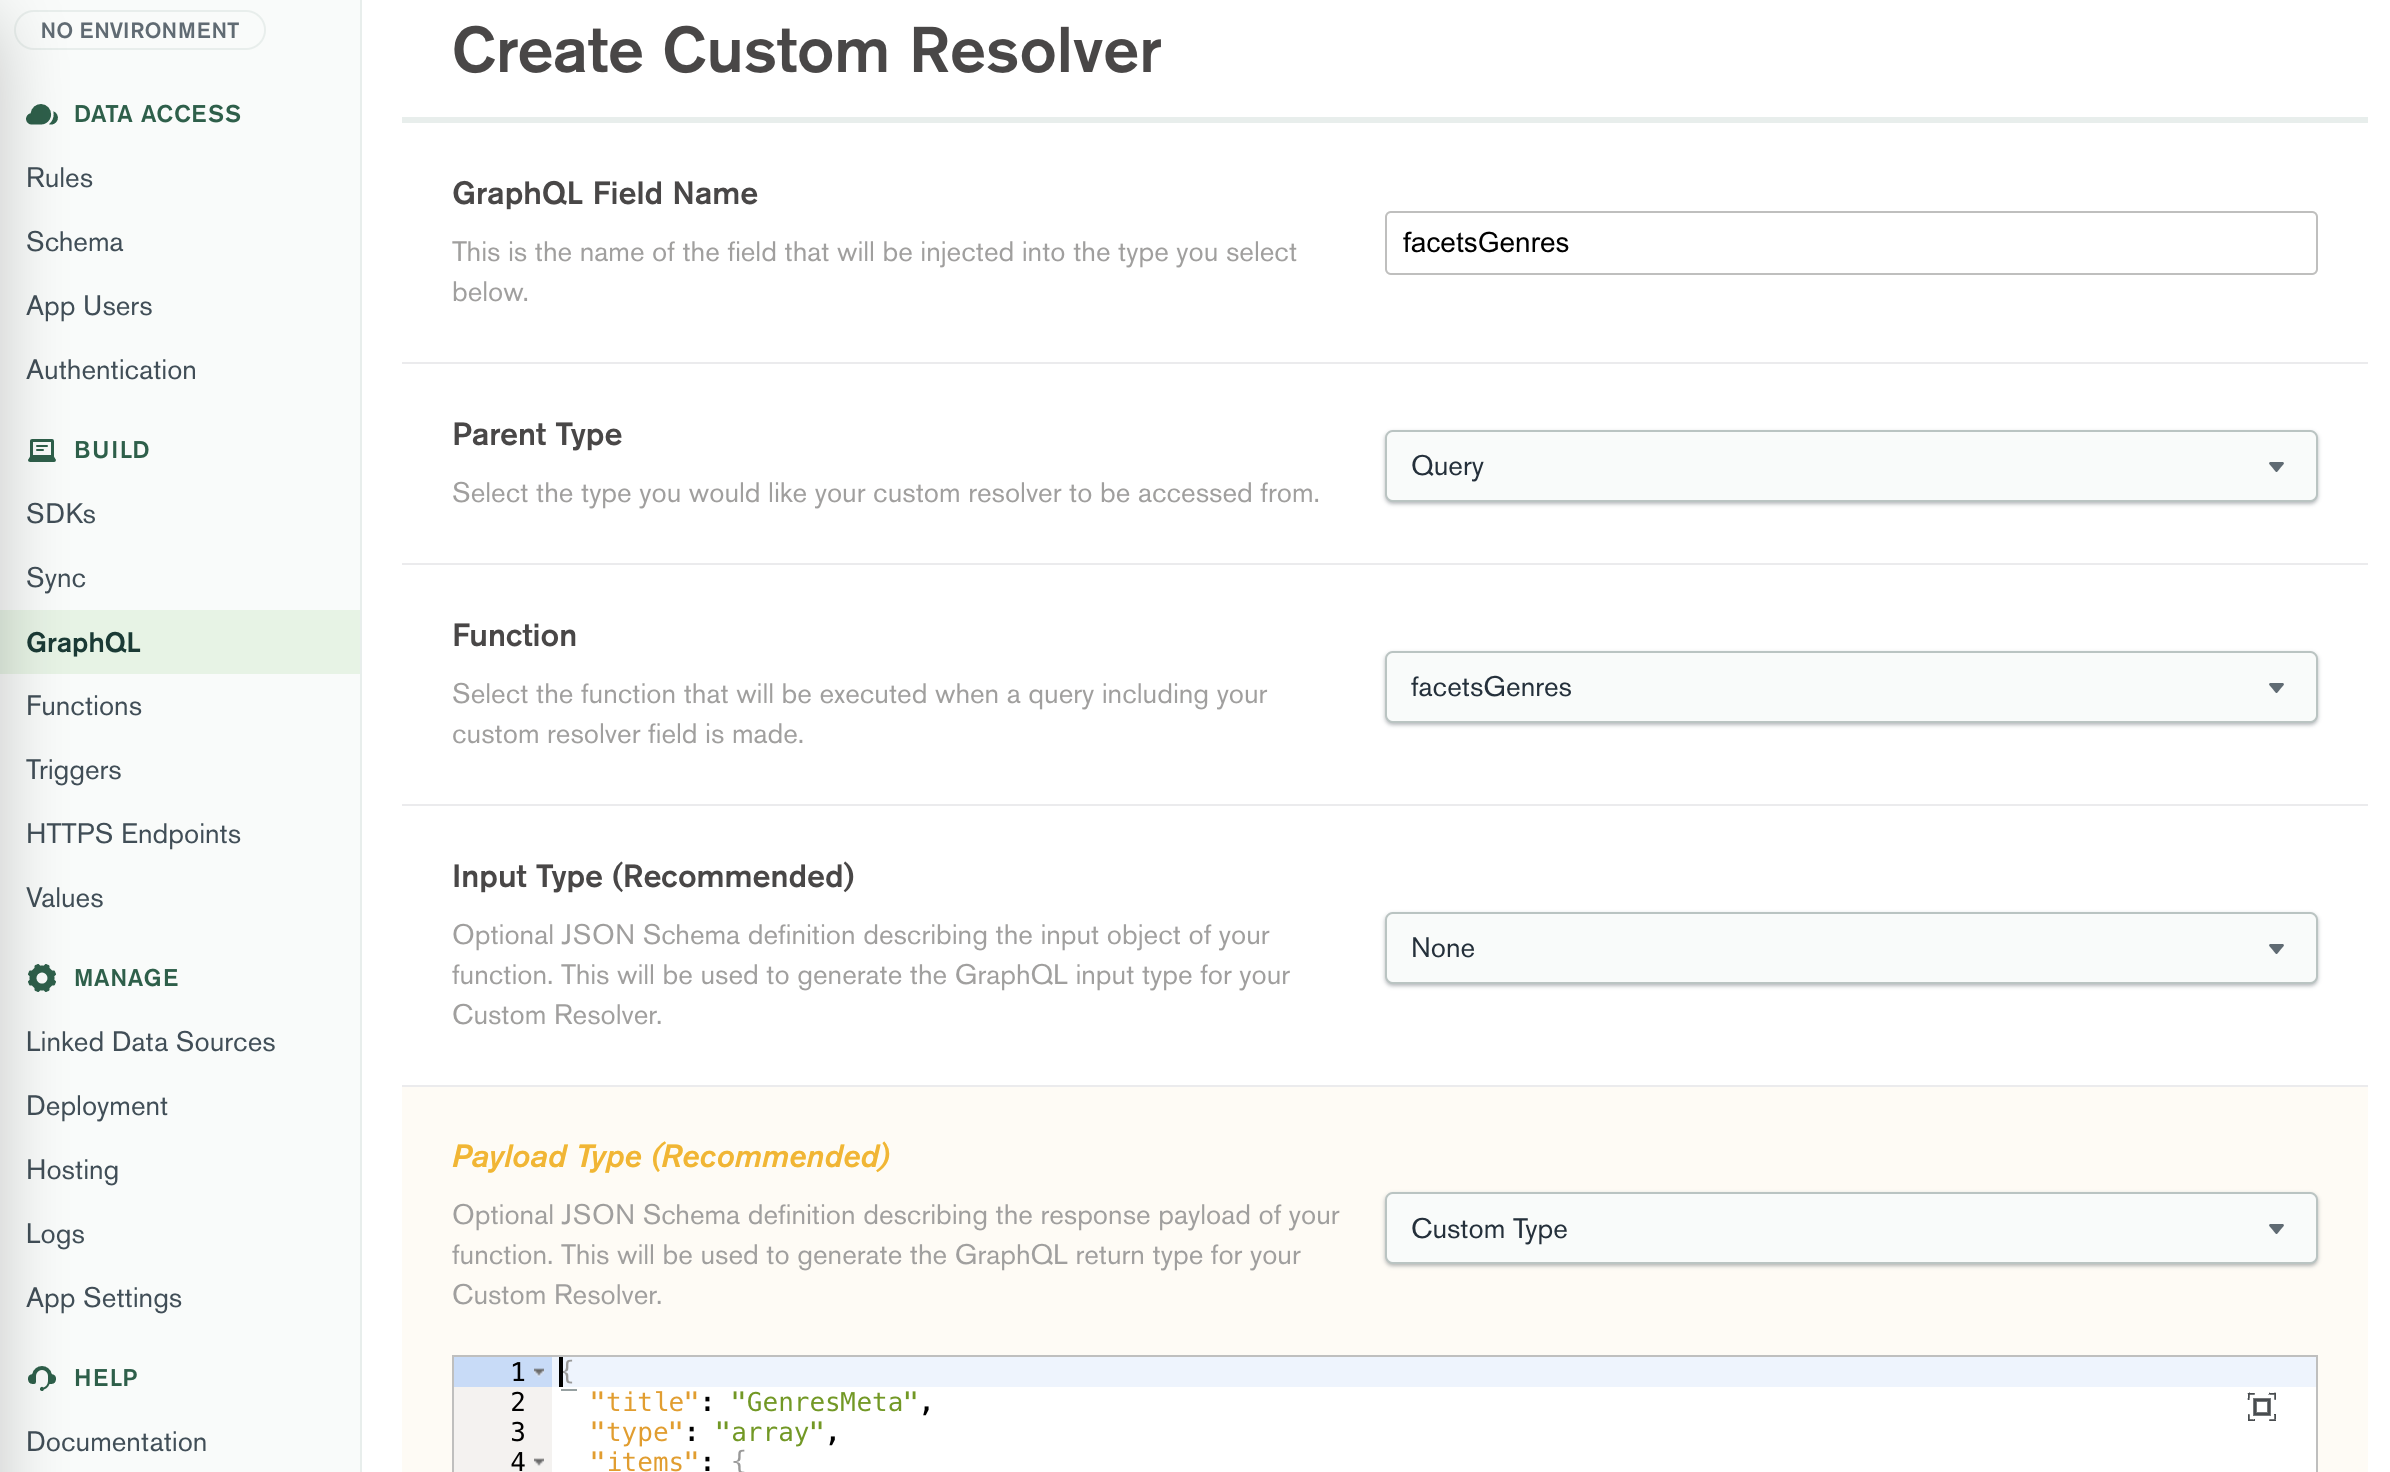
None Custom Type {
"title" : " GenresMeta " ,
"type" : " array " ,
"items" : {
"bsonType" : " object " ,
"properties" : {
"count" : {
"bsonType" : " double "
},
"facet" : {
"bsonType" : " object " ,
"properties" : {
"genresFacet" : {
"bsonType" : " object " ,
"properties" : {
"buckets" : {
"bsonType" : " array " ,
"items" : {
"bsonType" : " object " ,
"properties" : {
"_id" : {
"bsonType" : " string "
},
"count" : {
"bsonType" : " double "
}
}
}
}
}
}
}
}
}
}
}按一下「儲存草稿」按鈕儲存自訂解析器。
點擊頁面頂部的“查看草稿和部署”按鈕並部署您的變更。
現在,透過構面設定測試應用程式並開啟Genres的下拉清單。請注意,現在每個類型旁邊都有一個數字,代表該類型的電影總數。
MongoDB 應用程式服務託管可讓您託管、管理和提供應用程式的靜態媒體和文件檔案。您可以使用託管來儲存各個內容或上傳並提供整個用戶端應用程式。
我們的前端應用程式包含對應用程式服務上的 GraphQL API 的所有必要呼叫。我們可以將整個前端應用程式匯出為靜態網站並將其託管在 MongoDB App Services 上。
為此,您需要在專案的根資料夾中執行以下程式碼。確保您已安裝相依性。
npm install然後使用 nextjs 透過 npm 腳本建置並匯出網站。
npm run build && npm run export這將在專案的根資料夾中建立一個out資料夾。
在 MongoDB Atlas UI 的「應用程式服務」標籤上。在 Atlas UI 左側欄的管理中,按一下託管。點選啟用託管按鈕。將資料夾的內容out到「託管」標籤中以上傳所有檔案。
點擊頁面頂部的“查看草稿和部署”按鈕並部署您的變更。


現在點擊「設定」選項卡,複製應用程式服務網域並將其貼上到您選擇的瀏覽器中,然後按 Enter 鍵查看該網站。 ?