請查看我們關於Segment Anything Model 2 (SAM 2)的新版本。

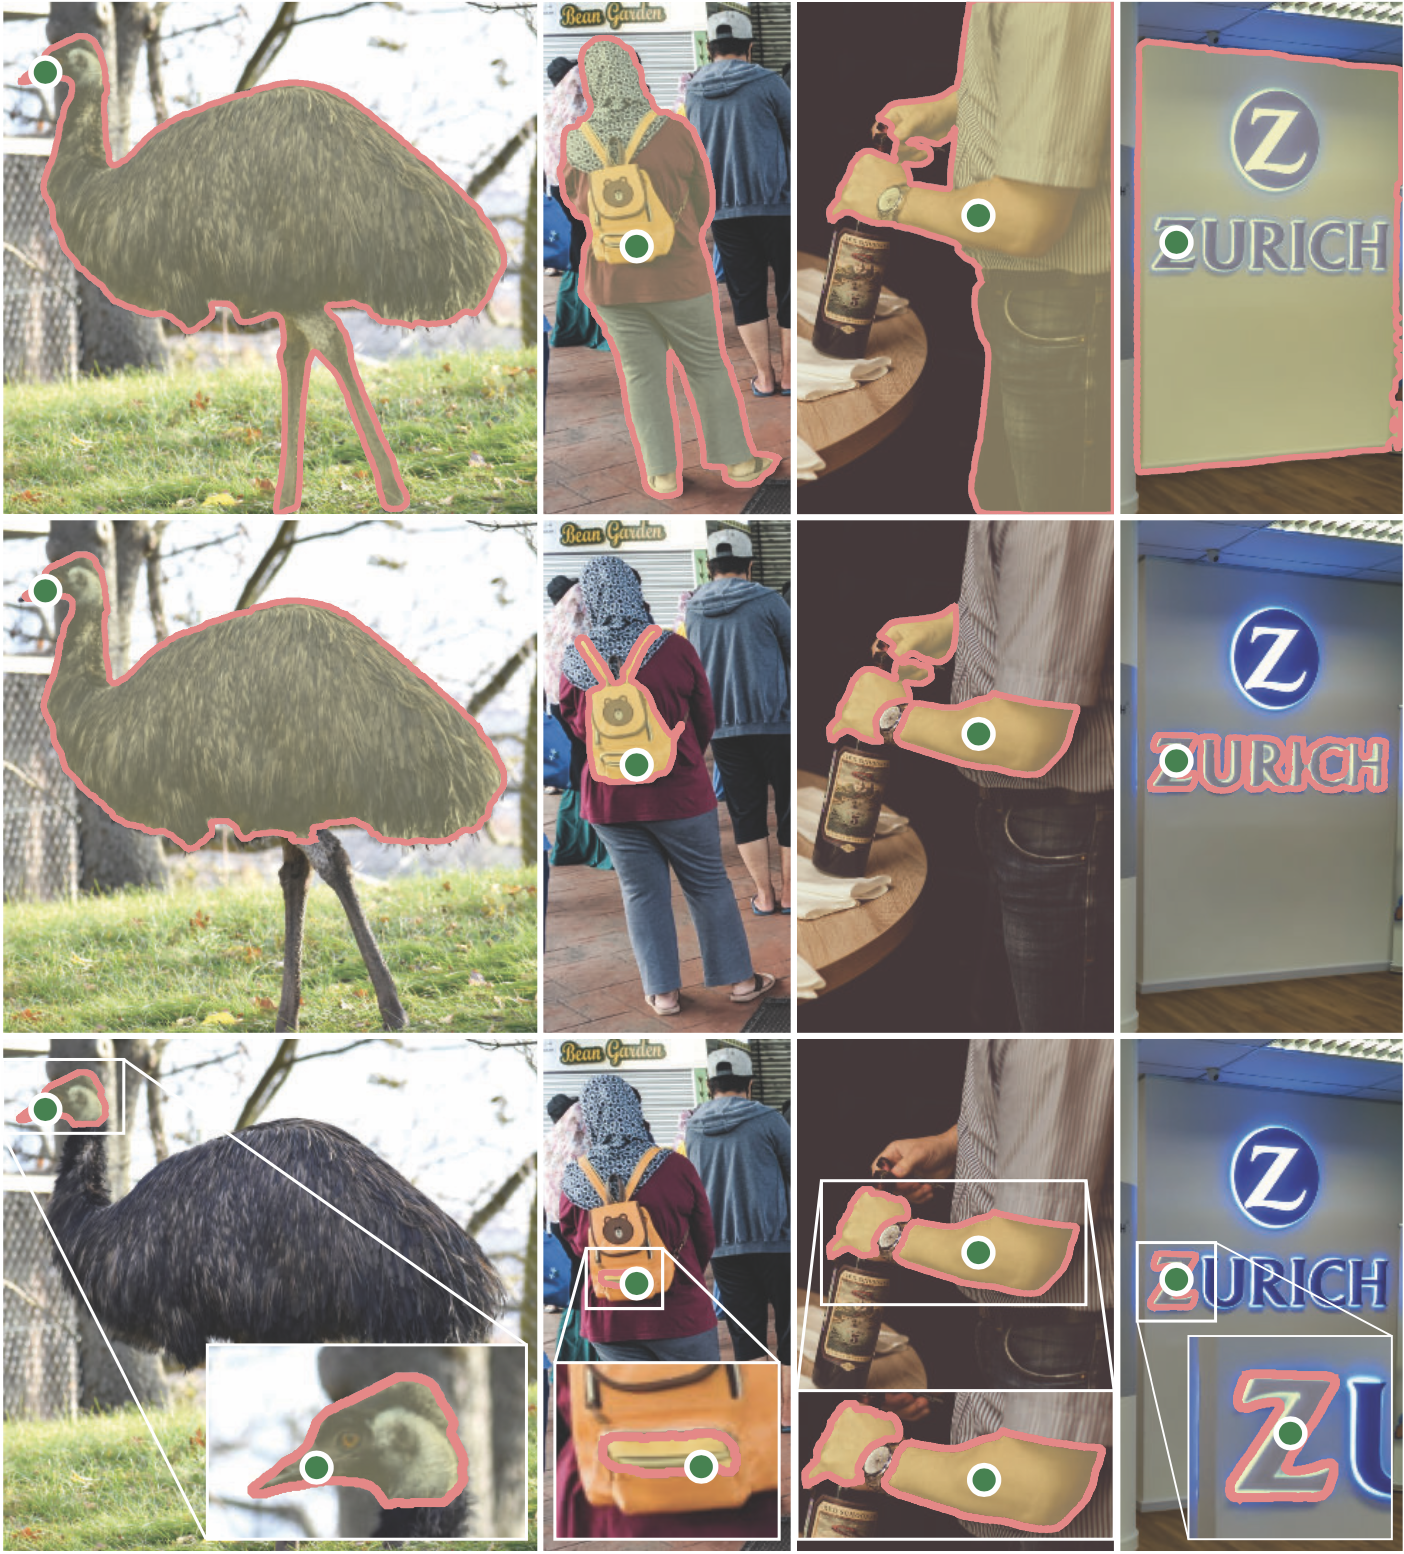
Segment Anything Model 2 (SAM 2)是解決影像和影片中快速視覺分割問題的基礎模型。我們將 SAM 擴展到視頻,將圖像視為具有單幀的視頻。該模型設計是一個簡單的變壓器架構,具有用於即時視訊處理的串流記憶體。我們建立了一個模型在環數據引擎,它透過用戶互動來改進模型和數據,以收集我們的 SA-V 數據集,這是迄今為止最大的視訊分割數據集。根據我們的資料進行訓練的 SAM 2 在廣泛的任務和視覺領域中提供了強大的性能。
元人工智慧研究,FAIR
亞歷山大·基里洛夫、艾瑞克·明通、尼基拉·拉維、毛漢子、克洛伊·羅蘭、蘿拉·古斯塔夫森、蕭泰特、史賓塞·懷特海德、亞歷克斯·伯格、盧萬彥、皮奧特·達勒、羅斯·吉爾希克
[ Paper ] [ Project ] [ Demo ] [ Dataset ] [ Blog ] [ BibTeX ]

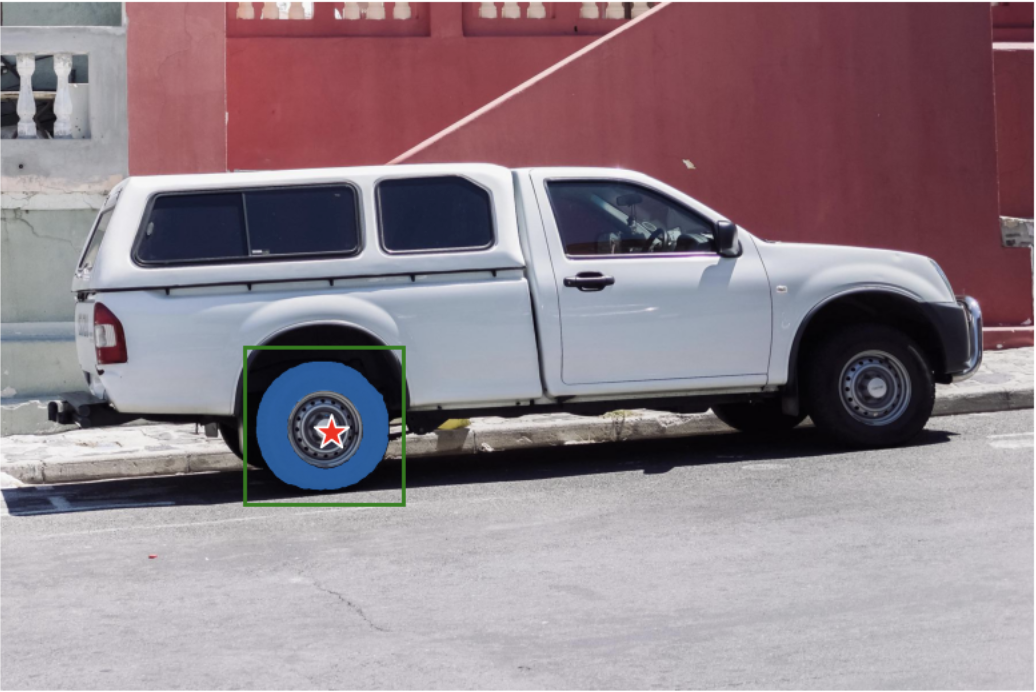
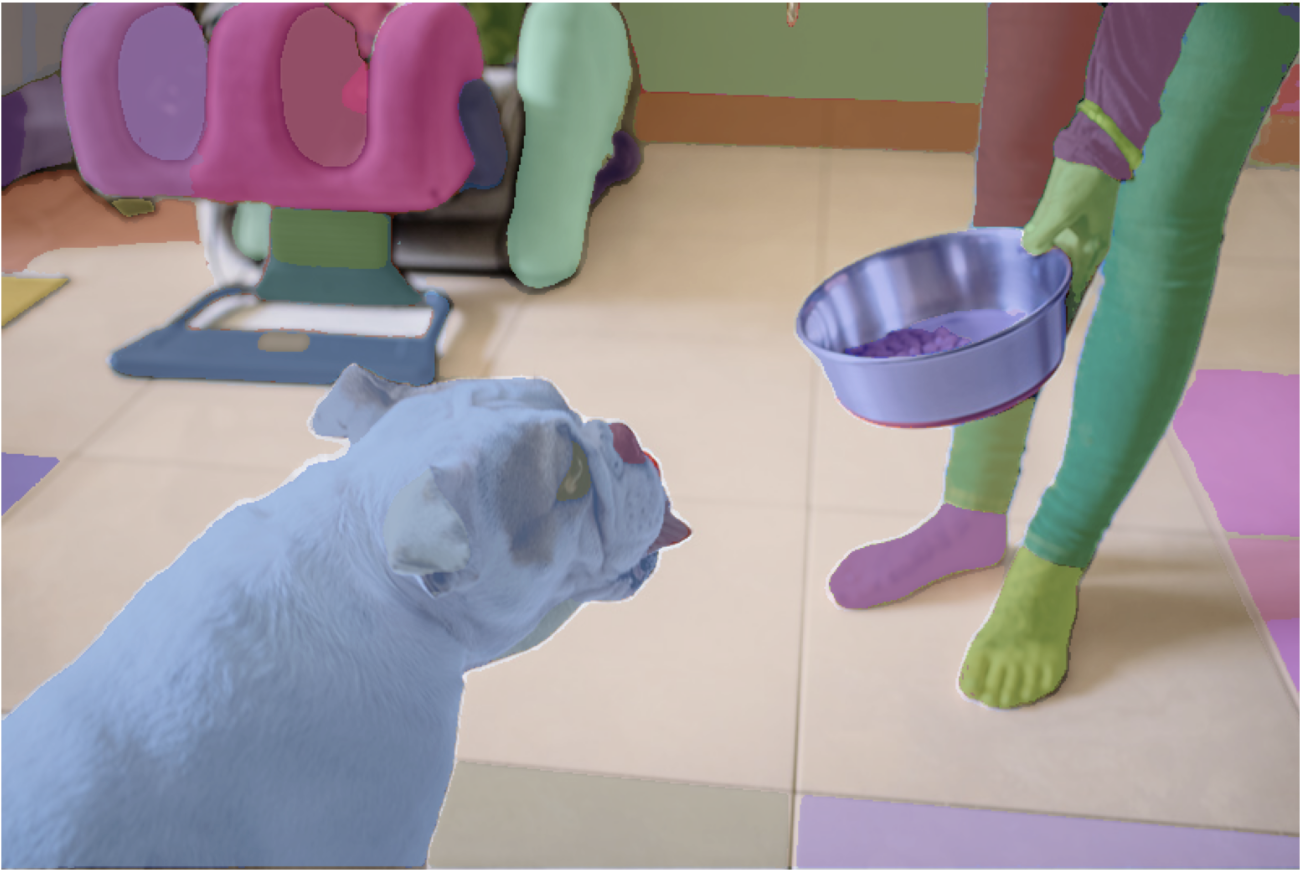
分段任意模型 (SAM)根據點或框等輸入提示產生高品質的物件遮罩,並可用於為影像中的所有物件產生遮罩。它在包含 1100 萬張圖像和 11 億個掩模的資料集上進行了訓練,在各種分割任務上具有強大的零樣本性能。


程式碼需要python>=3.8 ,以及pytorch>=1.7和torchvision>=0.8 。請依照此處的說明安裝 PyTorch 和 TorchVision 依賴項。強烈建議安裝支援 CUDA 的 PyTorch 和 TorchVision。
安裝Segment Anything:
pip install git+https://github.com/facebookresearch/segment-anything.git
或在本地克隆存儲庫並安裝
 git clone [email protected]:facebookresearch/segment-anything.git
cd segment-anything; pip install -e .
以下可選依賴項對於遮罩後處理、以 COCO 格式儲存遮罩、範例筆記本以及以 ONNX 格式匯出模型是必要的。運行範例筆記本還需要jupyter 。
pip install opencv-python pycocotools matplotlib onnxruntime onnx
首先下載一個模型檢查點。然後只需幾行即可使用該模型從給定的提示中取得遮罩:
 from segment_anything import SamPredictor, sam_model_registry
sam = sam_model_registry["<model_type>"](checkpoint="<path/to/checkpoint>")
predictor = SamPredictor(sam)
predictor.set_image(<your_image>)
masks, _, _ = predictor.predict(<input_prompts>)
或為整個影像產生蒙版:
 from segment_anything import SamAutomaticMaskGenerator, sam_model_registry
sam = sam_model_registry["<model_type>"](checkpoint="<path/to/checkpoint>")
mask_generator = SamAutomaticMaskGenerator(sam)
masks = mask_generator.generate(<your_image>)
此外,還可以從命令行為圖像產生蒙版:
python scripts/amg.py --checkpoint <path/to/checkpoint> --model-type <model_type> --input <image_or_folder> --output <path/to/output>
有關更多詳細信息,請參閱有關使用 SAM 和提示以及自動生成掩碼的示例筆記本。


SAM 的輕量級遮罩解碼器可以匯出為 ONNX 格式,以便它可以在支援 ONNX 運行時的任何環境中運行,例如演示中顯示的瀏覽器內。匯出模型
python scripts/export_onnx_model.py --checkpoint <path/to/checkpoint> --model-type <model_type> --output <path/to/output>
有關如何將透過 SAM 主幹進行的影像預處理與使用 ONNX 模型的遮罩預測相結合的詳細信息,請參閱範例筆記本。建議使用最新穩定版本的 PyTorch 進行 ONNX 匯出。
demo/資料夾有一個簡單的一頁 React 應用程序,它展示瞭如何在具有多線程的 Web 瀏覽器中使用導出的 ONNX 模型運行掩模預測。請參閱demo/README.md以了解更多詳細資訊。
該模型的三個模型版本具有不同的骨幹尺寸。這些模型可以透過運行來實例化
 from segment_anything import sam_model_registry
sam = sam_model_registry["<model_type>"](checkpoint="<path/to/checkpoint>")
點擊下面的連結下載對應模型類型的檢查點。
default或vit_h :ViT-H SAM 模型。vit_l :ViT-L SAM 模型。vit_b :ViT-B SAM 模型。 請參閱此處了解資料集的概述。數據集可以在這裡下載。下載資料集即表示您同意已閱讀並接受 SA-1B 資料集研究授權的條款。
我們將每個圖像的遮罩儲存為 json 檔案。它可以按以下格式作為 python 字典載入。
{
    "image"                 : image_info ,
    "annotations"           : [ annotation ],
}

image_info {
    "image_id"              : int ,              # Image id
    "width"                 : int ,              # Image width
    "height"                : int ,              # Image height
    "file_name"             : str ,              # Image filename
}

annotation {
    "id"                    : int ,              # Annotation id
    "segmentation"          : dict ,             # Mask saved in COCO RLE format.
    "bbox"                  : [ x , y , w , h ],     # The box around the mask, in XYWH format
    "area"                  : int ,              # The area in pixels of the mask
    "predicted_iou"         : float ,            # The model's own prediction of the mask's quality
    "stability_score"       : float ,            # A measure of the mask's quality
    "crop_box"              : [ x , y , w , h ],     # The crop of the image used to generate the mask, in XYWH format
    "point_coords"          : [[ x , y ]],         # The point coordinates input to the model to generate the mask
}
圖像 ID 可以在 sa_images_ids.txt 中找到,也可以使用上面的連結下載。
要將 COCO RLE 格式的遮罩解碼為二進位:
 from pycocotools import mask as mask_utils
mask = mask_utils.decode(annotation["segmentation"])
有關操作以 RLE 格式儲存的遮罩的更多說明,請參閱此處。
該模型根據 Apache 2.0 許可證獲得許可。
請參閱貢獻和行為準則。
Segment Anything 專案是在許多貢獻者(按字母順序排列)的幫助下實現的:
亞倫·阿德考克、瓦伊巴夫·阿加瓦爾、莫特扎·貝赫魯茲、傅成陽、阿什利·加布里埃爾、阿胡瓦·金斯坦德、艾倫·古德曼、蘇曼斯·古拉姆、胡家波、索米亞·賈因、德萬什·庫克雷賈、羅伯特·郭、Joshua Lane、李陽浩、Lilian Luong、Jitendra Malik、瑪麗卡·馬爾霍特拉/威廉·顏/ 歐姆卡·帕克希/ 尼基爾·雷納/ 德克·羅/ 尼爾·塞喬爾/ 凡妮莎·史塔克/ 巴拉·瓦拉達拉詹/ 布拉姆·瓦斯蒂/ 扎克瑞·溫斯特羅姆
如果您在研究中使用 SAM 或 SA-1B,請使用下列 BibTeX 條目。
 @article{kirillov2023segany,
  title={Segment Anything},
  author={Kirillov, Alexander and Mintun, Eric and Ravi, Nikhila and Mao, Hanzi and Rolland, Chloe and Gustafson, Laura and Xiao, Tete and Whitehead, Spencer and Berg, Alexander C. and Lo, Wan-Yen and Doll{'a}r, Piotr and Girshick, Ross},
  journal={arXiv:2304.02643},
  year={2023}
}