vue2 study
1.0.0
3.安裝webpack-html-plugin
4安裝vue
5安裝webpack-dev-server熱更新
6安裝babel
7安裝vue-loader處理vue的文件
8使用路由vue-router2
9.1vuex的基本應用
9.2state的拆分
10組件化,及組件間傳值
11.使用nodejs+koa2提供後台接口
12.設定koa允許前端跨域訪問
13 使用axios存取後台介面
    git clone https://github.com/liubin915249126/vue2-study.git
    cd vue2-study
    安装cnpm镜像
    npm install -g cnpm --registry=https://registry.npm.taobao.org
    npm install //安装依赖包
    npm start   //启动项目
cd 'to/your/path' npm init
分為全域安裝和項目內安裝
    npm install webpack -g
    npm install webpack --save-dev
     const path = require('path');

     module.exports = {
         entry: './Script/main.js', //项目入口文件
         output:{                    //输出编译后文件地址及文件名
             path: path.resolve(__dirname, 'dist'),
             filename: 'js/bundle.js'
         }
     };
命令列裡面執行webpack 指令即可看到編譯後的文件
npm install html-webpack-plugin --save-dev
    const HtmlWebpackPlugin = require('html-webpack-plugin');
    ...
    plugins:[
        ...
        new HtmlWebpackPlugin({
            title:'react 学习',
            inject:'body',
            filename:'index.html',
            template:path.resolve(__dirname, "index.html")
        }),
        ...
    ]
再次執行webpack指令可看到多了一個index.html檔案這個檔案是根據模板產生的並自動引入打包生成的js檔案運行打包後的index.html即可看到效果。
npm install vue -save
修改main.js:
    import Vue from  'vue';

    var MainCtrl = new Vue({
        el:'#main',
        data:{
            message:'Hello world'
        }
    })
修改index.html:
   <div id="main">
      <h3>{{message}}</h3>
   </div>
執行webpack打包運作index.html(打包的檔案)報錯,經查在webpack.config.js裡面設定:
    ...
    resolve: { alias: { 'vue': 'vue/dist/vue.js' } }
再次運行即可看到效果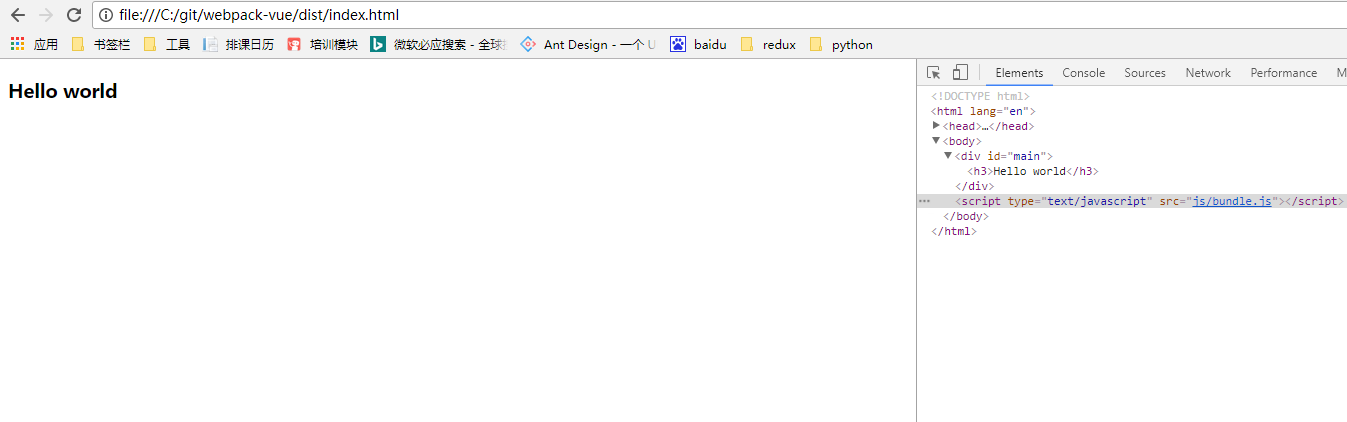
    npm install webpack-dev-server -g
    npm install webpack-dev-server --save-dev
    npm install vue-hot-reload-api --save-dev
配置webpack.config.js
    ...
    devServer: {
        historyApiFallback: true,
    },
    ...
配置package.json裡面指令
"start":"webpack-dev-server --hot --inline --progress --open"
執行npm start 瀏覽器自動開啟頁面,變更檔案後即可看到頁面即時更新
在使用.vue檔之前先安裝babel(將es6語法轉換為es5)
    npm install babel-core babel-loader babel-plugin-transform-runtime --save-dev
    npm install babel-preset-stage-0 babel-runtime babel-preset-es2015 --save-dev
專案根目錄新建.babelrc檔案、設定:
    {
    "presets": ["es2015", "stage-0"],
    "plugins": ["transform-runtime"]
    }
安裝loader 處理.css,.vue文件
npm install css-loader style-loader vue-loader vue-html-loader --save-dev
配置webpack.config.js
   ...
   module:{
       loaders: [
           {test: /.js$/,loader: 'babel-loader',exclude: /node_modules/},
           {test: /.vue$/,loader: 'vue-loader'}]
        },
    //vue: {loaders: {js: 'babel'}}
   ...
配置完運行報錯:Cannot find module 'vue-template-compiler' 安裝vue-template-compiler
cnpm install vue-template-compiler --save-dev
修改index.html:
  <body>
   <div id="main">
      <app></app>
   </div>
  </body>
新建src/index.vue:
  <template>
    <div class="message">{{ msg }}</div>
  </template>

    <script>
        export default {
        data () {
            return {
            msg: 'Hello from vue-loader!'
            }
        }
        }
    </script>

    <style>
        .message {
        color: blue;
        }
    </style>
修改main.js
    ...
    import App from './src/index.vue';

    new Vue({
        el: '#main',
        components: { App }
    })
儲存後運行npm start 即可看到效果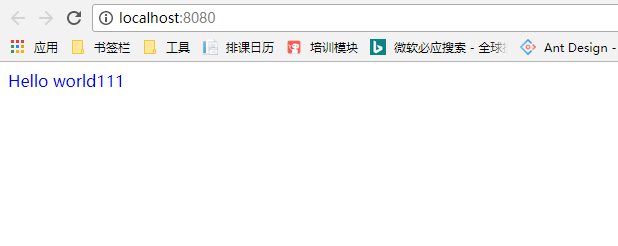
修改程式碼,可看到修改後的效果。
首先安裝vue-router:
npm install vue-router --save
修改main.js:
1.引入APP,about兩個元件導入router元件引入子元件Child
    import App from './src/index.vue';
    import About from './src/about.vue';
    import Child from './src/children.vue'
    import VueRouter from 'vue-router';

    Vue.use(VueRouter)
2.定義路由: 嵌套路由用children:[]存放,子組件在父組件的
<router-view></router-view>
中渲染,路由透過"/:id" 定義參數透過連結"/about/123"傳遞參數在元件中透過{{$route.params.id}}取得傳參
 const routes = [
    { path: '/index', component: App },
    { path: '/about/:id', component: About ,children:[
        { path: 'child', component: child}
    ]}
]
routes配置 const router = new VueRouter({
routes // (缩写)相当于 routes: routes
})
    const app = new Vue({
        router
    }).$mount('#main')
5.修改index.html文件
    <div id="main">
        <p>
            <router-link to="/index">index</router-link>
            <router-link to="/about/123">about</router-link>
            <router-link to="/about/123/child">child router</router-link>
        </p>
        <!-- 路由匹配到的组件将渲染在这里 -->
        <router-view></router-view>
    </div>
6.修改父元件about.vue 寫才發現,只能有一個頂層的HTML標籤
 </template>
    <div>
        <div class="message">{{ msg }}</div>
        <div>
        <span>传递的参数为:{{ $route.params.id }}</span>

        <router-view></router-view>
        </div>
    </div>
</template>
 routes: [
    ...
    { path: '/a', redirect: '/index' }
  ]
訪問/a時將跳轉值/index對應的組件
用vue.js寫單頁面應用時,會出現打包後的JavaScript包非常大,影響頁面加載,我們可以利用路由的懶加載去優化這個問題。將路由寫法改為:
 //定义路由
const routes = [
    { path: '/index', component: resolve => require(['./src/index.vue'], resolve) },
    {
        path: '/about/:id', component: resolve => require(['./src/about.vue'], resolve) ,
        children:[
            { path: 'child', component: resolve => require(['./src/children.vue'], resolve)}
    ]},
    { path: '/a', redirect: '/index' }
]
    // 字符串
    router.push('home')
    // 对象
    router.push({ path: 'home' })
    // 命名的路由
    router.push({ name: 'user', params: { userId: 123 }})
    // 带查询参数,变成 /register?plan=private
    router.push({ path: 'register', query: { plan: 'private' }})
參考文獻:vue-router 效果圖: 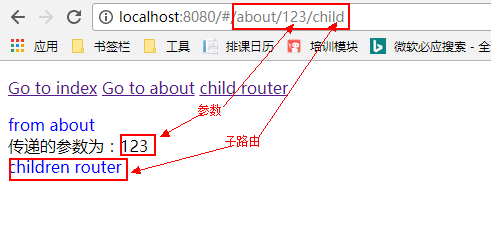
安裝vuex
npm install vuex --save
新建store.js檔:
        import Vue from 'vue';
        import Vuex from 'vuex';

        Vue.use(Vuex)
        //创建Store实例
        const store = new Vuex.Store({
            // 存储状态值
            state: {
                count:1
        },
            // 状态值的改变方法,操作状态值
            // 提交mutations是更改Vuex状态的唯一方法
            mutations: {
                increment(state){
                    state.count++;
                },
                decrement(state){
                    state.count--;
                }
        },
            // 在store中定义getters(可以认为是store的计算属性)。Getters接收state作为其第一个函数
            getters: {

        },
            actions: {

        }
        })
        // 要改变状态值只能通过提交mutations来完成
        export default store;
在main.js裡面注入store;
    ...
    //引入store
    import store from './store.js'
    ...
    const app = new Vue({
        router,
        store
    }).$mount('#main')
新建count.vue文件,並新建路由指向count組件參考vue-router的使用。 count.vue檔案:
    <template>
    <div>
        <div>{{$store.state.count}}</div>
        <div>
        <span @click="increment">increment</span>
        <span @click="decrement">decrement</span>
        </div>
    </div>
    </template>
    <style>
    </style>
    <script>
    export default {
        data(){
            return {};
        },
        methods:{
            increment(){
                this.$store.commit('increment')
            },
            decrement(){
                this.$store.commit('decrement')
            }
        }
    }
    </script>
效果圖: 
由於使用單一狀態樹,應用的所有狀態會集中到一個比較大的物件。當應用程式變得非常複雜時,store 物件就有可能變得相當臃腫。 為了解決以上問題,Vuex 讓我們可以將store 分割成模組(module)。每個模組擁有自己的state、mutation、action、getter
新建moduleA.js,moduleB.js
並修改store.js:
 ...
import moduleA from './moduleA';
import moduleB from './moduleB';
...
Vue.use(Vuex)
//创建Store实例
const store = new Vuex.Store({
    modules:{
        moduleA, moduleB //es6的写法,合并模块
    }
})
...
在組件裡面想訪問到state需要用到
    $store.state.moduleA.count
    $store.state.moduleB.Name
效果圖:  mutations裡面修改state的方法依然不變
元件(Component) 是Vue.js 最強大的功能之一。元件可以擴充HTML 元素,封裝可重複使用的程式碼。在較高層面上,元件是自訂元素,Vue.js 的編譯器為它添加特殊功能。在某些情況下,元件也可以表現為以is 特性進行了擴充的原生HTML 元素。
組件A寫法:
   <template>
   <div class="componentA">
   ...
   </div>
</template>
<script>
    export default {
    data () {
        return {
           msg: 'component-A',
        }
    }
    }
</script>
<style>

</style>
組件B寫法:
   <template>
   <div class="message" id="componentB">
        ...
   </div>
</template>

<script>
    import Vue from 'vue'
    export default Vue.component('my-component', {
            template: '#componentB ',
            data(){
                return {
                      msg: 'component-B',
                    }
            }
    })
</script>
<style>
</style>
在父元件component 分別引用掛在
   <template>
  <div>
   <component-A ></component-A>
   <component-B></component-B>
  </div>
</template>

<script>
    import componentA from './component-a.vue';
    import componentB from './component-b.vue'
    export default {
    data () {
        return {
        }
     },
     components:{
         "component-A":componentA,
         "component-B":componentB
     }
    }
</script>
<style>
</style>
對於簡單的父子組件或是同屬同一父組件的兄弟組件之間的通信,vue提供了方法,沒必要用到vuex
父組件:
<component-A :logo="logoMsg"></component-A> //logoMsg是父组件data里的值
子組件:
   <template>
   <div class="componentA">
      <div>{{logo}}</div>
   </div>
</template>
   ...
   data(){

   }
   props:["logo"],
   ...
父組件:
   <component-A :logo="logoMsg" @toParent="componenta"></component-A>
   ...
    methods:{
         componenta:function(data){ //data就是子组件传递过来的值
            this.data1 = data
         }
     }
子組件:
     methods:{
        toParent:function(){
            this.$emit('toParent',this.data1) //调用父组件toParent方法,并传递参数
        }
    }
效果圖: 
效果圖: 
bus.js檔:
   import Vue from 'vue'
   export default new Vue()
組件B $emit觸發事件:
  import Bus from './bus.js'
  ...
   byBus:function(){
           Bus.$emit('byBus',this.byBusData)
        }
元件A $on接受事件傳遞數據
    ...
    data(){
    },
    created(){
       Bus.$on('byBus',(data)=>{
           this.busData = data
       })
    },
效果圖: 
npm install koa koa-router --save-dev
在根目錄下下新server/index.js檔index.js:
    const Koa = require('koa');
    const router = require('koa-router')();
    const app = new Koa();
    router.get('/', (ctx, next)=> {
        ctx.response.body = '111'
    });

    app
        .use(router.routes())
        .use(router.allowedMethods());

    app.listen(3000,()=>{
       console.log('server is start at port 3000')
    });
package.json裡面設定指令:"server":"node server index.js" 啟動服務:npm run server 瀏覽器裡面存取localhost/3000可看到回傳值
使用koa2-cors設定跨網域安裝npm install koa2-cors --save-dev
   ...
    app.use(cors({
        origin: function (ctx) {
            if (ctx.url === '/test') {
                return false;
            }
            return '*';
        },
        exposeHeaders: ['WWW-Authenticate', 'Server-Authorization'],
        maxAge: 5,
        credentials: true,
        allowMethods: ['GET', 'POST', 'DELETE'],
        allowHeaders: ['Content-Type', 'Authorization', 'Accept'],
    }));
    ...
安裝axios:
npm install axios --save
在根目錄新建server/request.js 封裝一個request函數,所有的請求都透過request函數,便於對於請求統一處理
    import axios from 'axios'
    let BASE_URL = 'http1://localhost:3000'
    export default function request(data){
    let options = {...data}
    options.url = `${BASE_URL}${data.url}`
    return axios(options)
            .then(checkStatus)
            .then(parseJSON)
            .catch()
    }
(坑)axios.defaults.withCredentials = "include" //請求時帶上cookie axios請求預設是不加cookie的需要設定(坑)當設定請求時帶上cookie時後端允許的跨域不能用"* "要說明協定+網域+連接埠請求資料效果圖:效果圖
安裝:npm i element-ui -S 引入:
    import ElementUI from 'element-ui'
    import 'element-ui/lib/theme-default/index.css'
    Vue.use(ElementUI)
使用:使用前設定css,file載入器安裝style-loader,css-loader
npm install css-loader style-loader file-loader --save-dev
   {
        test: /.css$/,
        loader: 'style-loader!css-loader'
      },
      {
        test: /.(eot|svg|ttf|woff|woff2)(?S*)?$/,
        loader: 'file-loader'
      },
      {
        test: /.(png|jpe?g|gif|svg)(?S*)?$/,
        loader: 'file-loader',
        query: {
          name: '[name].[ext]?[hash]'
        }
      }
安裝:
cnpm install less less-loader --save-dev
使用:
 <style lang='less'>
   .articleWrap{
     .articleTop{
       color:red;
     }
   }
</style>
1.路由跳轉傳參:
<router-link :to="{ name:'articleinfo',params:{id:index}}"></router-link>
2.使用富文本編輯器:vue2-editor 安裝:cnpm install vue2-editor --save 使用:import { VueEditor } from 'vue2-editor'
使用cross-env:設定開發環境安裝:cnpm install cross-env --save-dev 設定指令:
    "start": "cross-env NODE_ENV=development webpack-dev-server --hot --inline --progress --open",
    "build":"cross-env NODE_ENV=production webpack"
修改webpack配置:
   if (process.env.NODE_ENV === 'production') {
    config.plugins = (config.plugins || []).concat([
        new webpack.DefinePlugin({
            'process.env': {
                'NODE_ENV': JSON.stringify('production'),
            },
            IS_PRODUCTION: true
        }),
        /*new webpack.optimize.UglifyJsPlugin({
            compress: {warnings: false},
            sourceMap: false
        }),*/
    ]);
}
else {
    config.plugins = (config.plugins || []).concat([
        new webpack.DefinePlugin({
            'process.env':
            {
                'NODE_ENV': JSON.stringify('development'),
            },
            IS_PRODUCTION: false
        }),
    ]);
}
在程式裡面透過:process.env.NODE_ENV 取得目前環境變數


