amazon chime sdk ios
v0.26.2
Amazon Chime SDKプロジェクトボード
注:SDKソースコードを使用して構築する場合、
developmentブランチには、公開されているChime Media Libraryで構築されない可能性のある出血エッジの変更が含まれているか、パブリックリリースほど安定していない可能性があります。
iOS用のAmazon Chime SDKは、Amazon Chimeサービスでパワーミーティングと同じインフラストラクチャサービスを使用して、iOSアプリケーションに共同オーディオ通話、ビデオ通話、および画面共有の表示機能を簡単に追加できます。
iOS用のこのAmazon Chime SDKは、AWSアカウントで作成した会議セッションリソースに接続することで機能します。 SDKには、会議セッションの構成、リストと選択の選択、ビデオデバイスの切り替え、スクリーン共有の開始と停止、メディアイベントが発生したときにコールバックを受信する方法を含む、iOSアプリケーションでカスタム通話とコラボレーションのエクスペリエンスを構築するために必要なすべてのものがありますボリュームが変化し、オーディオミュートやビデオタイルバインディングなどの会議機能を管理します。
また、コミュニティのリクエストとそのステータスを見つけることができるAmazon Chime SDKプロジェクトボードもあります。
開始するには、次のリソースを参照してください。
次のガイドを確認してください。
GitHubリリースを通じて、SPM、Cocoapods、またはバイナリからプロジェクトにAmazon Chime SDKを統合できます。
セットアップを目的として、プロジェクトのルートフォルダー( .xcodeprojファイルを見つけることができる場所)は、 rootと呼ばれます。
Amazon Chime SDKは、Cocoapodsから入手できます。ココアポッドをインストールしていない場合は、コマンドを実行してココアポッドをインストールします。
 $ gem install cocoapods
$ pod setup
システム設定に応じて、次のようにココアポッドをインストールするためにsudoを使用する必要がある場合があります。
 $ sudo gem install cocoapods
$ pod setup
ルートディレクトリ( *.xcodeprojファイルがあるディレクトリ)で、次のように実行して、プロジェクトにpodfileを作成します。
$ pod init
Podfile編集して、 AmazonChimeSDKプロジェクトに含めます。
 target 'YourTarget' do
    pod 'AmazonChimeSDK'
    ...
end
ビデオとコンテンツの共有機能、またはソフトウェアビデオコーデックのサポートが必要ない場合は、代わりにAmazonChimeSDKNoVideoCodecsを使用してサイズを削減できます。
 target 'YourTarget' do
    pod 'AmazonChimeSDKNoVideoCodecs'
    ...
end
(オプション)バックグラウンドブラーと交換機能を使用する場合は、次のことを追加します。
 target 'YourTarget' do
  pod 'AmazonChimeSDKMachineLearning'
  ...
end
次に、次のコマンドを実行してポッドをインストールします。
$ pod install --repo-update
プロジェクトを開くには、xcodeを使用してルートディレクトリに新しく生成された*.xcworkspaceファイルを開きます。これは、プロジェクトフォルダーに次のコマンドを発行することで行うことができます
$ xed .
注:プロジェクトを開くには *.xcodeprojを使用しないでください。
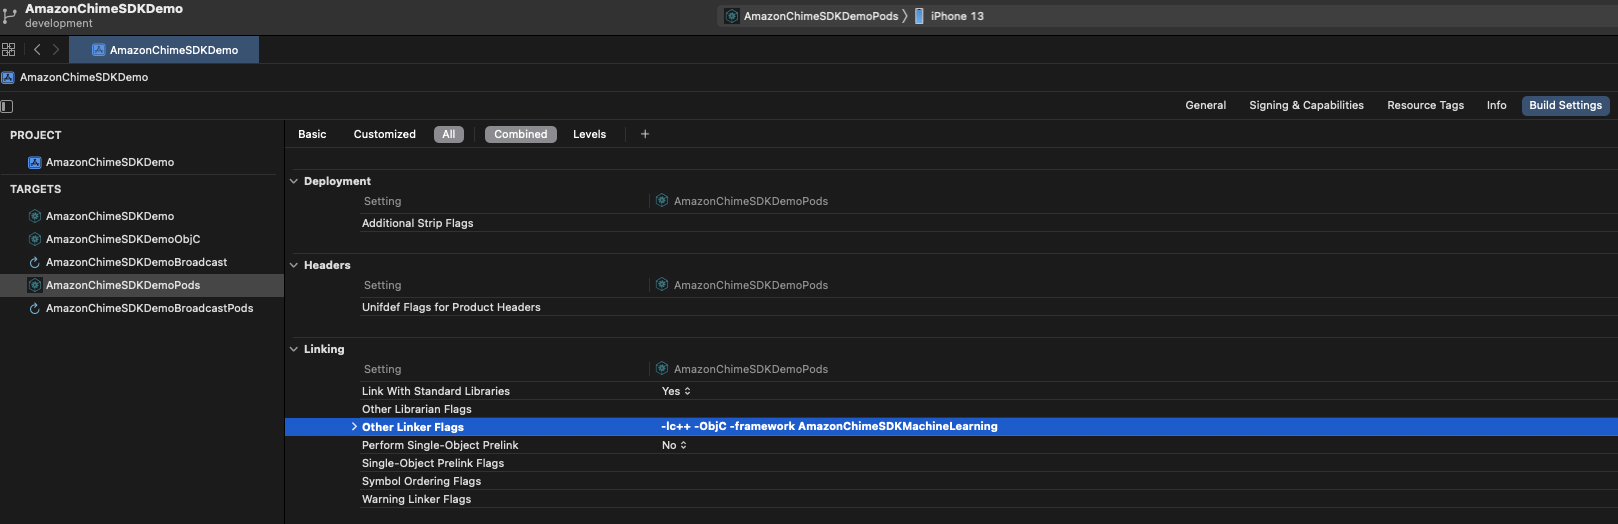
背景のぼかしと交換機能を使用している場合、 Build SettingsタブのLinkingセクションの下に、 -framework AmazonChimeSDKMachineLearningをOther Linker Flagsに追加します。
Amazon Chime SDKはSPMから入手できます。ビデオとコンテンツの共有機能、またはソフトウェアビデオコーデックのサポートが必要ない場合は、代わりにビデオコーデックSPMを使用しないことを選択できます。
Xcodeでプロジェクトを開きます
ファイルに移動> Swiftパッケージ>パッケージの依存関係を追加...
フィールドにパッケージリポジトリURLを入力するには、「https://github.com/aws/amazon-chime-sdk-ios-spm」を入力します。代わりにビデオコーデックメディアモジュールを使用しないようにするには、「https://github.com/aws/amazon-chime-sdk-ios-no-video-codecs-spm」を入力します。
最新バージョン( 0.23.1など)を入力し、 [次へ]をクリックします。
プロジェクトのパッケージを選択し、 [完了]をクリックします。 AmazonChimeSDKとAmazonChimeSDKMediaが必要です。バックグラウンドブラーとバックグラウンドの交換を使用する場合は、 AmazonChimeSDKMachineLearningを確認してください。
AmazonChimeSDKとAmazonChimeSDKMediaバイナリをダウンロードしてください。AmazonChimeSDKMachineLearningバイナリもダウンロードしてください。それ以外の場合は、以下の指示でAmazonChimeSDKMachineLearningへのすべての参照を無視できます。AmazonChimeSDKMediaの代わりにAmazonChimeSDKMediaNoVideoCodecsバイナリを使用し、以下の指示のAmazonChimeSDKMediaNoVideoCodecsとしてAmazonChimeSDKMediaへのすべての参照を扱うことができます。注:さまざまなリリースの混合と一致するバイナリをサポートしていません。
.framework sまたは.xcframework sを解凍してコピーします。これは、プロジェクトが使用するフレームrootに依存します。 Xcode12.3以降の場合は、問題をコンパイルしている場合は.xcframeworkを使用してください。 .xcframework 、Amazon Chime SDK iOS V0.15.0の後に利用できますxcodeで.xcodeprojファイルを開き、ビルドターゲットをクリックします。
Build Settingsタブで、
Framework Search Pathに$(PROJECT_DIR)を追加します。
@executable_path/Frameworksを追加して、 Runpath Search Pathsを追加します。
Linkingセクションで、 Other Linker Flagsに次の2つのフラグを追加します。
-lc++-ObjC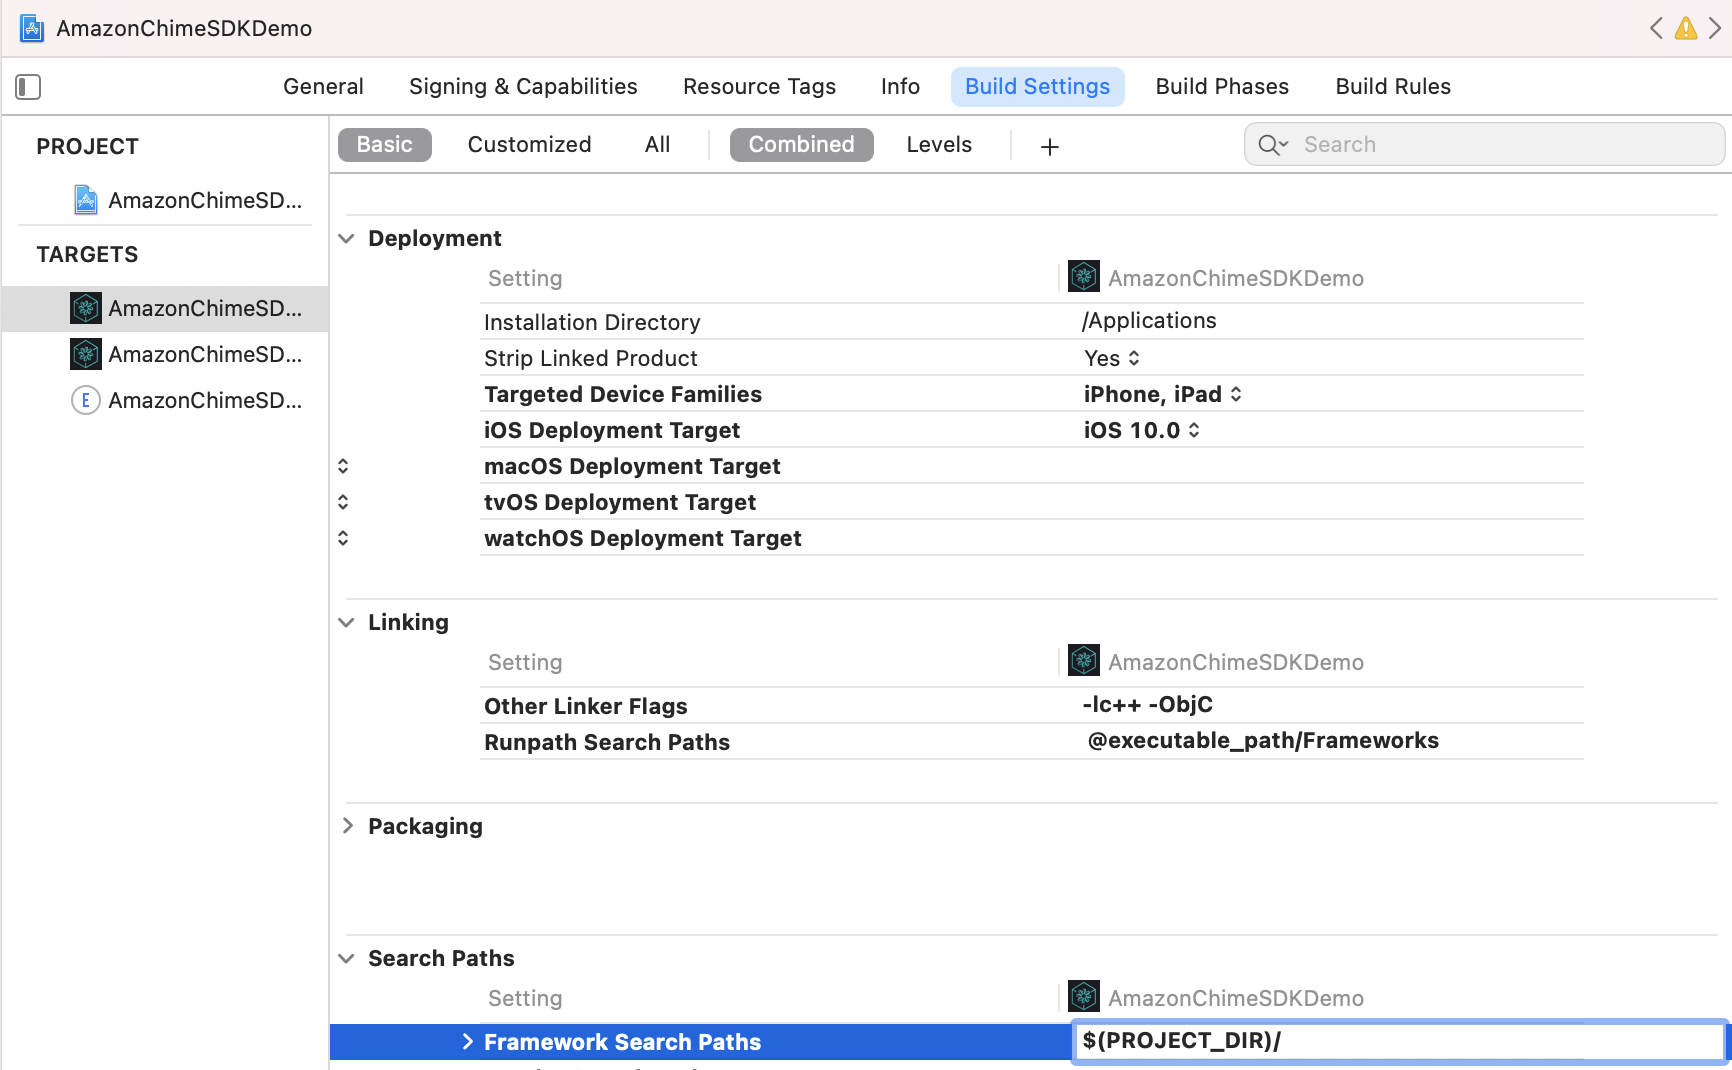
Generalタブ]で、 Frameworks, Libraries, and Embedded Contentセクションを探します。 +をクリックしてから、 Add OthersてからAdd Files 。
.framework使用している場合は、 AmazonChimeSDK.framework .framework AmazonChimeSDKMedia.framework 、およびAmazonChimeSDKMachineLearning.frameworkの場所を指定します.xcframework代わりに.xcframework 、Amazon Chime SDK iOS V0.15.0の後に利用できます。.xcframeworkを使用している場合は、 AmazonChimeSDK.xcframework 、 AmazonChimeSDKMedia.xcframework 、およびAmazonChimeSDKMachineLearning.xcframeworkの場所をステップ1から指定します。AmazonChimeSDK.framework AmazonChimeSDKMedia.frameworkおよびFrameworksの場合、 EmbedオプションでEmbed & Signが選択されていることを確認します。 AmazonChimeSDKMachineLearning.frameworkの場合、 Do Not Embedを選択します。 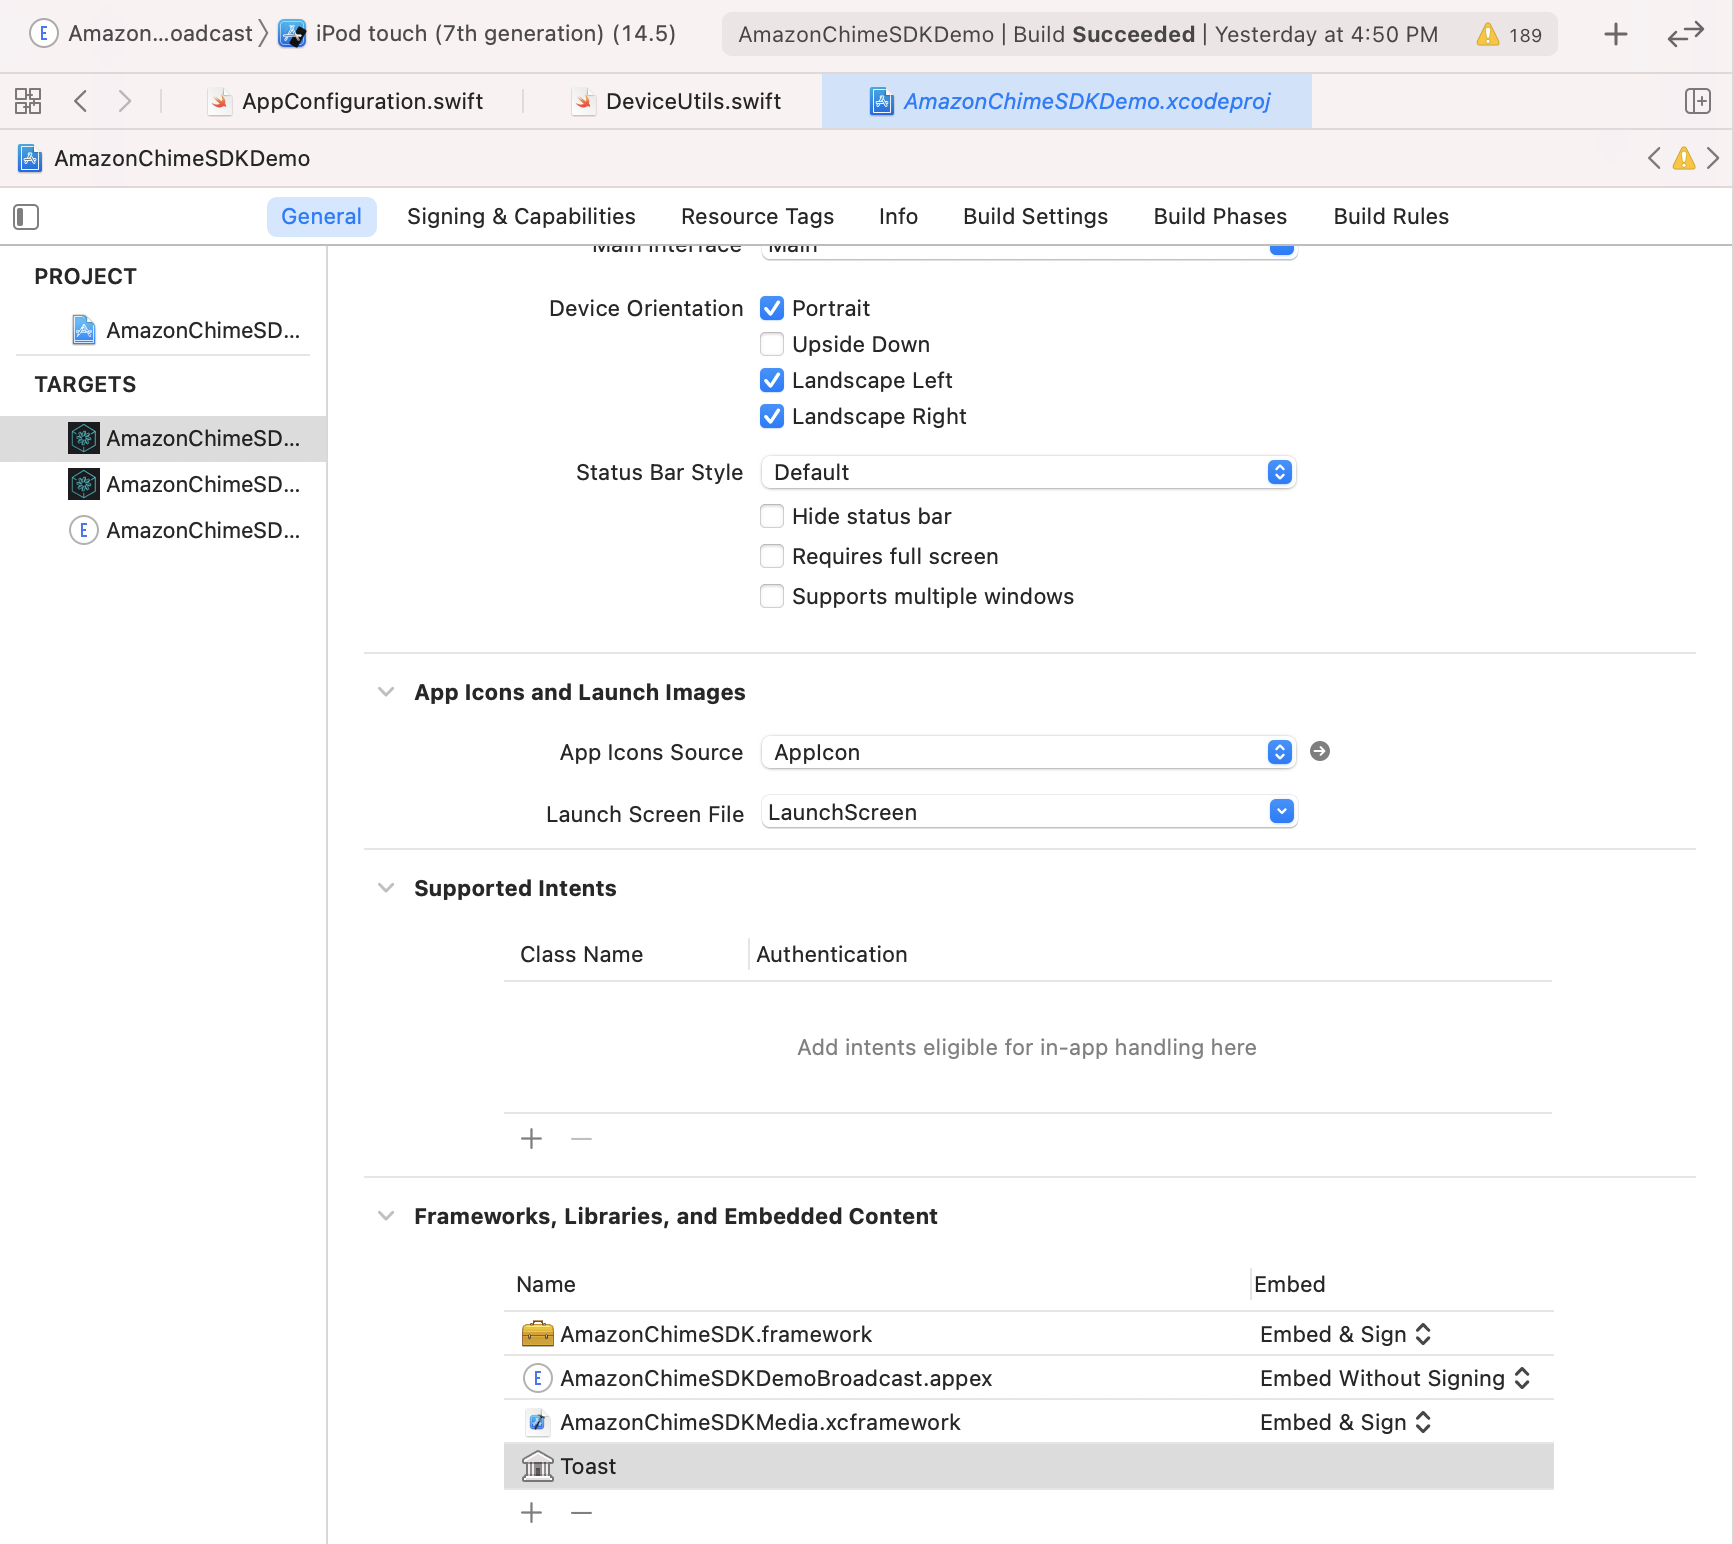
デモアプリケーションを実行するには、次の手順に従ってください。
git clone [email protected]:aws/amazon-chime-sdk-ios.git
/AmazonChimeSDKDemo/Podfileの両方のターゲットについて、 AMAZON_CHIME_SDK_VERSION 0.19.3特定のSDKバージョンに置き換えます。
/AmazonChimeSDKDemoの下で、次のコマンドを実行してポッドをインストールします。
$ pod install --repo-update
最新リリースからAmazonChimeSDKMediaとAmazonChimeSDKMachineLearningバイナリをダウンロードしてください。
AmazonChimeSDKMedia.xcframeworkをamazon-chime-sdk-ios/AmazonChimeSDK AmazonChimeSDKMachineLearning.xcframework amazon-chime-sdk-ios/AmazonChimeSDKDemoフォルダーに解凍してコピーします。
Amazon-Chime-SDK-JSからサーバーレスデモを展開します
AmazonChimeDemoSDKBroadcast.appexは、Amazonchimesdkdemoが使用するデバイスレベルの画面共有のブロードキャスト拡張機能であり、 Embed without Signing Embedオプションで選択されていることを確認します。これをテストしたくない場合はFrameworks, Libraries, and Embedded Contentセクションから削除します。
各ターゲットについて、 Signing & Capabilitiesの下でタブ、
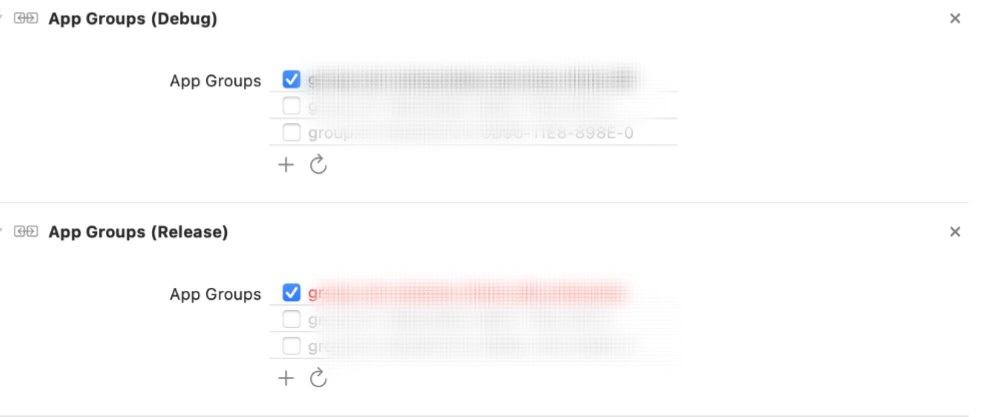
Signingセクション、独自のApple開発者チームとバンドル識別子を使用します。App Groupsセクション、共有デバイスレベルの画面キャプチャをテストする場合は、独自のアプリグループを選択します。詳細については、コンテンツの共有を参照してください。 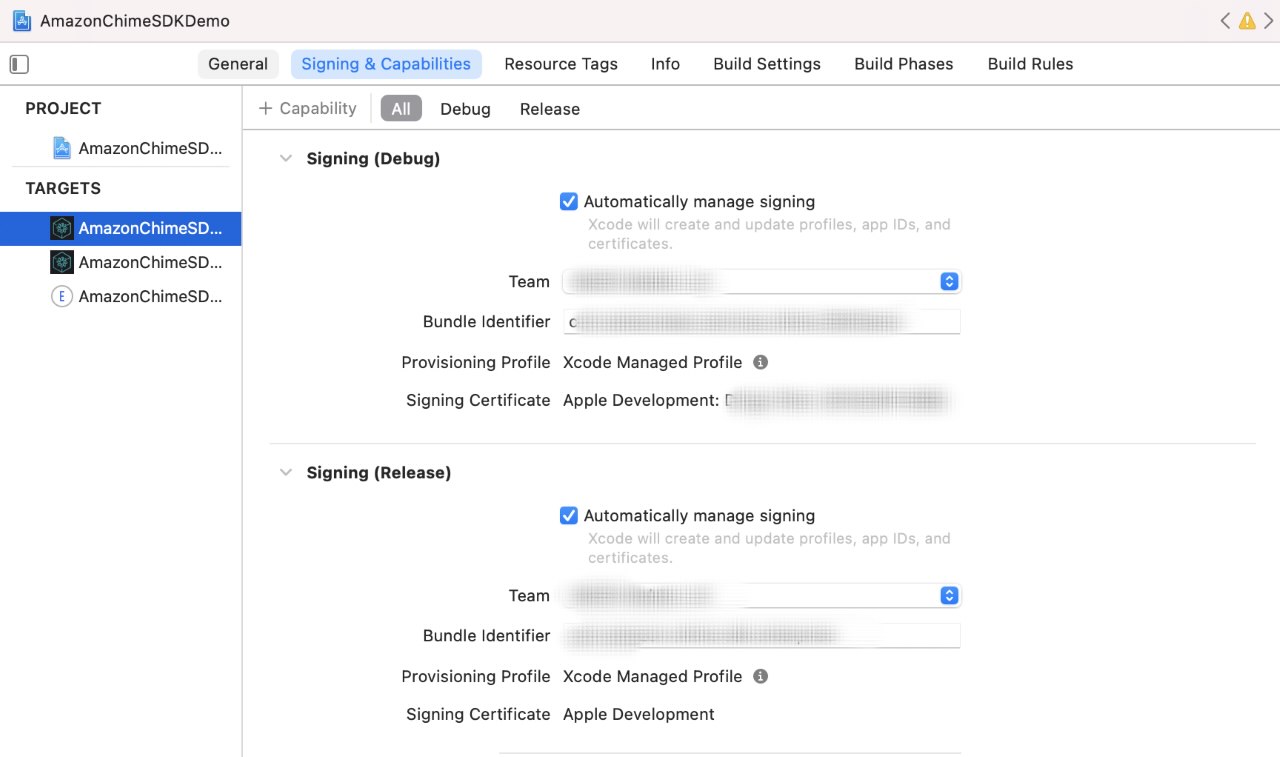
サーバーのURLと領域を更新します:
AppConfiguration.swift更新します。ViewControllerObjC.h更新します。 (オプション) AppConfiguration.swiftとSampleHandler.swiftの両方で、 broadcastBundleIdとappGroupId更新します。詳細については、コンテンツの共有を参照してください。
AmazonChimeSDKDemo.xcworkspaceファイルをAmazonChimeSDKDemo/ xcodeを使用して、Xcode IDEの上部バーのスキームドロップダウンリストからAmazonChimeSDKDemoPodsを選択し、ビルドデバイスを選択して[実行]ボタンをクリックします。
AmazonChimeSDKDemo.xcworkspaceファイルをAmazonChimeSDKDemo/ xcodeを使用して、Xcode IDEの上部バーのスキームドロップダウンリストからAmazonChimeSDKDemoを選択し、ビルドデバイスを選択して[実行]ボタンをクリックします。
接合画面で、 CallKitなしで会議に参加するか、 CallKitの着信/発信コールを介して参加することを選択します。デモアプリにはプッシュ通知がないため、着信コールを介して10秒ずつ接合され、ユーザーがアプリをバックグラウンドまたは画面をロックして動作を模倣するのに十分な時間を与えます。
このプロジェクトで潜在的なセキュリティの問題を発見した場合は、脆弱性レポートページからAWS/Amazonセキュリティに通知するようお願いします。公開githubの問題を作成しないでください。
オーディオの送信と受信を開始するには、会議セッションを開始する必要があります。
meetingSession . audioVideo . start ( )デフォルトの構成は次のとおりです。
.outputOnlyを必要とすることを避けるために使用し.noneでください)AudioVideoConfigurationで非デフォルトオプションを指定してから、会議セッションを開始できます。
 var audioVideoConfig = AudioVideoConfiguration (
    audioMode : . mono48k ,
    audioDeviceCapabilities : . outputOnly ,
    callKitEnabled : true ,
    enableAudioRedundancy : false ,
    reconnectTimeoutMs : 180 * 1000 )
meetingSession . audioVideo . start ( audioVideoConfiguration : audioVideoConfig ) 注:イベントの欠落を避けるには、セッションが開始される前にオブザーバーを追加します。 Meetings.audiovideo.RemoveaudiovideOobserver(オブザーバー)に電話して、オブザーバーを削除できます。
 class MyAudioVideoObserver : AudioVideoObserver {
    func audioSessionDidStartConnecting ( reconnecting : Bool ) {
        if ( reconnecting ) {
            // e.g. the network connection is dropped.
        }
    }
    func audioSessionDidStart ( reconnecting : Bool ) {
        // Meeting session starts.
        // Can use realtime, devices APIs.
    }
    func audioSessionDidDrop ( ) { }
    func audioSessionDidStopWithStatus ( sessionStatus : MeetingSessionStatus ) {
         // See the "Stopping a session" section for details.
    }
    func audioSessionDidCancelReconnect ( ) { }
    func connectionDidRecover ( ) { }
    func connectionDidBecomePoor ( ) { }
    func videoSessionDidStartConnecting ( ) { }
    func videoSessionDidStartWithStatus ( sessionStatus : MeetingSessionStatus ) {
        // Video session starts.
        // Can use video APIs.
    }
    func videoSessionDidStopWithStatus ( sessionStatus : MeetingSessionStatus ) { }

    meetingSession . audioVideo . addAudioVideoObserver ( observer : self )
}会議に利用可能なオーディオデバイスをリストします。
 // An list of MediaDevice objects
let audioDevices = meetingSession . audioVideo . listAudioDevices ( )

for device in audioDevices {
    logger . info ( msg : " Device type: ( device . type ) , label: ( device . label ) " )
} MediaDeviceを渡して、オーディオデバイスを選択します。注:セッションが開始された後、これを呼び出す必要があります。 ListAudioDevices()から返品されたデバイスのいずれかを使用して、Chooseaudiodeviceを呼び出す必要があります。
 let audioDevices = audioVideo . listAudioDevices ( )
val device = /* An item from audioDevices */
meetingSession . audioVideo . chooseAudioDevice ( mediaDevice : device ) 注:カスタムカメラキャプチャソースを使用している場合、SwitchCamera()はOPではありません。詳細については、カスタムビデオを参照してください。
利用可能な場合は、デバイスでフロントカメラまたはバックカメラを使用するように切り替えます。
meetingSession . audioVideo . switchCamera ( ) DeviceChangeObserverを追加して、新しいオーディオデバイスが接続されているときやオーディオデバイスが切断されたときにコールバックを受信します。 audioDeviceDidChangeには、更新されたデバイスリストが含まれています。
 class MyDeviceChangeObserver : DeviceChangeObserver {
    func audioDeviceDidChange ( freshAudioDeviceList : [ MediaDevice ] ) {
        // A list of updated MediaDevice objects
        for device in freshAudioDeviceList {
            logger . info ( msg : " Device type: ( device . type ) , label: ( device . label ) " )
        }
    }

    meetingSession . audioVideo . addDeviceChangeObserver ( observer : self )
} let activeAudioDevice = meetingSession . audioVideo . getActiveAudioDevice ( )会議に参加すると、モノ/16kHz 、モノ/48kHz 、ステレオ/48kHzがサポートされています。ステレオ/48kHzは、オーディオセッションを開始するときに明示的に指定されていない場合、デフォルトのオーディオモードとして設定されます。
meetingSession . audioVideo . start ( ) // starts the audio video session with Stereo/48KHz audio, audio input and output devices enabled, callkit disabled, and audio redundancy enabled

meetingSession . audioVideo . start ( audioVideoConfiguration ) // starts the audio video session with the specified [AudioVideoConfiguration]
注:これまでのところ、オブザーバーを追加して、デバイスとセッションのライフサイクルイベントを受信しました。次のユースケースでは、リアルタイムAPIメソッドを使用して、ボリュームインジケーターを送信および受信し、ミュート状態を制御します。
 let muted = meetingSession . audioVideo . realtimeLocalMute ( ) // returns true if muted, false if failed

let unmuted = meetingSession . audioVideo . realtimeLocalUnmute // returns true if unmuted, false if failed これを使用して、リアルタイムインジケーターUIを構築し、配列によって配信される変更について更新することができます。
注:これらのコールバックには、以前のコールバックのデルタのみが含まれます。
 class MyRealtimeObserver : RealtimeObserver {
    func volumeDidChange ( volumeUpdates : [ VolumeUpdate ] ) {
        for currentVolumeUpdate in volumeUpdates {
            // Muted, NotSpeaking, Low, Medium, High
            logger . info ( msg : " ( currentVolumeUpdate . attendeeInfo . attendeeId ) 's volume changed: ( currentVolumeUpdate . volumeLevel ) " )
        }
    }
    func signalStrengthDidChange ( signalUpdates : [ SignalUpdate ] ) {
        for currentSignalUpdate in signalUpdates {
            // None, Low, High
            logger . info ( msg : " ( currentSignalUpdate . attendeeInfo . attendeeId ) 's signal strength changed: ( currentSignalUpdate . signalStrength ) " )
        }
    }
    func attendeesDidJoin ( attendeeInfo : [ AttendeeInfo ] ) {
        for currentAttendeeInfo in attendeeInfo {
            logger . info ( msg : " ( currentAttendeeInfo . attendeeId ) joined the meeting " )
        }
    }
    func attendeesDidLeave ( attendeeInfo : [ AttendeeInfo ] ) {
        for currentAttendeeInfo in attendeeInfo {
            logger . info ( msg : " ( currentAttendeeInfo . attendeeId ) left the meeting " )
        }
    }
    func attendeesDidDrop ( attendeeInfo : [ AttendeeInfo ] ) {
        for currentAttendeeInfo in attendeeInfo {
            logger . info ( msg : " ( currentAttendeeInfo . attendeeId ) dropped from the meeting " )
        }
    }
    func attendeesDidMute ( attendeeInfo : [ AttendeeInfo ] ) {
        for currentAttendeeInfo in attendeeInfo {
            logger . info ( msg : " ( currentAttendeeInfo . attendeeId ) muted " )
        }
    }
    func attendeesDidUnmute ( attendeeInfo : [ AttendeeInfo ] ) {
        for currentAttendeeInfo in attendeeInfo {
            logger . info ( msg : " ( currentAttendeeInfo . attendeeId ) unmuted " )
        }
    }

    meetingSession . audioVideo . addRealtimeObserver ( observer : self )
} activeSpeakerDidDetectイベントを使用して、利用可能な場合は最もアクティブなスピーカーのビデオタイルを拡大または強調できます。 scoreCallbackIntervalMsを設定し、 activeSpeakerScoreDidChangeを実装することにより、アクティブなスピーカーのスコアを定期的に受信できます。
 class MyActiveSpeakerObserver : ActiveSpeakerObserver {
    let activeSpeakerObserverId = UUID ( ) . uuidString

    var observerId : String {
        return activeSpeakerObserverId
    }

    func activeSpeakerDidDetect ( attendeeInfo : [ AttendeeInfo ] ) {
        if !attendeeInfo . isEmpty {
            logger . info ( msg : " ( attendeeInfo [ 0 ] . attendeeId ) is the most active speaker " )
        }
    }

    var scoresCallbackIntervalMs : Int {
        return 1000 // 1 second
    }

    func activeSpeakerScoreDidChange ( scores : [ AttendeeInfo : Double ] ) {
       let scoresInString = scores . map { ( score ) -> String in
            let ( key , value ) = score
            return " ( key . attendeeId ) : ( value ) "
       } . joined ( separator : " , " )
       logger . info ( msg : " Scores of active speakers are: ( scoresInString ) " )
    }

    // Calculating the active speaker base on the SDK provided policy, you can provide any custom algorithm
    meetingSession . audioVideo . addActiveSpeakerObserver ( policy : DefaultActiveSpeakerPolicy ( ) , observer : self )
}注:ビデオを表示するには、ビデオを
VideoRenderViewにバインドする必要があります。
isLocalTileプロパティを使用して、ローカルビデオタイルを識別できます。
isContentプロパティを使用して、コンテンツビデオタイルを識別できます。画面とコンテンツの共有を参照してください。同じリモート参加者がビデオを再起動すると、新しいタイルIDでタイルが作成されます。
Amazon Chime SDKを使用して、iOSの会議アプリケーションの構築からビデオの追加/削除/表示に関する詳細をご覧ください。
startRemoteVideoに電話してリモートビデオの受信を開始できます。これはデフォルトでは発生しないためです。
meetingSession . audioVideo . startRemoteVideo ( ) stopRemoteVideoリモートビデオの受信を停止し、既存のリモートビデオ用にonVideoTileRemovedトリガーします。
meetingSession . audioVideo . stopRemoteVideo ( ) class MyVideoTileObserver : VideoTileObserver {
func videoTileDidAdd ( tileState : VideoTileState ) {
// Ignore local video (see View local video), content video (see Screen and content share)
if tileState . isLocalTile || tileState . isContent {
return
}
let videoRenderView = /* a VideoRenderView object in your application to show the video */
meetingSession . audioVideo . bind ( videoView : videoRenderView , tileId : tileState . tileId )
}
func videoTileDidRemove ( tileState : VideoTileState ) {
// unbind video view to stop viewing the tile
meetingSession . audioVideo . unbindVideoView ( tileId : tileState . tileId )
}
meetingSession . audioVideo . addVideoTileObserver ( observer : self )
} // Use internal camera capture for the local video
meetingSession . audioVideo . startLocalVideo ( )
// Use internal camera capture and set configuration for the video, e.g. simulcastEnabled, maxBitRateKbps
// If maxBitRateKbps is not set, it will be self adjusted depending on number of users and videos in the meeting
// This can be called multiple times to enable/disable simulcast and adjust video max bit rate on the fly
let localVideoConfig = LocalVideoConfiguration ( simulcastEnabled : true, maxBitRateKbps : 600 )
meetingSession . audioVideo . startLocalVideo ( config : localVideoConfig )
// You can switch camera to change the video input device
meetingSession . audioVideo . switchCamera ( )
// Or you can inject custom video source for local video, see custom video guide meetingSession . audioVideo . stopLocalVideo ( ) 注:ローカルビデオをミラーリングする必要があります。 videorenderview.mirror = trueを設定します
 class MyVideoTileObserver : VideoTileObserver {
    func videoTileDidAdd ( tileState : VideoTileState ) {
            if tileState . isLocalTile {
                let localVideoView = /* a VideoRenderView object in your application to show the video */
                meetingSession . audioVideo . bind ( videoView : localVideoView , tileId : tileState . tileId )
            }
        }
    }

    func videoTileDidRemove ( tileState : VideoTileState ) {
        // unbind video view to stop viewing the tile
        meetingSession . audioVideo . unbindVideoView ( tileId : tileState . tileId )
    }

    meetingSession . audioVideo . addVideoTileObserver ( observer : self )
}
より高度なビデオタイル管理については、ビデオページネーションをご覧ください。
注:お客様または他の参加者がコンテンツ(画面キャプチャやその他のビデオソースオブジェクトなど)を共有すると、コンテンツ参加者(出席者-ID#コンテンツ)がセッションに参加し、通常の参加者がビデオを共有するかのようにコンテンツを共有します。
たとえば、出席者IDは「My-ID」です。
meetingSession.audioVideo.startContentShareに電話すると、コンテンツの参加者「My-ID#Content」がセッションに参加し、コンテンツを共有します。
 class MyContentShareObserver : ContentShareObserver {
    func contentShareDidStart ( ) {
        logger . info ( msg : " Content Share has started " )
    }

    func contentShareDidStop ( status : ContentShareStatus ) {
        logger . info ( msg : " Content Share has stopped " )
    }

    meetingSession . audioVideo . addContentShareObserver ( observer : self )
    let contentShareSource = /* a ContentShareSource object, can use InAppScreenCaptureSource for screen share or any subclass with custom video source */
    // ContentShareSource object is not managed by SDK, builders need to start, stop, release accordingly
    meetingSession . audioVideo . startContentShare ( source : contentShareSource )
}
コンテンツ共有の構成を設定できます。たとえば、maxbitratekbpsなどです。達成される実際の品質は、システムとネットワークが提供できるものによって、通話全体で異なる場合があります。
 let contentShareConfig = LocalVideoConfiguration ( maxBitRateKbps : 200 )
meetingSession . audioVideo . startContentShare ( source : contentShareSource , config : contentShareConfig )
詳細については、コンテンツの共有を参照してください。
meetingSession . audioVideo . stopContentShare ( ) Chime SDKは、会議ごとに2つの同時コンテンツシェアを許可します。リモートコンテンツの共有は、 onVideoTileAddedをトリガーしますが、ローカルシェアはそうしません。プレビュー用のビデオをレンダリングするには、 ContentShareSourceのVideoSourceにVideoSinkを追加します。
 class MyVideoTileObserver : VideoTileObserver {
    func videoTileDidAdd ( tileState : VideoTileState ) {
        if ( tileState . isContent ) {
            // tileState.attendeeId is formatted as "attendee-id#content"
            let attendeeId = tileState . attendeeId
            // Get the attendee ID from "attendee-id#content"
            let baseAttendeeId = DefaultModality ( attendeeId ) . base ( )
            logger . info ( msg : " $baseAttendeeId is sharing screen " )

            let screenVideoView = /* a VideoRenderView object in your application to show the video */
            meetingSession . audioVideo . bindVideoView ( videoView : screenVideoView , tileId : tileState . tileId )
        }
    }

    func videoTileDidRemove ( tileState : VideoTileState ) {
        meetingSession . audioVideo . unbindVideoView ( tileId : tileState . tileId )
    }

    meetingSession . audioVideo . addVideoTileObserver ( observer : self )
}より利用可能なメトリックや、オーディオ、ビデオ、コンテンツの共有品質を監視するためのObservableMetric参照してください。
 class MyMetricsObserver : MetricsObserver {
    func metricsDidReceive ( metrics : [ AnyHashable : Any ] ) {
        logger . info ( msg : " Media metrics have been received: ( metrics ) " )
    }

    meetingSession . audioVideo . addMetricsObserver ( observer : self )
}会議セッションを開始した後、複数のトピックからリアルタイムメッセージを受信できます。
 class MyDataMessageObserver : DataMessageObserver {
    let dataMessageTopic = " chat "
    // A throttled message is returned by backend from local sender
    func dataMessageDidReceived ( dataMessage : DataMessage ) {
        logger . info ( msg : " ( dataMessage . timestampMs ) ( dataMessage . text ( ) ) ( dataMessage . senderAttendeeId ) " )
    }

    // You can also subscribe to multiple topics.
    meetingSession . audioVideo . addRealtimeDataMessageObserver ( topic : dataMessageTopic , observer : self )
} 任意のトピックにリアルタイムメッセージを送信することができます。これには、購読したオブザーバーに通知されます。
注:トピックはアルファ数である必要があり、ハイフンとアンダースコアを含めることができます。データは2kbを超えることはできません。寿命はオプションですが、整数は正です。
 let dataMessageTopic = " chat "
let dataMessageLifetimeMs = 1000

do {
    // Send "Hello Chime" to any subscribers who are listening to "chat" topic with 1 seconds of lifetime
    try meetingSession
        . audioVideo
        . realtimeSendDataMessage ( topic : dataMessageTopic ,
                                 data : " Hello Chime " ,
                                 lifetimeMs : dataMessageLifetimeMs )
} catch let err as SendDataMessageError {
    logger . error ( msg : " Failed to send message! ( err ) " )
} catch {
    logger . error ( msg : " Unknown error ( error . localizedDescription ) " )
}注:メモリリークを避けるために、すべてのオブザーバーを削除し、追加したリソースをリリースしてください。
 class MyAudioVideoObserver : AudioVideoObserver {
    func audioSessionDidStopWithStatus ( sessionStatus : MeetingSessionStatus ) {
        // This is where meeting ended.
        // You can do some clean up work here.
    }

    func videoSessionDidStopWithStatus ( sessionStatus : MeetingSessionStatus ) {
        // This will be invoked as well.
    }

    meetingSession . audioVideo . addAudioVideoObserver ( observer : self )
    meetingSession . audioVideo . stop ( )
}
Amazon Voice Focusは、会議のバックグラウンドノイズを減らし、会議の経験を改善します。詳細については、Amazon Voice Focusを参照してください。
 let enabled = audioVideo . realtimeSetVoiceFocusEnabled ( enabled : true ) // enabling Amazon Voice Focus successful

let disabled = audioVideo . realtimeSetVoiceFocusEnabled ( enabled : false ) // disabling Amazon Voice Focus successfulカスタムビデオソースを使用すると、ビデオフィルターの適用など、ビデオを制御できます。詳細については、カスタムビデオを参照してください。
バージョン0.23.3から始めて、SDKは、パケットの損失を検出するために、オーディオの品質への影響を減らすために、パケット損失を検出することで冗長なオーディオデータの送信をサーバーに開始します。冗長なオーディオパケットは、アクティブなオーディオ、つまりスピーチ、音楽を含むパケットにのみ送信されます。これにより、検出されたパケット損失の量に応じて、オーディオによって消費される帯域幅が通常の最大3倍に増加する可能性があります。 SDKは、5分間パケット損失が検出されていない場合、冗長データの送信を自動的に停止します。
この機能を無効にする必要がある場合は、セッションを開始する前にaudiovideoconfigurationを使用して行うことができます。
meetingSession . audioVideo . start ( AudioVideoConfiguration ( enableAudioRedundancy : false ) )機能を無効にするオプションはありますが、オーディオ品質を向上させるために有効にすることをお勧めします。それを無効にする1つの考えられる理由は、顧客が非常に厳しい帯域幅の制限を持っている場合です。
Amazon Chime SDKの一般的なFAQを参照してください。
アプリケーションは、会議を作成する際にロガーのインスタンスを渡すことにより、Chime SDKからログを取得できます。 Amazon Chime SDKには、コンソールにログインするConsoleLoggerなど、アプリケーションが使用できるロガーのデフォルトの実装がいくつかあります。 ConsoleLogger 、デフォルトとしてINFOレベルに設定されています。したがって、メディアログを含むすべてのログを取得するために、次のことによりロガーを作成します。
logger = ConsoleLogger ( name : " logger " , level : . DEFAULT ) お客様とあなたのエンドユーザーは、バックグラウンド交換で使用するためにアップロードされるすべてのコンテンツ(任意の画像を含む)に対して責任があり、そのようなコンテンツが法律に違反したり、第三者の権利を侵害したり、不正に流したり、そうでなければ重要な用語に違反しないことを確認する必要がありますAmazonとの合意(ドキュメント、AWSサービス条件、または許容可能な使用ポリシーを含む)。
Copyright Amazon.com、Inc。またはその関連会社。無断転載を禁じます。


