poemkit
PoemKit Stable
 poemkit " width="180" style="max-width: 100%;">
SSR을 통한 빠른 웹 디자인 및 개발을 위한 React가 포함된 무료 웹 키트입니다. 또한 마이크로 프론트엔드 아키텍처이기도 합니다. React, Redux, Router, Axios 및 Express를 사용합니다. 이 프로젝트는 nodejs 라이브러리로 부트스트랩되었습니다. Project는 pm2를 통해 다양한 저장소 호스팅 서비스의 자동 배포를 지원합니다. poemkit 최신 웹 애플리케이션 구축을 위한 50개 이상의 내장 UI 구성 요소를 제공합니다.
poemkit 명령을 통해 작동하고 배포할 수 있지만, 그 뒤에 작성하려면 여전히 실제 코드가 필요합니다. 이러한 키트는 실제 웹 사이트나 애플리케이션 프로토타입에 통합할 수 있는 UI 구성 요소 및 일부 논리 모듈 역할을 하며, 실제 세계에서 작동하려면 프로그래밍 기능이 필요합니다. poemkit 완전히 사용자 정의 가능한 웹팩 요구 사항을 충족합니다.
? 독립형 React UI 구성 요소 라이브러리(BootStrap 5 기반) Funda UI를 사용할 수도 있습니다.
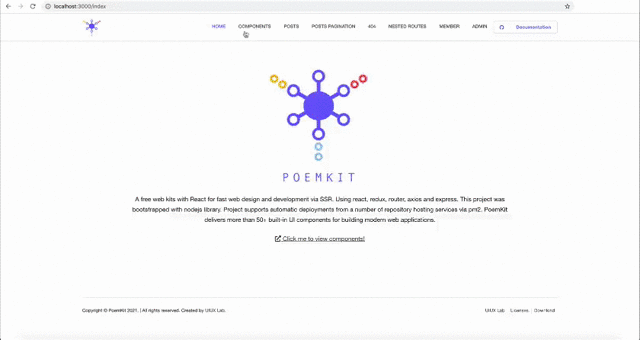
온라인 데모를 보려면 https://uiux.cc/poemkit을 확인하세요.
서버는 http://localhost:3000 에서 실행됩니다.
 poemkit /
├── README.md
├── CHANGELOG.md
├── CONTRIBUTING.md
├── LICENSE
├── ecosystem.config.js ------------------------- # for pm2
├── babel.config.js
├── tsconfig.json
├── webpack.config.js
├── package-lock.json
├── package.json
├── test/            --------------------------- # Unit Testing scripts
├── public/          --------------------------- # HTML template of Homepage
│   ├── index.html
│   ├── manifest.json
│   └── server/  ------------------------------- # PHP scripts used to the server for testing
│   └── assets/
├── dist/        ------------------------------- # Files compiled, used in the production environment
│   ├── css/
│   │   ├── poemkit .css
│   │   └── poemkit .min.css
│   └── js/
│   │   ├── poemkit .js
│   │   └── poemkit .min.js
├── src/
│   ├── client/
│   │   ├── client.js
│   │   ├── actions/
│   │   ├── reducers/
│   │   ├── helpers/
│   │   ├── services/
│   │   ├── router/
│   │   ├── components/ -------------------------  # Independent React components
│   │   │     ├── * /
│   │   │     ├── _utils/ -----------------------  # General utilities & snippets(js & css)
│   │   │     └── _plugins/ ---------------------  # Third-party plugins
│   │   ├── views/ ------------------------------  # Website pages
│   │   │     ├── _pages/
│   │   │     └── _html/
│   └── server/
│   │   ├── app.js
│   │   ├── server.js
│   │   └── renderer.js
│   └── store/
│   │   └── createStore.js
│   └── config/
│   │   ├── tmpl-manifest.json  -----------------  # `manifest.json` file template
│   │   └── websiteConfig.js  -------------------  # website config
└──webpack.config.js 수정할 수 있음). 컴퓨터에 노드를 설정해야 합니다. 그러면 빌드된 배포판이 ./dist/* 및 ./public/*.html 로 출력됩니다.
1단계. NPM을 사용하거나(현재 프로젝트 디렉터리를 찾아 다음 명령을 입력하세요.) Github에서 최신 버전을 다운로드하세요. nodejs의 경우 일부 종속성을 설치해야 합니다.
$ npm install poemkit또는 저장소를 복제하여 빌드 스크립트를 포함한 모든 소스 파일을 가져옵니다.
$ git clone git://github.com/xizon/ poemkit .git 2단계 . 먼저 " poemkit /" 폴더 디렉터리에 대한 절대 경로를 사용합니다.
$ cd /{your_directory}/ poemkit 3단계. 모든 개발 작업을 수행하기 전에 Node 10+ 설치되어 있는지 확인하십시오. 그런 다음 기본 디렉터리에서 다음 코드를 실행하여 노드 모듈 종속성을 설치합니다.
$ npm install현재 테스트 환경은 `Node 18+`, `npm 9+`입니다. 종속성 설치가 실패하는 경우(일반적으로 현재 Node 18+로 테스트된 Nodejs 버전을 업그레이드했기 때문에 발생함) 새 버전의 npm이 이전 버전의 npm과 충돌할 수 있습니다. 다음 명령을 사용하여 종속성을 설치하세요.$ npm install --legacy-peer-deps설치가 계속 실패하면 다음 방법을 사용하십시오.
package.json에서 devDependency , 종속성 및 PeerDependency 를 제거하고package-lock.json파일을 삭제한 후 종속성을 다시 설치하십시오.$ npm install --save-dev @testing-library/jest-dom @testing-library/[email protected] @types/react @typescript-eslint/eslint-plugin @typescript-eslint/parser babel-loader clean-webpack-plugin cross-env css-loader css-minimizer-webpack-plugin eslint eslint-config-prettier eslint-plugin-prettier eslint-plugin-react file-loader glslify-loader html-loader html-webpack-plugin identity-obj-proxy include-file-webpack-plugin jest jsdom jest-environment-jsdom json-loader log-timestamp mime-types mini-css-extract-plugin sass nodemon postcss prettier prettier-loader random-string raw-loader [email protected] safe-buffer sass-loader style-loader tar terser-webpack-plugin ts-jest ts-node tsconfig-paths typescript webpack webpack-cli webpack-dev-middleware webpack-dev-server $ npm install @babel/core @babel/node @babel/plugin-proposal-class-properties @babel/plugin-transform-runtime @babel/polyfill @babel/preset-env @babel/preset-flow @babel/preset-react @babel/preset-typescript @babel/register axios babel-plugin-module-resolver compression cors express ignore-styles moment [email protected] [email protected] [email protected] [email protected] [email protected] [email protected] [email protected] [email protected] [email protected]
4단계. 일반적으로 사용되는 명령:
애플리케이션을 디버그합니다. 컴파일 및 패키징 동작 없이 TypeScript로 별도로 확인할 수 있습니다.
$ npm run checkwebpack을 사용하여 파일을 묶습니다.
$ npm run build 로컬 테스트 및 코드 검사를 위해 다음 명령을 실행합니다. 서버가 실행되고 있는 것을 볼 수 있습니다. (Express 서버만 실행하세요.) Ctrl + C 사용하여 중지합니다.
$ npm run dev5단계 . 완료되면 다음 위치에서 액세스할 수 있는 서버가 가동됩니다.
http://localhost:3000디버깅하기 전에 새 코드를 번들로 묶는 것이 좋습니다.
6단계(선택 사항). 호스팅 서버에 노드 서버 배포
배포하기 전에 빌드 명령을 실행하십시오. (노드 권한으로 인해 작동하지 않는 경우 다음 명령을 사용하십시오)
$ npm run deploy 기존 배포 중지
$ npm run destroy7단계(선택 사항). 단위 테스트
$ npm run test메모:
a) 오류: npm 업데이트 확인에 실패했습니다.
해결책:
$ sudo chown -R $USER : $( id -gn $USER ) /Users/{username}/.configb) 오류: Node sass 버전 6.xx는 ^ 4.xx와 호환되지 않습니다.
해결책:
$ npm install [email protected]c) Node 버전을 업그레이드하는 경우 다음 코드를 실행하십시오.
$ npm install
$ npm rebuild node-sass
PM2를 서비스로 사용하여 Reactjs 애플리케이션을 시작합니다(Node v13.9.0 이상을 사용하는 경우에만 작동합니다.)
Node14+ 버전이 여기에 설치됩니다
$ curl -sL https://rpm.nodesource.com/setup_14.x | sudo bash -
$ sudo yum install nodejs
$ node --version  # v14.16.1
$ npm --version   # 6.14.12
$ which node babel-node # check the location of node and babel-node $ sudo npm install pm2@latest -g$ sudo npm install -g babel-cli
$ sudo npm install -g @babel/core @babel/cli @babel/preset-env $ sudo npm install -g typescript ts-node$ sudo pm2 install typescript # into your `" poemkit /"` folder directory.
$ cd /{your_directory}/ poemkit
# run app
$ pm2 start ecosystem.config.js
# Detect available init system, generate configuration and enable startup system, and you can check the status of the same using
$ pm2 startup
$ systemctl status pm2-root
$ pm2 start /{your_directory}/ poemkit /ecosystem.config.js --restart-delay=3000
$ pm2 save
# other commands
$ pm2 restart ecosystem.config.js
$ pm2 stop ecosystem.config.js
$ pm2 delete ecosystem.config.js
$ pm2 list
$ pm2 logs클라우드 서버에 NPM 또는 PM2를 사용하여 애플리케이션을 배포할 때 발생할 수 있는 문제에 대한 몇 가지 해결 방법은 다음과 같습니다.
a) 오류: 권한이 거부되었습니다. '/usr/lib/node_modules'에 액세스하세요.
해결책:
chmod -R a+x node_modulesb) 오류: JavaScript 힙의 메모리가 부족합니다.
V8의 메모리 사용량에 대한 엄격한 표준 제한은 수동으로 늘리지 않는 경우 최대 1GB(32비트) 및 1.7GB(64비트)입니다.
해결책:
export NODE_OPTIONS=--max_old_space_size=4096c) 오류: EACCES: 권한이 거부되었습니다. mkdir '/root/.pm2/xxxx'
해결책:
일반적으로
NPM사용하여 PM2 명령을 실행하지 마십시오.다음을 시도해 볼 수도 있습니다.
데몬 없음 모드(pm2 kill)에서 PM2를 시작하기 전에 모든 PM2 인스턴스를 종료해야 합니다.
 # re-install PM2 (optional)
sudo npm i -g pm2

# if pm2 was reinstalled, ts-node must be reinstalled (optional)
sudo npm install -g ts-node@latest

# clear all pm2 instances
pm2 kill

# then restart it
pm2 start xxxxxx
여기에서 기본 React 앱을 만든 다음 Apache 또는 Nginx 웹 서버에 React 앱을 배포해야 합니다. 프록시 설정에 대한 튜토리얼은 네트워크를 참조하세요.
이제 앱을 배포할 준비가 되었으므로 Nginx 끝을 준비해야 합니다. Nginx가 설치되어 있지 않은 경우 다음 두 명령을 실행하여 apt 패키징 시스템으로 쉽게 설치할 수 있습니다.
$ sudo apt update
$ sudo apt install nginx
또는
$ sudo yum install nginx -yNginx를 시작합니다:
$ systemctl start nginx부팅 시 시작:
$ systemctl enable nginxCentOS 8에서 FirewallD를 사용하여 방화벽 설정:
$ firewall-cmd --permanent --zone=public --add-service=http
$ firewall-cmd --permanent --zone=public --add-service=https
$ firewall-cmd --permanent --zone=public --add-port=3000/tcp
$ firewall-cmd --reload
$ systemctl restart nginx
Nginx가 시스템에서 실행되고 있는지 확인할 수 있습니다.
$ systemctl status nginx 자, 이제 Nginx 서비스가 성공적으로 실행되었으므로 /etc/nginx/conf.d/default.conf 에 있는 구성 파일을 수정할 수 있습니다. 여기서는 올바른 React 애플리케이션을 실행하도록 도메인을 가리킬 것입니다.
$ vi /etc/nginx/conf.d/default.conf파일 끝에 다음을 추가합니다.
server {
        listen      443 ssl ;
        server_name backend1.example.com ;

        ...
        location / {
            proxy_set_header Host $http_host ;
            proxy_pass http://{YOUR_IP}:3000 ;
        }

}
파일에 다음 줄을 추가한 후 Nginx 서비스를 다시 시작해야 합니다.
$ systemctl restart nginx서비스가 성공적으로 다시 시작되면 메시지가 없을 것입니다. 그렇지 않으면 오류 메시지 줄이 뱉어질 것입니다.
./src/server/app.js 파일을 수정하고 https.createServer([options][, requestListener])를 사용하여 익스프레스 서비스를 래핑합니다. 아래 샘플 코드를 확인하세요.
 import path from 'path' ;
import https from 'https' ;
const cert = fs . readFileSync ( path . join ( __dirname , '../../path/bundle.crt' ) ) ;
const key = fs . readFileSync ( path . join ( __dirname , '../../path/ca.key' ) ) ;
const server = https . createServer ( { key : key , cert : cert } , app ) ;

...
app . get ( '/' , ( req , res ) => { res . send ( 'this is an secure server' ) } ) ;
...

server . listen ( port , ( ) => console . log ( `Frontend service listening on port: ${ port } , access https://localhost: ${ port } in the web browser` ) ) ; webpack.config.js 에서 개발 빌드와 프로덕션 빌드 사이를 명확하게 하려면 환경 변수를 사용할 수 있습니다.
OS X와 Windows를 모두 고려하려면 타사 도구 크로스 환경을 사용할 수 있습니다.
1단계. 명령을 실행하여 크로스 환경을 설치합니다.
$ npm install --save-dev cross-env 2단계. 스크립트의 package.json 파일에는 프로덕션 버전의 웹팩 어셈블리에 대해 미리 만들어진 명령이 표시됩니다.
 "scripts" : {
	"dev" : " cross-env NODE_ENV=development nodemon --require ignore-styles --exec ts-node -r tsconfig-paths/register ./src/server/server.js " ,
    "build" : " cross-env NODE_ENV=production webpack --progress --mode production "
}
크로스 환경 설정 변수와 값 NODE_ENV=xxx 통해 웹팩 실행 중에 이 변수를 얻습니다.
3단계 . webpack.config.js 구성 파일에서 객체 프로세스 및 추가 속성 env의 이 검사를 변수 NODE_ENV 에 적용해 보겠습니다.
 if ( process . env . NODE_ENV === 'production' ) {
    // .. тwe apply (or add) some kind of plugin
} 기본 템플릿 ./src/client/views/_html/index.html 을 수정합니다. ./public/index.html 로 자동 생성됩니다. 여기에는 React 헬멧이 사용해야 하는 HTML 태그가 포함되어 있습니다. 예를 들면 다음과 같습니다.
 <!DOCTYPE html >
< html {{helmetHtmlAttributes}} >
	< head >
		< meta charset =" utf-8 " />
		{{helmetTitle}}

		<!-- manifest.json provides metadata used when your web app is added to the
             homescreen on Android. See https://developers.google.com/web/fundamentals/engage-and-retain/web-app-manifest/
		============================================= -->
		< link rel =" manifest " href =" @@{website_root_directory}/manifest.json " />

		<!-- Mobile Settings
		============================================= -->
        < meta name =" viewport " content =" width=device-width, initial-scale=1, maximum-scale=1 " />
        <!-- Mobile Settings end -->

		<!-- Compatibility
		============================================= -->
        < meta http-equiv =" X-UA-Compatible " content =" IE=edge " />
        <!-- Compatibility  end -->

		<!-- Core & Theme CSS
		============================================= -->
        < link rel =" stylesheet " href =" @@{website_root_directory}/dist/css/ poemkit .min.css?ver=@@{website_hash} " />
        <!-- Core & Theme CSS  end -->


        <!-- Overwrite Font Files
           *
           * The fonts extracted with `mini-css-extract-plugin` may not load correctly
           * Font files in `dist/fonts/` are fetched automatically by `file-loader`, you can configure webpack.config.js to name them.
        ============================================= -->
        < style >
        @font-face {
            font-family: 'Font Awesome 5 Free';
            font-style: normal;
            font-weight: 900;
            font-display: $fa-font-display;
            src: url('@@{website_root_directory}/dist/fonts/fa-solid-900.eot');
            src: url('@@{website_root_directory}/dist/fonts/fa-solid-900.eot?#iefix') format('embedded-opentype'),
            url('@@{website_root_directory}/dist/fonts/fa-solid-900.woff2') format('woff2'),
            url('@@{website_root_directory}/dist/fonts/fa-solid-900.woff') format('woff'),
            url('@@{website_root_directory}/dist/fonts/fa-solid-900.ttf') format('truetype'),
            url('@@{website_root_directory}/dist/fonts/fa-solid-900.svg#fontawesome') format('svg');
          }

          .fa,
          .fas {
            font-family: 'Font Awesome 5 Free';
            font-weight: 900;
          }

          @font-face {
            font-family: 'Font Awesome 5 Brands';
            font-style: normal;
            font-weight: 400;
            font-display: $fa-font-display;
            src: url('@@{website_root_directory}/dist/fonts/fa-brands-400.eot');
            src: url('@@{website_root_directory}/dist/fonts/fa-brands-400.eot?#iefix') format('embedded-opentype'),
            url('@@{website_root_directory}/dist/fonts/fa-brands-400.woff2') format('woff2'),
            url('@@{website_root_directory}/dist/fonts/fa-brands-400.woff') format('woff'),
            url('@@{website_root_directory}/dist/fonts/fa-brands-400.ttf') format('truetype'),
            url('@@{website_root_directory}/dist/fonts/fa-brands-400.svg#fontawesome') format('svg');
            }

            .fab {
                font-family: 'Font Awesome 5 Brands';
                font-weight: 400;
            }
            @font-face {
                font-family: 'Font Awesome 5 Free';
                font-style: normal;
                font-weight: 400;
                font-display: $fa-font-display;
                src: url('@@{website_root_directory}/dist/fonts/fa-regular-400.eot');
                src: url('@@{website_root_directory}/dist/fonts/fa-regular-400.eot?#iefix') format('embedded-opentype'),
                url('@@{website_root_directory}/dist/fonts/fa-regular-400.woff2') format('woff2'),
                url('@@{website_root_directory}/dist/fonts/fa-regular-400.woff') format('woff'),
                url('@@{website_root_directory}/dist/fonts/fa-regular-400.ttf') format('truetype'),
                url('@@{website_root_directory}/dist/fonts/fa-regular-400.svg#fontawesome') format('svg');
            }

            .far {
                font-family: 'Font Awesome 5 Free';
                font-weight: 400;
            }
        </ style >
         <!-- Overwrite Font Files   end -->


		<!-- SEO
		============================================= -->
		{{helmetMeta}}
		{{helmetLink}}
        < meta name =" generator " content =" @@{website_generator} " />
        < meta name =" author " content =" @@{website_author} " />
        <!-- SEO  end -->


		<!-- Favicons
		============================================= -->
		< link rel =" icon " href =" @@{website_root_directory}/assets/images/favicon/favicon-32x32.png " type =" image/x-icon " />
		< link rel =" shortcut icon " href =" @@{website_root_directory}/assets/images/favicon/favicon-32x32.png " sizes =" 32x32 " />
		< link rel =" apple-touch-icon " href =" @@{website_root_directory}/assets/images/favicon/apple-touch-icon-57x57.png " />
		< link rel =" apple-touch-icon " sizes =" 72x72 " href =" @@{website_root_directory}/assets/images/favicon/apple-touch-icon-72x72.png " />
		< link rel =" apple-touch-icon " sizes =" 114x114 " href =" @@{website_root_directory}/assets/images/favicon/apple-touch-icon-114x114.png " />
		<!-- Favicons  end -->

  </ head >

  < body {{helmetBodyAttributes}} >

	  < noscript >
	      You need to enable JavaScript to run this app.
	  </ noscript >

	  < div id =" app " > {{reactApp}} </ div >

	<!-- Your Plugins & Theme Scripts
	============================================= -->
	< script >
		var REVISION     = "@@{website_version}" ,
			APP_ROOTPATH = {
				"templateUrl" : "@@{website_root_directory}" , //If the file is in the root directory, you can leave it empty. If in another directory, you can write: "/blog"  (but no trailing slash)
				"homeUrl"     : "" ,  //Eg. https://uiux.cc
				"ajaxUrl"     : ""   //Eg. https://uiux.cc/wp-admin/admin-ajax.php
			} ;
    </ script >
    < script > window . __PRELOADED_STATE__ = { { preloadedState } } ; </ script >
    < script src =" @@{website_root_directory}/dist/js/ poemkit .min.js?ver=@@{website_hash} " > </ script >
	<!-- Your Plugins & Theme Scripts  end -->

  </ body >
</ html >
./public/manifest.json 파일은 ./src/config/tmpl-manifest.json 기반으로 자동 생성됩니다.
webpack.config.js 에 해결을 추가하여 모듈 확인을 구성할 수 있습니다. 다른 모듈을 임포트할 때 상대 경로를 사용하면 상대 경로를 모두 파악해야 하므로 번거로울 수 있습니다. 따라서 별칭을 추가하면 더 쉽게 작업을 수행할 수 있습니다.
webpack.config.js :
...
const alias = {
	pathConfig            : './src/config' ,
	pathComponents        : './src/client/components' ,
	pathRouter            : './src/client/router' ,
	pathHelpers            : './src/client/helpers' ,
	pathServices          : './src/client/services' ,
	pathReducers          : './src/client/reducers' ,
	pathPages             : './src/client/views/_pages' ,
	pathActions           : './src/client/actions' ,
	pathServer            : './src/server' ,
	pathStore             : './src/store'
} ;

...
resolve : {
	extensions : [ '.js' , '.jsx' , '.ts' , '.tsx' , '.scss' , '.sass' ] ,
	alias : {

		// specific mappings.
		// Supports directories and custom aliases for specific files when the express server is running,
		// you need to configure the `babel.config.js` and `tsconfig.json` at the same time
		'@/config' : path . resolve ( __dirname , alias . pathConfig ) ,
		'@/components' : path . resolve ( __dirname , alias . pathComponents ) ,
		'@/router' : path . resolve ( __dirname , alias . pathRouter ) ,
		'@/helpers' : path . resolve ( __dirname , alias . pathHelpers ) ,
		'@/services' : path . resolve ( __dirname , alias . pathServices ) ,
		'@/reducers' : path . resolve ( __dirname , alias . pathReducers ) ,
		'@/pages' : path . resolve ( __dirname , alias . pathPages ) ,
		'@/actions' : path . resolve ( __dirname , alias . pathActions ) ,
		'@/server' : path . resolve ( __dirname , alias . pathServer ) ,
		'@/store' : path . resolve ( __dirname , alias . pathStore ) ,

	}
} ,
...
babel.config.js :
...
  "plugins" : [
	[ "module-resolver" , {
	  "root" : [ "./src" ] ,
	  "alias" : {
		"@/config" : "./src/config" ,
		"@/components" : "./src/client/components" ,
		"@/router" : "./src/client/router" ,
		"@/helpers" : "./src/client/helpers" ,
		"@/services" : "./src/client/services" ,
		"@/reducers" : "./src/client/reducers" ,
		"@/pages" : "./src/client/views/_pages" ,
		"@/actions" : "./src/client/actions" ,
		"@/server" : "./src/server" ,
		"@/store" : "./src/store"
	  }
	} ]
  ]
. . .
tsconfig.json :
{
  "compilerOptions" : {
    "baseUrl" : " ./src " ,
    "paths" : {
        "@/config/*" : [ " config/* " ],
        "@/components/*" : [ " client/components/* " ],
        "@/router/*" : [ " client/router/* " ],
        "@/helpers/*" : [ " client/helpers/* " ],
        "@/services/*" : [ " client/services/* " ],
        "@/reducers/*" : [ " client/reducers/* " ],
        "@/pages/*" : [ " client/views/_pages/* " ],
        "@/actions/*" : [ " client/actions/* " ],
        "@/server/*" : [ " server/* " ],
        "@/store/*" : [ " store/* " ]
    }
  }
}
package.json :
{
  "jest" : {
    "testEnvironment" : " jsdom " ,
    "moduleNameMapper" : {
      " \ .(css|less|scss|sass)$" : " identity-obj-proxy " ,
      "^@/config/(.*)" : " <rootDir>/src/config/$1 " ,
      "^@/components/(.*)" : " <rootDir>/src/client/components/$1 " ,
      "^@/router/(.*)" : " <rootDir>/src/client/router/$1 " ,
      "^@/helpers/(.*)" : " <rootDir>/src/client/helpers/$1 " ,
      "^@/services/(.*)" : " <rootDir>/src/client/services/$1 " ,
      "^@/reducers/(.*)" : " <rootDir>/src/client/reducers/$1 " ,
      "^@/pages/(.*)" : " <rootDir>/src/client/views/_pages/$1 " ,
      "^@/actions/(.*)" : " <rootDir>/src/client/actions/$1 " ,
      "^@/server/(.*)" : " <rootDir>/src/server/$1 " ,
      "^@/store/(.*)" : " <rootDir>/src/store/$1 "
    },
    "transform" : {
      "^.+ \ .(js|jsx)$" : " babel-jest " ,
      "^.+ \ .(ts|tsx)?$" : " ts-jest "
    }
  }
} webpack.config.js 에 있는 출력을 사용하여 모듈 유형 및 네임스페이스와 같은 라이브러리 관련 설정을 구성합니다.
...
const globs = {
	port                  : 8080 ,
	examples              : 'public' ,
	build                 : 'src/client' ,
	dist                  : 'dist'
} ;

...
output : {
	path : path . resolve ( __dirname , './' + globs . dist + '/js' ) ,
	filename : '[name].js'
} ,
... package.json 의 사이트 정보 구성을 수정하여 템플릿의 자리 표시자를 업데이트할 수 있습니다. 이와 같이:
{
  "author" : " UIUX Lab " ,
  "name" : " poemkit " ,
  "email" : " [email protected] " ,
  "version" : " 1.0.0 " ,
  "projectName" : " poemkit " ,
  "createdInfo" : " UIUX Lab (https://uiux.cc) " ,
  "projectURL" : " https://uiux.cc " ,
  "description" : " React toolkit for building a full website that also is a Micro-Frontend Architecture " ,
  ...
} 웹 사이트의 기본 탐색이기도 한 경로 구성(기본 탐색의 페이지에 구성될 중첩 경로 구성은 포함되지 않음) ./src/client/router/RoutesConfig.js 에 액세스합니다.
라우터의 일부 스크립트는 ./src/client/router/App.js 파일에서 수정할 수 있습니다.
서버 측의 일부 스크립트는 ./src/server/renderer.js 파일에서 수정할 수 있습니다.
서버와 React 애플리케이션을 동시에 실행하려면 package.json 에 proxy 키를 추가해야 합니다. 우리는 이미 서버가 포트 3000에서 실행되도록 설정했으므로 프록시를 localhost:3000 으로 지정합니다.
{
  "proxy" : " http://localhost:3000 " ,
  ...
}
PropTypes 사용하여 유형을 확인하세요. $ npm run dev그런 다음 다음 JavaScript 코드를 사용하여 디버깅할 수 있습니다. 터미널에 오류 및 경고 메시지를 표시합니다.
 import PropTypes from "prop-types" ;
import React , { Component } from 'react' ;

export default class YourComponentName extends Component {
	public static propTypes = { } ;
	constructor ( props ) {
		super ( props ) ;
	}
	render ( ) { ... }
}

if ( process . env . NODE_ENV === 'development' ) {

	YourComponentName . propTypes = {
	    displayEnable : PropTypes . bool . isRequired ,
		htmlString : PropTypes . oneOfType ( [ PropTypes . string , PropTypes . object ] )
	}

} 애플리케이션은 기본적으로 일부 타사 라이브러리(아이콘, 애니메이션, 3D 엔진 등)를 로드하며, 필요에 따라 이를 로드하거나 구성 파일을 수정할 수 있습니다. ./src/client/components/_plugins/ 에 대한 액세스
타사 플러그인은 기본적으로 사용자 정의 구성 요소와 함께 사용되며 제거할 수도 있습니다.
프로젝트를 다른 디렉터리에 업로드할 때 사용할 수 있도록 웹 사이트의 루트 디렉터리를 변경합니다. ./src/config/websiteConfig.js 의 rootDirectory 키를 수정합니다.
파일이 루트 디렉터리에 있으면 비워 둘 수 있습니다. 다른 디렉토리에 있는 경우 "/blog"라고 쓸 수 있습니다. (후행 슬래시 없음)
{
  "rootDirectory" : " "
}
사이트 주소(URL)는 일반적으로 SEO 최적화에 사용됩니다. ./src/config/websiteConfig.js 의 siteUrl 키를 수정합니다. URL 이름은 https://domain-name.com 입니다 (후행 슬래시 및 하위 디렉터리 없음).
{
  "siteUrl" : " "
} 웹사이트의 API URL을 변경합니다. 아래와 같이 ./src/config/websiteConfig.js 의 키 API 수정합니다.
{
  "API" : {
	  "RECEIVE_DEMO_LIST" : " https://apiurl1.com " ,
	  "RECEIVE_DEMO_LISTDETAIL" : " https://apiurl2.com "
  }
}버그 찾기, 끌어오기 요청 보내기, 문서 개선 등 모든 기여를 환영하며 높이 평가합니다. 시작하려면 기여 가이드라인을 살펴보세요. 감사해요!
릴리스
| 크롬 | 파이어폭스 | 가장자리 | 즉 | 원정 여행 | 오페라 | iOS | 기계적 인조 인간 |
|---|---|---|---|---|---|---|---|
| >= 49 | >= 45 | >=14 | >=11 | >= 9 | >= 30 | >=10 | >=4.4 |
MIT에 따라 라이센스가 부여되었습니다.


