copilot for openbb
1.0.0
ยินดีต้อนรับสู่พื้นที่เก็บข้อมูลตัวอย่างสำหรับการรวม copilots แบบกำหนดเองเข้ากับ OpenBB Terminal
พื้นที่เก็บข้อมูลนี้มีทุกสิ่งที่คุณต้องการในการสร้างและเพิ่ม copilots ที่คุณกำหนดเองลงใน OpenBB Copilot
ต่อไปนี้เป็นเหตุผลทั่วไปบางประการว่าทำไมคุณอาจต้องการสร้างนักบินของคุณเอง:
หากต้องการรวม Copilot แบบกำหนดเองที่คุณสามารถโต้ตอบด้วยจากเทอร์มินัล OpenBB คุณจะต้องสร้าง API แบ็กเอนด์ที่ Terminal สามารถส่งคำขอได้
Copilot API ที่คุณกำหนดเองจะตอบสนองด้วยเหตุการณ์ที่เซิร์ฟเวอร์ส่ง (SSE)
หมายเหตุ: หากคุณต้องการเริ่มต้นอย่างรวดเร็ว เราขอแนะนำให้เรียกใช้ Copilot ตัวอย่างตัวใดตัวหนึ่งที่รวมอยู่ในพื้นที่เก็บข้อมูลนี้ และเพิ่มเป็น Copilot แบบกำหนดเองใน OpenBB Terminal (แต่ละ Copilot ตัวอย่างจะมีคำแนะนำเกี่ยวกับวิธีการเรียกใช้) การโคลนและการแก้ไขตัวอย่าง Copilot เป็นวิธีที่ดีเยี่ยมในการสร้าง Copilot แบบกำหนดเอง
แนวคิดที่สำคัญที่สุดที่ต้องทำความเข้าใจก็คือโปรโตคอล copilot นั้น ไร้สัญชาติ ซึ่งหมายความว่าทุกคำขอจาก OpenBB Terminal ไปยัง Copilot ของคุณจะรวมข้อความก่อนหน้าทั้งหมด (เช่น การเสร็จสิ้น AI, ข้อความจากมนุษย์, การเรียกใช้ฟังก์ชัน และผลลัพธ์การเรียกใช้ฟังก์ชัน) ไว้ในเพย์โหลดคำขอ
ซึ่งหมายความว่า Copilot ที่คุณกำหนดเองไม่จำเป็นต้องรักษาสถานะใดๆ ระหว่างคำขอ ควรใช้เพย์โหลดคำขอเพื่อสร้างการตอบกลับ
OpenBB Terminal มีหน้าที่รับผิดชอบแต่เพียงผู้เดียวในการรักษาสถานะการสนทนา และจะเพิ่มการตอบกลับไปยังอาร์เรย์ messages ในเพย์โหลดคำขอ
OpenBB Terminal จะส่งคำขอ POST ไปยังจุดสิ้นสุด query ที่กำหนดไว้ในไฟล์ copilots.json ของคุณ (เพิ่มเติมในภายหลัง) เพย์โหลดของคำขอนี้จะมีข้อมูล เช่น ข้อความของการสนทนาปัจจุบัน บริบทที่เพิ่มไว้อย่างชัดเจน ข้อมูลเกี่ยวกับวิดเจ็ตบนแดชบอร์ดที่ใช้งานอยู่ในปัจจุบัน URL ที่จะดึงข้อมูล และอื่นๆ
แกนหลักของสคีมาคำขอแบบสอบถามที่คุณต้องนำไปใช้มีดังนี้:
{
  "messages" : [  # <-- the chat messages between the user and the copilot (including function calls and results)
    {
      "role" : "human" ,  # <-- each message has a role: "human", "ai", or "tool"
      "content" : "Hi there."  # <-- the content of the message
    }
  ],
  "context" : [  # <-- explicitly added context by the user (optional)
    {
      "uuid" : "3fa85f64-5717-4562-b3fc-2c963f66afa6" ,  # <-- the UUID of the widget
      "name" : "<widget name>" ,  # <-- the name of the widget
      "description" : "<widget description>" ,  # <-- the description of the widget
      "data" : {
        "content" : "<data>"  # <-- the data of the widget
      },
      "metadata" : {
        "<metadata key>" : "<metadata value>" ,  # <-- the metadata of the widget
        ...
      }
    },
    ...
  ],
  "widgets" : [  # <-- the widgets currently visible on the active dashboard on Terminal Pro (optional)
    {
      "uuid" : "3fa85f64-5717-4562-b3fc-2c963f66afa6" ,  # <-- the UUID of the widget
      "name" : "<widget name>" ,  # <-- the name of the widget
      "description" : "<widget description>" ,  # <-- the description of the widget
      "metadata" : {
        "<metadata key>" : "<metadata value>" ,  # <-- the metadata of the widget
        ...
      }
    },
    ...
  ],
}
เราจะอธิบายแต่ละช่องเหล่านี้โดยละเอียดด้านล่าง
messages นี่คือรายการข้อความระหว่างผู้ใช้กับนักบิน ซึ่งรวมถึงข้อความของผู้ใช้ ข้อความของนักบิน การเรียกใช้ฟังก์ชัน และผลลัพธ์การเรียกใช้ฟังก์ชัน แต่ละข้อความมี role และ content
ตัวอย่างที่ง่ายที่สุดคือเมื่อไม่มีการเรียกใช้ฟังก์ชัน ซึ่งประกอบด้วยอาร์เรย์ข้อความของ human และ ai
OpenBB Terminal จะเพิ่มข้อความ ai ที่ส่งคืนทั้งหมด (จาก Copilot ของคุณ) ต่อท้ายอาร์เรย์ messages ของคำขอติดตามผล
 # Only one human message
{
  "messages" : [
    {
      "role" : "human" ,
      "content" : "Hi there."
    }
  ],
  ...
}
# Multiple messages
{
"messages" : [
{
"role" : "human" ,
"content" : "Hi there."
},
{
"role" : "ai" ,
"content" : "Hi there, I'm a copilot. How are you?"
},
{
"role" : "human" ,
"content" : "I'm fine, thank you. What is the weather in Tokyo?"
}
],
...
} การเรียกใช้ฟังก์ชันไปยัง Terminal Pro (เช่น เมื่อดึงข้อมูลวิดเจ็ต) รวมถึงผลลัพธ์ของการเรียกใช้ฟังก์ชันเหล่านั้น (ที่มีข้อมูลวิดเจ็ต) จะรวมอยู่ในอาร์เรย์ messages ด้วย สำหรับข้อมูลเกี่ยวกับการเรียกใช้ฟังก์ชัน โปรดดูส่วน "การเรียกใช้ฟังก์ชัน" ด้านล่าง
contextนี่เป็นอาร์เรย์ทางเลือกของข้อมูลวิดเจ็ตที่ OpenBB Terminal จะส่งเมื่อวิดเจ็ตถูกเพิ่มเป็นบริบทโดยผู้ใช้อย่างชัดเจน สิ่งนี้เกิดขึ้นเมื่อผู้ใช้คลิกที่ปุ่ม "เพิ่มเป็นบริบท" บนวิดเจ็ตใน OpenBB Terminal
ฟิลด์ context ทำงานดังนี้:
{
...
" context ": [
{
"uuid" : "3fa85f64-5717-4562-b3fc-2c963f66afa6" , # <-- each widget has a UUID
"name" : "Analyst Estimates" ,
"description" : "Contains analyst estimates for a ticker" ,
"data" : {
"content" : "<data>" # <-- the data of the widget could either be a JSON string or plaintext (you must choose how to handle this in your copilot)
},
"metadata" : { # <-- additional metadata about the widget
"symbol" : "AAPL" ,
"period" : "quarter" ,
"source" : "Financial Modelling Prep" ,
"lastUpdated" : 1728998071322
}
},
{
"uuid" : "8b2e5f79-3a1d-4c9e-b6f8-1e7d2a9c0b3d" , # <-- the context can have multiple widgets
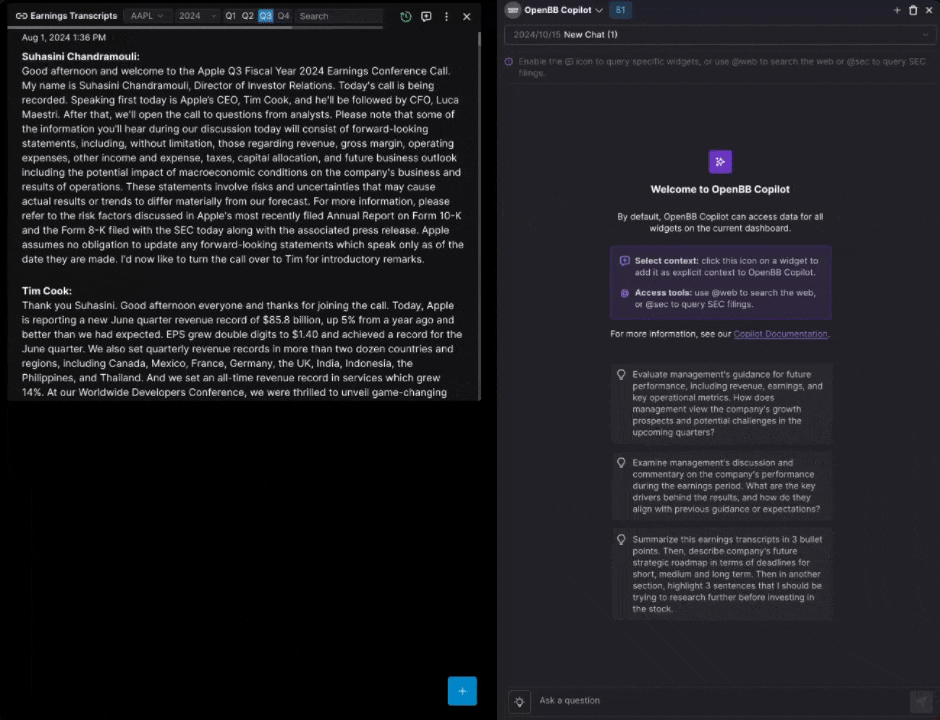
"name" : "Earnings Transcripts" ,
"description" : "Contains earnings transcripts for a ticker" ,
"data" : {
"content" : "<data>" # <-- the data of the widget
},
"metadata" : {
"symbol" : "AAPL" ,
"period" : "quarter" ,
"source" : "Intrinio" ,
"lastUpdated" : 1728998071322
}
},
...
],
...
}widgetsนี่คืออาร์เรย์ของวิดเจ็ตที่มองเห็นได้บนแดชบอร์ดที่ใช้งานอยู่บน Terminal Pro * สิ่งนี้มีประโยชน์เฉพาะในกรณีที่คุณวางแผนที่จะใช้งานการเรียกใช้ฟังก์ชันใน copilot ที่คุณกำหนดเอง (ซึ่งแนะนำ แต่ไม่จำเป็น) ซึ่งช่วยให้สามารถขอข้อมูลวิดเจ็ตจากแดชบอร์ดที่ใช้งานอยู่ในปัจจุบันของผู้ใช้บน OpenBB Terminal
{
  ...
  " widgets ": [
    {
      "uuid" : "c276369e-e469-4689-b5fe-3f8c76f7c45a" ,
      "name" : "Stock Price Quote Widget" ,
      "description" : "Contains the current stock price of a ticker" ,
      "metadata" : {
        "ticker" : "AAPL"
      }
    },
    {
      "uuid" : "9f8e7d6c-5b4a-3c2e-1d0f-9e8d7c6b5a4b" ,
      "name" : "Financial Ratios Widget" ,
      "description" : "Displays key financial ratios for a company" ,
      "metadata" : {
        "ticker" : "AAPL" ,
        "period" : "TTM"
      }
    },
    ...
  ],
  ...
}Copilot แบบกำหนดเองของคุณจะต้องตอบสนองต่อคำขอของ OpenBB Terminal โดยใช้ Server-Sent Events (SSE)
OpenBB Terminal สามารถประมวลผล SSE ต่อไปนี้:
copilotMessageChunk : ใช้เพื่อส่งคืนโทเค็น copilot ที่สตรีมแล้ว (ตอบกลับบางส่วน) กลับไปที่ OpenBB Terminal คุณสามารถสตรีมคำตอบเหล่านี้ได้ในขณะที่ถูกสร้างขึ้นcopilotFunctionCall : ใช้เพื่อขอข้อมูล (เช่น ข้อมูลวิดเจ็ต) หรือดำเนินการฟังก์ชันเฉพาะ สิ่งนี้จะสั่งให้ Terminal Pro ดำเนินการเพิ่มเติมในฝั่งไคลเอ็นต์ สิ่งนี้จำเป็นเฉพาะในกรณีที่คุณวางแผนที่จะใช้งานการเรียกใช้ฟังก์ชันใน copilot ที่คุณกำหนดเอง copilotMessageChunkก้อนข้อความ SSE มีรูปแบบดังต่อไปนี้:
 event: copilotMessageChunk
data: {"delta":"H"}  # <-- the `data` field must be a JSON object.
delta ต้องเป็นสตริง แต่สามารถมีความยาวเท่าใดก็ได้ เราขอแนะนำให้สตรีมกลับแต่ละก้อนที่คุณได้รับจาก LLM ของคุณทันทีที่สร้างเป็น delta
ตัวอย่างเช่น หากคุณต้องการสตรีมข้อความ "สวัสดี!" กลับ คุณจะต้องส่ง SSE ต่อไปนี้:
 event: copilotMessageChunk
data: {"delta":"H"}

event: copilotMessageChunk
data: {"delta":"i"}

event: copilotMessageChunk
data: {"delta":"!"}
copilotFunctionCall (จำเป็นสำหรับการเรียกใช้ฟังก์ชันเท่านั้น)การเรียกใช้ฟังก์ชัน SSE มีรูปแบบดังต่อไปนี้:
 event: copilotFunctionCall
data: {"function":"get_widget_data","input_arguments":{"widget_uuid":"c276369e-e469-4689-b5fe-3f8c76f7c45a"}}
ขอย้ำอีกครั้งว่าช่อง data ต้องเป็นออบเจ็กต์ JSON ฟิลด์ function คือชื่อของฟังก์ชันที่จะเรียกใช้ (ปัจจุบันรองรับเฉพาะ get_widget_data เท่านั้น) และฟิลด์ input_arguments คือพจนานุกรมของอาร์กิวเมนต์ที่จะส่งผ่านไปยังฟังก์ชัน สำหรับฟังก์ชัน get_widget_data อาร์กิวเมนต์ที่จำเป็นเพียงอย่างเดียวคือ widget_uuid ซึ่งเป็น UUID ของวิดเจ็ตที่จะดึงข้อมูล (จากหนึ่งใน UUID ในอาร์เรย์ widgets ของคำร้องขอ)
ด้วยการเพิ่มการเรียกใช้ฟังก์ชันให้กับ copilot ของคุณ จะสามารถขอข้อมูลที่มองเห็นได้บนแดชบอร์ดที่ใช้งานอยู่ในปัจจุบันของผู้ใช้ใน OpenBB Terminal
รายการวิดเจ็ตทั้งหมดที่มองเห็นได้บนแดชบอร์ดของผู้ใช้จะถูกส่งไปยัง copilot ของคุณในอาร์เรย์ widgets ของเพย์โหลดคำขอ
หากต้องการดึงข้อมูลจากวิดเจ็ต copilot ของคุณควรตอบสนองด้วยเหตุการณ์ copilotFunctionCall โดยระบุ UUID ของวิดเจ็ต:
 event: copilotFunctionCall
data: {"function":"get_widget_data","input_arguments":{"widget_uuid":"c276369e-e469-4689-b5fe-3f8c76f7c45a"}}
หลังจากปล่อยเหตุการณ์ copilotFunctionCall คุณต้องปิดการเชื่อมต่อและรอคำขอแบบสอบถามใหม่จาก OpenBB Terminal
เมื่อได้รับเหตุการณ์ copilotFunctionCall เทอร์มินัล OpenBB จะดึงข้อมูล และเริ่มคำขอแบบสอบถาม ใหม่ คำขอแบบสอบถามใหม่นี้จะรวมการเรียกใช้ฟังก์ชันดั้งเดิม รวมถึงการเรียกใช้ฟังก์ชันที่ส่งผลให้เกิดอาร์เรย์ messages
{
  ...
  " messages ": [
    ...
    {
      "role" : "ai" ,
      "content" : "{ " function " : " get_widget_data " , " input_arguments " :{ " widget_uuid " : " c276369e-e469-4689-b5fe-3f8c76f7c45a " }}"
    },
    {
      "role" : "tool" ,
      "function" : "get_widget_data" ,
      "data" : {
        "content" : "<data>"
      }
    }
  ]
}
โปรดสังเกตว่า:
messagescontent ของข้อความ ai การเรียกใช้ฟังก์ชันคือออบเจ็กต์ JSON ที่เข้ารหัสด้วยสตริงคำต่อคำของช่อง data ของเหตุการณ์ copilotFunctionCall (นี่เป็นกลไกที่มีประโยชน์มากสำหรับการลักลอบนำข้อมูลเมตาเพิ่มเติมที่เกี่ยวข้องกับการเรียกใช้ฟังก์ชัน หาก copilot ของคุณต้องการ) ในปัจจุบัน การเรียกใช้ฟังก์ชันเดียวที่ OpenBB Terminal รองรับคือ get_widget_data ซึ่งดึงข้อมูลจากวิดเจ็ตเฉพาะ
Copilot แบบกำหนดเองของคุณได้รับคำขอต่อไปนี้จาก OpenBB Terminal:
{
  "messages" : [
    {
      "role" : " human " ,
      "content" : " What is the current stock price of AAPL? "
    }
  ],
  "widgets" : [
    {
      "uuid" : " 38181a68-9650-4940-84fb-a3f29c8869f3 " ,
      "name" : " Historical Stock Price " ,
      "description" : " Historical Stock Price " ,
      "metadata" : {
        "symbol" : " AAPL " ,
        "source" : " Financial Modelling Prep " ,
        "lastUpdated" : 1728994470324
      }
    }
  ]
}
จากนั้นคุณแยกวิเคราะห์การตอบสนอง จัดรูปแบบข้อความเป็น LLM ของคุณ (รวมถึงข้อมูลเกี่ยวกับวิดเจ็ตที่มีอยู่) สมมติว่านักบินอวกาศของคุณพิจารณาว่าสามารถตอบคำถามของผู้ใช้ได้โดยใช้วิดเจ็ตที่มีอยู่ และสร้างการเรียกใช้ฟังก์ชันเพื่อดึงข้อมูล
จากนั้นนักบินของคุณจะตอบสนองด้วย SSE ต่อไปนี้และปิดการเชื่อมต่อ:
 event: copilotFunctionCall
data: {"function":"get_widget_data","input_arguments":{"widget_uuid":"38181a68-9650-4940-84fb-a3f29c8869f3"}}
จากนั้น OpenBB Terminal จะดำเนินการฟังก์ชันที่ระบุ และสร้างคำขอสืบค้นใหม่ไปยัง copilot ที่คุณกำหนดเอง:
{
  "messages" : [
    {
      "role" : "human" ,
      "content" : "What is the current stock price of AAPL?"
    },
    {
      "role" : "ai" ,
      "content" : "{ " function " : " get_widget_data " , " input_arguments " :{ " widget_uuid " : " 38181a68-9650-4940-84fb-a3f29c8869f3 " }}"
    },
    {
      "role" : "tool" ,
      "function" : "get_widget_data" ,
      "data" : {
        "content" : "[{ " date " : " 2024-10-15T00:00:00-04:00 " , " open " :233.61, " high " :237.49, " low " :232.37, " close " :233.85, " volume " :61901688, " vwap " :234.33, " adj_close " :233.85, " change " :0.24, " change_percent " :0.0010274},{ " date " : " 2024-10-14T00:00:00-04:00 " , " open " :228.7, " high " :231.73, " low " :228.6, " close " :231.3, " volume " :39882100, " vwap " :230.0825, " adj_close " :231.3, " change " :2.6, " change_percent " :0.0114},{ " date " : " 2024-10-11T00:00:00-04:00 " , " open " :229.3, " high " :233.2, " low " :228.9, " close " :231.0, " volume " :32581944, " vwap " :231.0333, " adj_close " :231.0, " change " :1.7, " change_percent " :0.0074}, ... ]"
      }
    }
  ],
  "widgets" : [
    {
      "uuid" : "38181a68-9650-4940-84fb-a3f29c8869f3" ,
      "name" : "Historical Stock Price" ,
      "description" : "Historical Stock Price" ,
      "metadata" : {
        "symbol" : "AAPL" ,
        "source" : "Financial Modelling Prep" ,
        "lastUpdated" : 1728994470324
      }
    }
}
จากนั้นคุณแยกวิเคราะห์การตอบสนอง ประมวลผลข้อมูล และจัดรูปแบบข้อความเป็น LLM ของคุณ สมมติว่า LLM จะสร้างสตริงโทเค็นเพื่อตอบคำถามของผู้ใช้ จากนั้นสิ่งเหล่านี้จะถูกสตรีมกลับไปยังผู้ใช้โดยใช้ copilotMessageChunk SSE:
 event: copilotMessageChunk
data: {"delta":"The"}

event: copilotMessageChunk
data: {"delta":" current"}

event: copilotMessageChunk
data: {"delta":" stock"}

event: copilotMessageChunk
data: {"delta":" price"}

event: copilotMessageChunk
data: {"delta":" of"}

event: copilotMessageChunk
data: {"delta":" Apple"}

event: copilotMessageChunk
data: {"delta":" Inc."}

event: copilotMessageChunk
data: {"delta":" (AAPL)"}

event: copilotMessageChunk
data: {"delta":" is"}

event: copilotMessageChunk
data: {"delta":" $150.75."}
copilots.json ) หากต้องการรวม copilot แบบกำหนดเองเข้ากับ OpenBB Terminal คุณจะต้องกำหนดค่าและให้บริการไฟล์ copilots.json ไฟล์นี้กำหนดวิธีที่ Copilot แบบกำหนดเองของคุณเชื่อมต่อกับส่วนหน้า รวมถึงฟีเจอร์ใดบ้างที่ Copilot แบบกำหนดเองของคุณรองรับ และตำแหน่งที่ควรส่งคำขอ
นี่คือตัวอย่างการกำหนดค่า copilots.json:
{
  "example_copilot" : { # <-- the ID of your copilot
    "name" : "Mistral Example Co. Copilot" , # <-- the display name of your copilot
    "description" : "AI-powered financial copilot that uses Mistral Large as its LLM." , # <-- a short description of your copilot
    "image" : "<url>" , # <-- a URL to an image icon for your copilot
    "hasStreaming" : true , # <-- whether your copilot supports streaming responses via SSEs. This must always be true.
    "hasFunctionCalling" : true , # <-- whether your copilot supports function calling
    "endpoints" : {
      "query" : "<url>" # <-- the URL that Terminal Pro will send requests to. For example, "http://localhost:7777/v1/query"
    }
  }
}
ไฟล์ copilots.json ของคุณจะต้องให้บริการที่ <your-host>/copilots.json เช่น http://localhost:7777/copilots.json


