face rec tools
v1.0.0
Media Library Face Tools
สำหรับการสร้าง dlib และอื่น ๆ
sudo apt-get install build-essential cmake python3-pipsudo apt-get install python3-opencvการติดตั้งไลบรารีด้วย CUDA นั้นไม่ใช่เรื่องง่ายและอาจแตกต่างกันไปสำหรับระบบปฏิบัติการที่แตกต่างกัน ลิงค์ที่มีประโยชน์สำหรับการตั้งค่า CUDA
https://developer.nvidia.com/cuda-downloads
https://medium.com/@sb.jaduniv/how-to install-opencv-4-2-0-with-cuda-10-1-on-ubuntu-20-04-lts-focal-fossa-bdc034109df3
https://www.pyimagesearch.com/2019/12/09/how-to-install-tensorflow-2-0-on-ubuntu/
pip3 install deepfaceติดตั้งโคลน face_recognition ของฉัน (มีการดัดแปลงบางอย่างเพื่อรองรับใบหน้าที่จับคู่ภายนอก)
git clone https://github.com/sashacmc/face_recognition.git ; cd face_recognition ; pip3 install . ; cd ..git clone https://github.com/sashacmc/face-rec-tools.git ; cd face-rec-tools ; pip3 install . ; cd ..ใช้ไฟล์จากไฟล์กำหนดค่าที่กำหนดไว้ล่วงหน้าหรือเตรียมความพร้อมของคุณเอง
ไฟล์กำหนดค่าที่กำหนดไว้ล่วงหน้าซึ่งอยู่ในโฟลเดอร์ CFG ของแพ็คเกจ (เช่น ~/.local/lib/python3.6/site-packages/face_rec_tools/cfg/)
คัดลอกไปยังตำแหน่งกำหนดค่าเริ่มต้น (~/.face-rec.cfg) หรือระบุด้วยสวิตช์บรรทัดคำสั่ง "-c"
cp ~ /.local/lib/python3. ? /site-packages/face_rec_tools/cfg/frontal.cfg ~ /.face-rec.cfg # recognize single image and print output (useful for debug)
face-rec-cli -a recognize_image -i imagefile.jpg
# recognize single video and print summary output (useful for debug)
face-rec-cli -a recognize_video -i videofile.mp4
# recognize folder and store the result in the database
face-rec-cli -a recognize_folder -i /folder/with/images
# remove folder recognition the result from the database
face-rec-cli -a remove_folder -i /folder/with/images
# match/rematch unmatched faces in database
face-rec-cli -a match_unmatched
# match/rematch all faces in database
face-rec-cli -a match_all
# match/rematch faces from folder in database
face-rec-cli -a match_folder -i /folder/with/images
# save faces from folder (must be previously recognized)
# cachedb must be disabled (otherwise they will saved inside cachedb)
face-rec-cli -a save_faces -i /folder/with/images -o /folder/for/faces
# find face from image in database and save them in folder
# cachedb must be disabled (otherwise they will saved inside cachedb)
face-rec-cli -a get_faces_by_face -i image_with_one_face.jpg -o /folder/for/facesเรียกใช้เซิร์ฟเวอร์จากบรรทัดคำสั่ง
face-rec-server เปิดเบราว์เซอร์กับคุณชื่อโฮสต์/ip_adress และพอร์ต 8081
สำหรับการรับรู้โฟลเดอร์ใหม่คลิกเพื่อ "รับรู้"-> "เพิ่มไฟล์ใหม่ ... " และระบุโฟลเดอร์ที่คุณต้องการรับรู้ 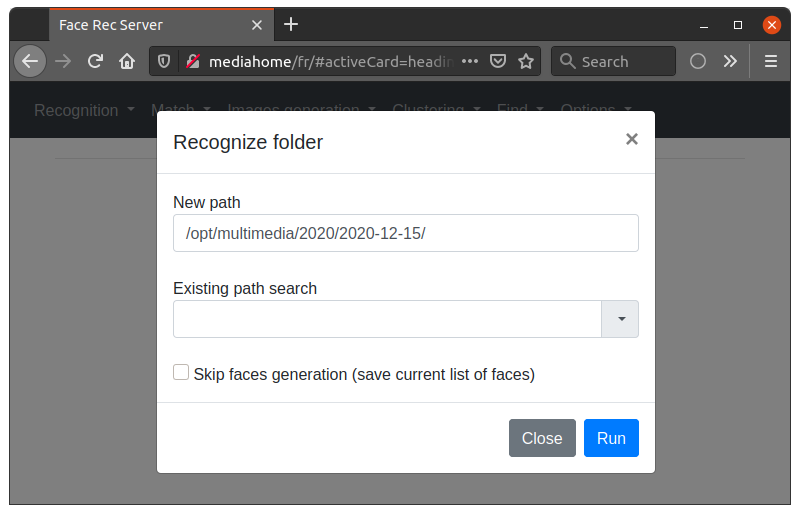
ครั้งแรกการรับรู้จะใช้เวลาสักครู่เนื่องจากการโหลดโมเดลที่จำเป็น
หลังจากได้รับการยอมรับครั้งแรกคุณจะได้รับใบหน้าทั้งหมดโดยไม่ทราบ 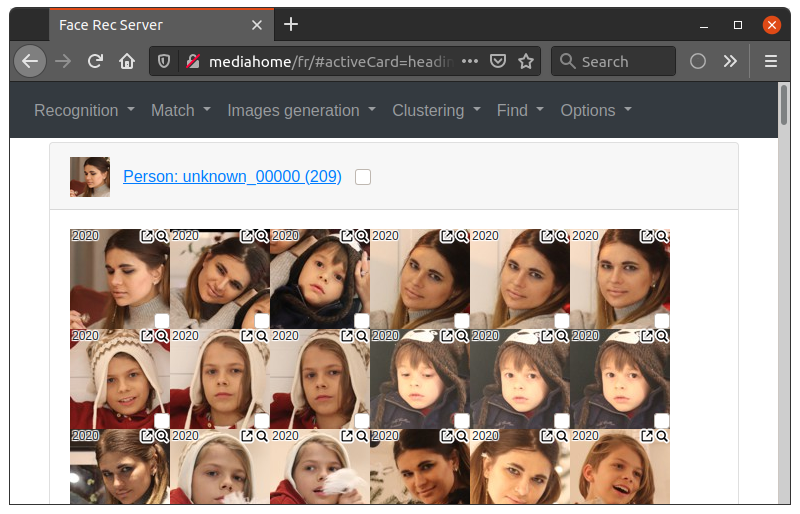
คลิกที่ใบหน้า (หรือเลือกหลายอย่างด้วย shift/ctrl) เพื่อเพิ่มเป็นรูปแบบ 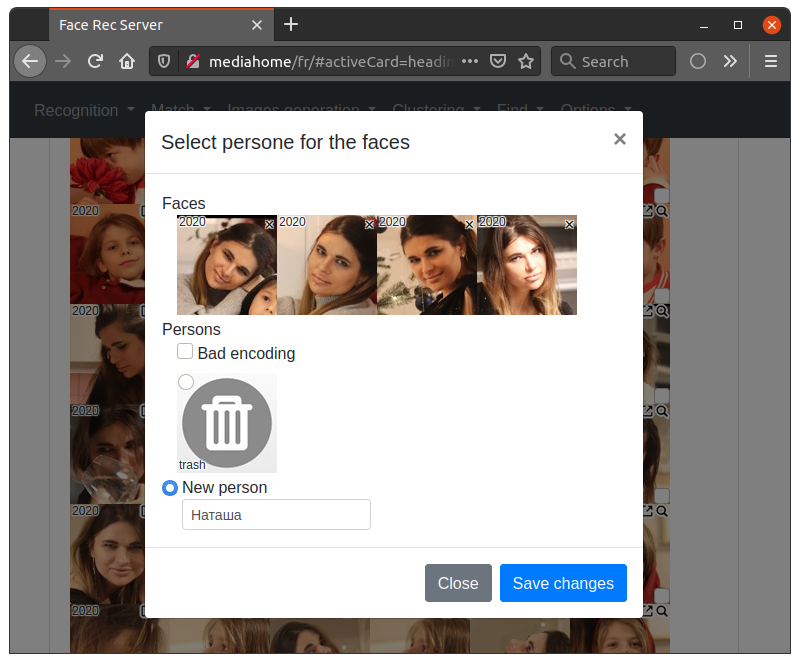
ชื่อที่เพิ่มก่อนหน้านี้จะถูกบันทึกและคุณไม่จำเป็นต้องป้อนอีกครั้ง หากคุณต้องการเปลี่ยนโลโก้หน้าเริ่มต้นคุณสามารถเพิ่มเป็น 0_face.jpg สำหรับโฟลเดอร์ย่อยแต่ละคน 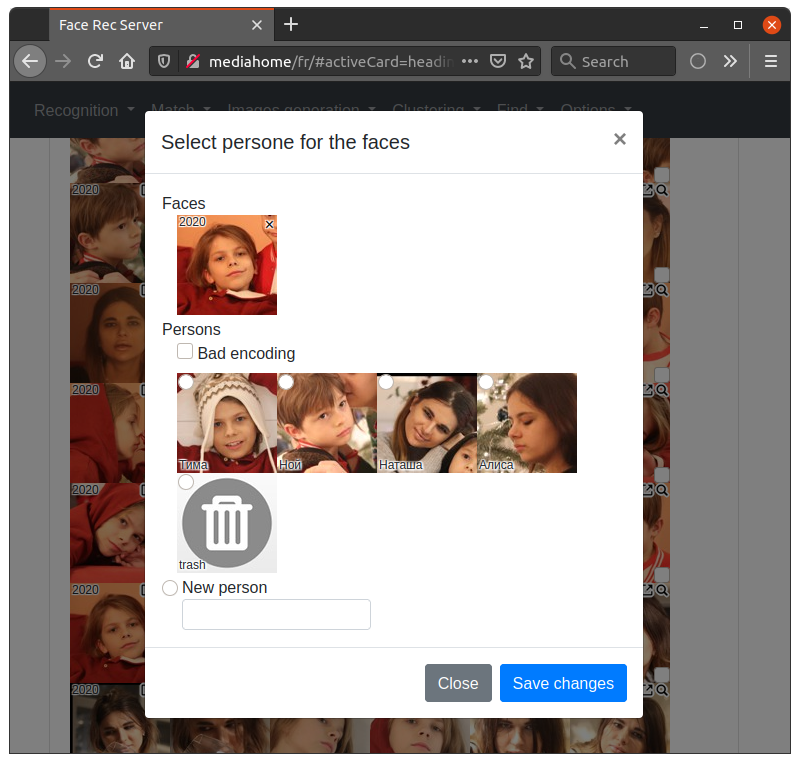
หลังจากการเพิ่มรูปแบบแล้วเริ่มการแข่งขันอีกครั้ง (เช่น "การจับคู่"-> "โฟลเดอร์การแข่งขัน ... ") 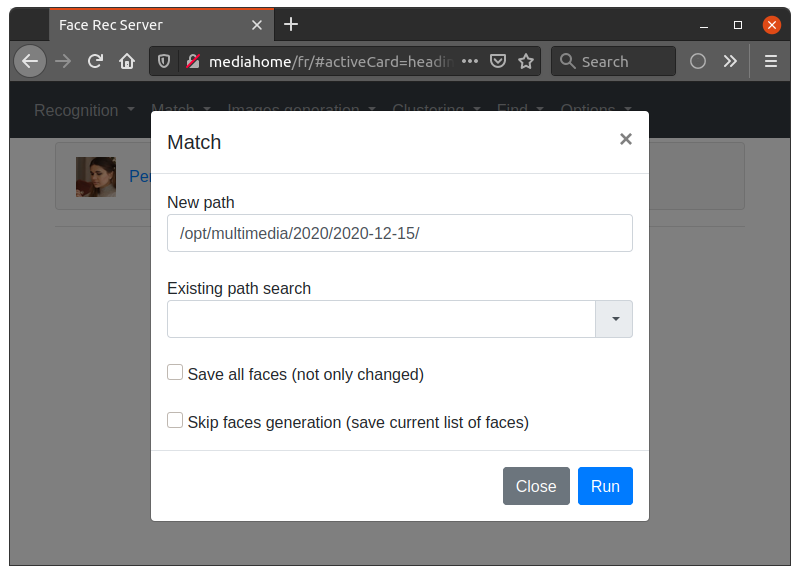
หลังจากจับคู่กับรูปแบบคุณจะได้จับคู่บุคคลและบุคคลที่ตรงกับ "อ่อนแอ" หมายความว่ามันไม่ตรงกับอย่างเต็มที่และจะไม่ถูกใช้สำหรับการซิงค์หรือค้นหา คุณต้องตรวจสอบและเพิ่มลงในรูปแบบ 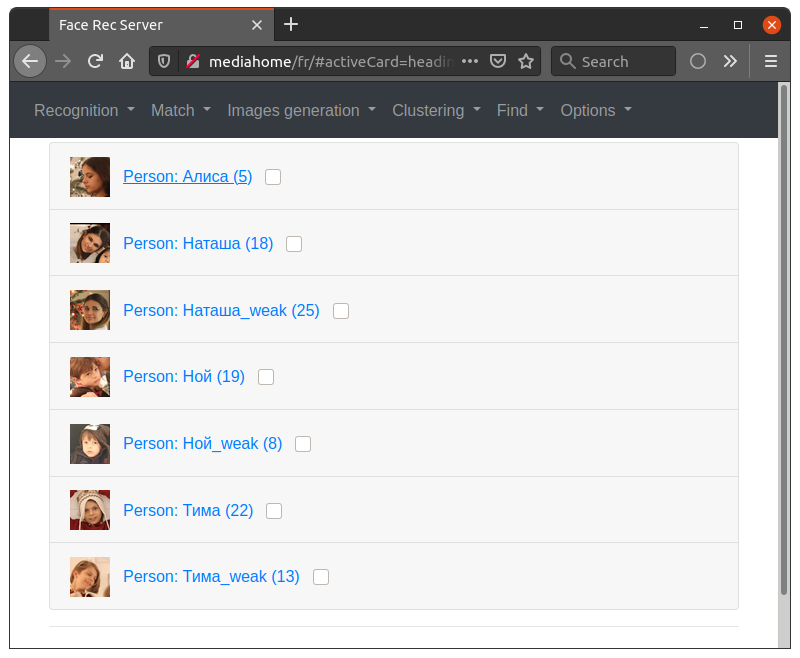
หากคุณต้องการข้อมูลเพิ่มเติมเกี่ยวกับใบหน้าคุณสามารถคลิก ไอคอนเพื่อดูไฟล์ต้นฉบับหรือไฟล์
 เพื่อดูรูปแบบที่มันถูกจับคู่กับ
หากคุณมีใบหน้าจำนวนมากคุณสามารถทำให้รูปแบบการแยกง่ายขึ้นโดยค่าเฉลี่ยของการจัดกลุ่มในการจัดกลุ่มเมนูมันจะแยกใบหน้าใกล้กับกลุ่มและจะอนุญาตให้เพิ่มลงในรูปแบบเข้าด้วยกัน
เครื่องมือจดจำใบหน้าอนุญาตให้ซิงค์ผลลัพธ์การจดจำกับ Plex Media Server โดยใช้แท็ก ไฟล์ที่รู้จักจะติดแท็กด้วยแท็ก "บุคคล: [person_name]"
 # set all tags to the Plex database
face-rec-plexsync -a set_tags

# clear all tags from the Plex database
face-rec-plexsync -a remove_tags

# recognize all files which present in the Plex database
# but not recognized yet and store the result in the database
face-rec-plexsync -a sync_new

# delete from database all files which not present in the Plex database
face-rec-plexsync -a sync_deletedหากคุณไม่มี plex หรือต้องการใช้การค้นหาที่ซับซ้อนมากขึ้นคุณสามารถใช้คำสั่งติดตาม
(มันจะค้นหาไฟล์ทั้งหมดในโฟลเดอร์ 2020 ซึ่งมีใบหน้าของบุคคลชื่อ 1 และ name2)
face-rec-db -a find_files_by_names -f 2020 -n Name1,Name2ขอบคุณทุกคนที่ทดสอบและให้คำแนะนำ
รายงานข้อผิดพลาดคำแนะนำและคำขอดึงยินดีต้อนรับ!


