Canva is a very excellent online design software. When we create templates, we have the sizes that come with the software, and we can also customize the sizes. Here is a tutorial on how to create custom-sized images with Canva. If you are interested Friends, come and take a look.

1. Open the browser on your computer desktop, enter "canva can draw" in the search box, enter the canva can draw official website interface, and register or log in to your account according to your needs.
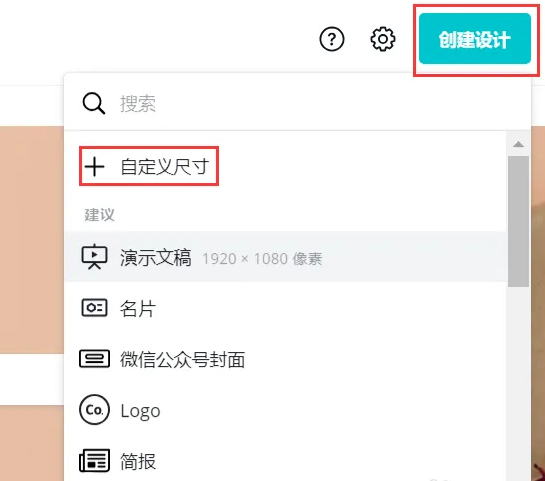
2. Click the "Create Design" button in the upper right corner, and click the "Custom Size" option in the pop-up window. In addition to the custom size option, there are also options such as "Presentation", "Business Card", and "Logo".

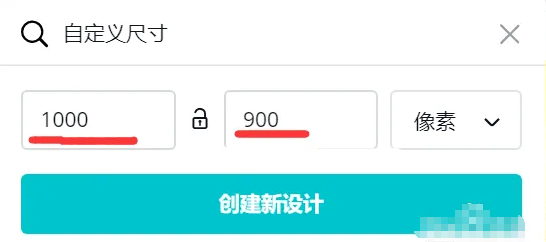
3. After clicking the "Custom Size" option, the corresponding window will appear below. Set the "Width" and "Height" according to your needs. Here, we take 1000 and 900 pixels as an example. Click the "Create New Design" button to complete the creation. .

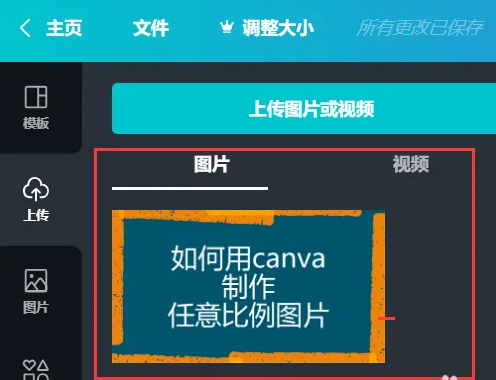
4. After entering the new interface, click the "Upload" option to upload a picture of any size.

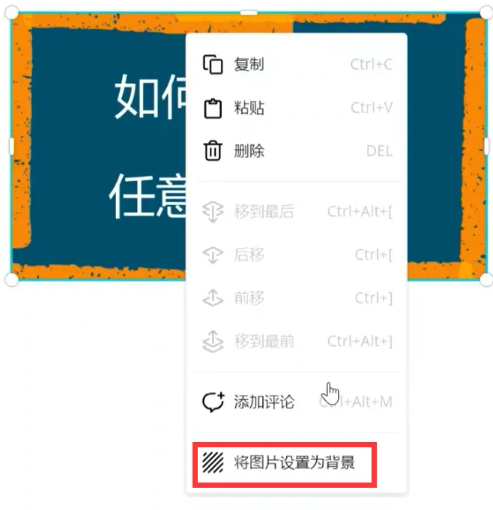
5. Move the image to the design area on the right, right-click the image, and click the "Set image as background" option in the pop-up window. The image will automatically fill a canvas of 1000:900 pixels.
