Lovelace
velace's first appearance in these alleys.
去阅读 Lovelace 文档。
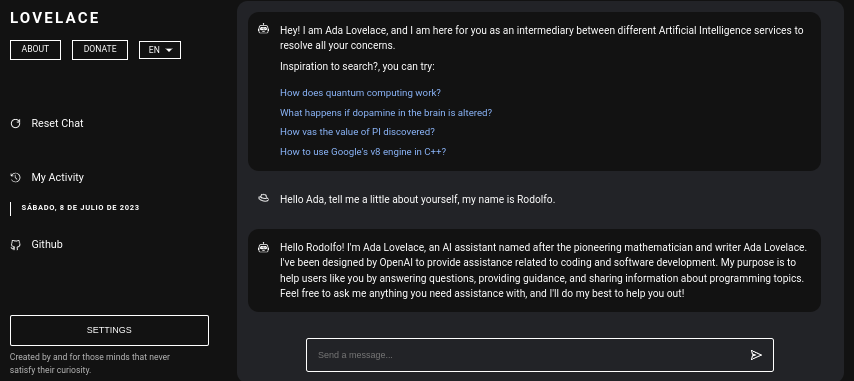
Lovelace 是一个 Web 应用程序,允许使用 Python 的 GPT4FREE 库与 ChatGPT 自由交互。该软件是用JavaScript编写的,服务器端使用NodeJS + Express + SocketIO,前端使用Vite + ReactJS。
后端允许不同的客户端与 ChatGPT 进行通信。如果您使用 Lovelace 的目的是为了您自己的目的或目的,您只能在您的网络中挂载后端服务器,而忽略应用程序的另一端,即客户端;后端允许通过 API 进行交互,或者您可以使用某些 SocketIO 客户端通过 WebSocket 进行连接。
目录:
在您的计算机或服务器上安装 Lovelace 相对简单,在此过程中不会出现任何重大复杂情况;但是,在开始克隆存储库之前,请确保您至少拥有NodeJS v18.0.0和Python v3.10 。
请考虑,如果您的系统上没有安装所需的 NodeJS 版本,您可以使用版本管理器NVM (Node Version Manager) 。
 # Installing NVM on your system...
export NVM_DIR= " $HOME /.nvm " && (
  git clone https://github.com/nvm-sh/nvm.git " $NVM_DIR "
  cd " $NVM_DIR "
  git checkout ` git describe --abbrev=0 --tags --match " v[0-9]* " $( git rev-list --tags --max-count=1 ) `
) && . " $NVM_DIR /nvm.sh "

# Once NVM has been installed, we proceed to install the specified NodeJS version (> 18.0.0)
nvm install 18.0.0如果您的系统上没有Python v3.10 ,您可以考虑以下操作:
 # (DEBIAN)
sudo add-apt-repository ppa:deadsnakes/ppa && sudo apt update && sudo apt install python3.10

# (MacOS)
brew install [email protected]
以同样的方式,考虑在您的系统上安装 pip,因为在安装必要的模块以便能够在网络中安装后端服务器时将使用它。
curl https://bootstrap.pypa.io/get-pip.py -o get-pip.py
python3 get-pip.py
现在,假设您的系统上安装了上述依赖项,我们可以继续下一步......
在开始安装和配置后端服务器作为 Lovelace 前端之前,我们需要克隆应用程序源代码所在的 Github 存储库。
考虑一下,在阅读的这一点上,我假设您已经拥有 Python 版本 3.10 或更高版本以及 NodeJS 版本 18.0.0;在上一篇文章中,在继续安装之前,解释了安装每个组件的步骤。
 # Cloning the Github repository that contains the source code (I stole it from a cyber).
git clone https://github.com/CodeWithRodi/Lovelace/ && cd Lovelace

# Accessing the "Client" folder, which stores the source code of the
# Vite + ReactjS (Frontend) application, and then installing its required modules from NPM.
cd Server && npm install --force && pip install -r Requirements.txt

# Like the previous line, we access the "Server" folder that houses the source code
# for the Lovelace Backend, then we install the NPM packages required to mount on the network.
cd ../Client && npm install --force
您可能更喜欢在一行中运行所有内容......
git clone https://github.com/CodeWithRodi/Lovelace/ && cd Lovelace && cd Server && npm install --force && pip install -r Requirements.txt && cd ../Client && npm install --force && cd ..请记住,当您安装运行服务器所需的模块时,将执行pip install -r Requirements.txt命令,以便安装必要的软件包以便能够使用GPT4FREE库。来自Python。如果你没有安装pip或者没有安装 Python 包,即使你在网络上安装了后端服务器和客户端,你也将无法执行任何操作,因为当向通过 WebSocket 或通过 API 使用后端的 NodeJS python-shell库,与负责返回响应的相应 Python 文件进行通信,如果没有必要的要求,则会抛出错误。
克隆 Github 存储库后,我们可以继续配置和网络安装前端和后端应用程序,但是,让我们更深入地了解存储每个子文件夹的内容,这些子文件夹包含通过克隆存储库生成的文件夹。
| 文件夹 | 描述 |
|---|---|
| 客户 | “Client”文件夹存储了Vite + React应用程序的源代码,即Lovelace前端,您可以将网站挂载到您的网络上,以便能够与后端通信并与AI建立高质量的对话! |
| 文档 | “Documentation”文件夹包含软件文档的源代码:https://lovelace-docs.codewithrodi.com/。 |
| 服务器 | “Server”文件夹包含 Lovelace 后端的源代码,它是在 NodeJS 下使用 Express 构建的,以提供 API 和 SocketIO,用于在 WebSocket 下传输响应。 |
此外,除了文件夹之外,您还会遇到一些文件,这些文件将以同样的方式与下面的描述一起呈现。
| 文件 | 描述 |
|---|---|
| .clocignore | 它由“cloc”软件使用,该软件可以对软件代码行进行计数,并通过技术和所使用的编程语言可能具有的注释将它们分开。在“clocignore”文件中,有软件在计数时必须忽略的那些文件和目录的路径。 |
| 执照 | 包含客户端和服务器源代码受约束的 Lovelace 许可证。该软件根据 MIT 许可证获得许可。 |
克隆存储库并且随后安装了必要的服务器和客户端 NPM 模块后,就可以设置后端以开始使用该软件了。
让我们从服务器开始,这就是神奇发生的地方,你可以通过 API 请求或使用 WebSocket 与 AI 进行通信;接下来,您将看到一系列命令,以便能够在网络中安装服务器。
 # Accessing the <Server> folder that houses the repository you cloned earlier
cd Server/

# Running the server...
npm run start如果您已正确完成所有操作,则服务器应该已经在您的系统上运行。访问http://0.0.0.0:8000/api/v1/即可查看!
脚本( npm run <script_name> ) | 描述 |
|---|---|
| 开始 | 服务器开始正常执行,如果您想将其安装到生产环境中,可以考虑此选项。 |
| 开发者 | 在“nodemon”包的帮助下以开发模式启动服务器的执行。 |
您应该知道环境变量是动态字符值,它允许您存储与凭据、配置等相关的信息...,然后您将看到位于服务器源代码中的“.env”文件,其中依次您将获得有关可用变量操作的描述。
 # Specifies the execution mode of the server, considers the value of <NODE_ENV>
# can be <development> and <production>.
NODE_ENV = production

# Address of the server where the client application is running.
CLIENT_HOST = https://lovelace.codewithrodi.com/

# Port where the server will
# start executing over the network.
SERVER_PORT = 8000

# Hostname where the server will be launched in
# complement with the previously established
# port on the network.
SERVER_HOST = 0.0.0.0

# If you have an SSL certificate, you must
# specify the certificate and then the key.
SSL_CERT =
SSL_KEY =

# Others...
CORS_ORIGIN = *
BODY_MAX_SIZE = 100kb
假设阅读中此时你已经在网络上架设了后端服务器,我们可以继续架设客户端的服务器,这样你就可以开始通过你所访问的网站与AI进行交互了。接下来将配置...
客户端应用程序使用ReactJS构建,使用Vite作为开发工具。只需几个终端命令,您就可以立即在网络上快速设置和部署应用程序!通过遵循我们的说明并利用 ReactJS 和 Vite 的强大功能,您将体验到无缝且高效的设置过程。
确保为了正确使用 Web 应用程序,服务器必须已在网络上运行。
 # Accessing the existing <Client> folder within the cloned repository
cd Client/

# Assuming you have already installed the necessary npm packages <npm install --force>
# we will proceed to start the server in development mode
npm run dev快乐黑客!...您的服务器应该运行在http://0.0.0.0:5173/ 。
与前面的阅读中完成的方式相同,接下来将显示客户端应用程序在其“.env”文件中的环境变量列表及其描述。
 # Address where the backend server was mounted, you must
# be sure to specify in the address if you have ridden
# the server under HTTPS, changing <http> to <https> ;)
VITE_SERVER = http://0.0.0.0:8000

# The server has a suffix to be able to access its respective API
# in this case we use v1
VITE_API_SUFFIX = /api/v1

# Others...
VITE_DONATE_LINK = https://ko-fi.com/codewithrodi
VITE_GPT4FREE_LINK = https://github.com/xtekky/gpt4free
VITE_SOFTWARE_REPOSITORY_LINK = https://github.com/codewithrodi/Lovelace如果您想修改网络地址或在网络上启动 Vite 服务器时使用的端口,可以考虑修改vite.config.js文件。该文件包含Vite服务器的配置设置。以下是vite.config.js文件的内容:
 export default defineConfig ( {
  plugins : [ react ( ) ] ,
  server : {
    // If you want to change the network address where the server will be mounted
    // you must change <0.0.0.0> to the desired one.
    host : '0.0.0.0' ,
    // Following the same line above, you must modify the port <5173>
    // for which you want to ride on the network.
    port : 5173
  } ,
  define : {
    global : { }
  }
} ) ;
请注意,修改这些设置应谨慎进行,因为它可能会影响服务器的可访问性。确保选择合适的网络地址和尚未使用的端口。
Vite 因其高效的环境而成为开发用 JavaScript 编写的 Web 应用程序的流行选择。它具有显着的优势,例如在开发过程中加载新模块或编译源代码时大大减少启动时间。通过利用 Vite,开发者可以体验到更高的生产力和更快的开发周期。其速度和性能优化使其成为 Web 开发项目的宝贵工具。
Web 应用程序能够检测访问平台的 Web 浏览器的语言,以便稍后能够检测是否有所请求语言的内容翻译,如果不存在,则翻译将被退回。默认对应英文。
考虑一下,要添加新翻译,您可以访问Client/src/Locale/ ,其中最后一个Locale/文件夹包含一系列 JSON,其格式如下{LANGUAGE_IN_ISO_369}.json ;如果您想添加新的翻译,您只需遵循格式并复制相应的键,其值将更新为您正在创建的所需语言。
目前,Web 应用程序中存在以下翻译: French - Arabic - Chinese - German - English - Spanish - Italian - Portuguese - Russian - Turkish 。
如果您打算利用 Lovelace 来满足您的个人需求和目标,您可以忽略在 ReactJS 中实现的客户端应用程序。相反,请将您的注意力转移到服务器上,因为这是魔法真正发生的地方。
请记住,当使用 API 或 WebSocket 与后端通信时,作为Model or Role发送的数据不区分大小写,也就是说,如果Model的值为gPT-3.5-TUrbO并不重要,因为它将从后端格式化后, Prompt显然也不重要,但赋予Provider的值是,在后面的阅读中你将学习如何获取可用的 Provider 以便在与 AI 建立交互时能够使用,以同样的方式那您将能够知道它们各自的型号是什么,或者您现在可以访问lovelace后端公共实例的相同路径/api/v1/chat/providers/并查看信息。
以下是通过本机 Fetch 函数使用 API 的示例:
const Data = {
// Select the model you want to use for the request.
// <GPT-3.5-Turbo> | <GPT-4>
Model : 'GPT-3.5-Turbo' , // Recommended Model
// Use a provider according to the model you used, consider
// that you can see the list of providers next to the models
// that have available in:
// [GET REQUEST]: http://lovelace-backend.codewithrodi.com/api/v1/chat/providers/
Provider : 'GetGpt' , // Recommended Provider, you can also use 'DeepAi'
// GPT Role
Role : 'User' ,
// Prompt that you will send to the model
Prompt : 'Hi Ada, Who are you?'
} ;
// Note that if you want to use your own instance replace
// <https://lovelace-backend.codewithrodi.com> for the address
// from your server, or <http://0.0.0.0:8000> in case it is
// is running locally.
const Endpoint = 'https://lovelace-backend.codewithrodi.com/api/v1/chat/completions' ;
// We will make the request with the Fetch API provided in a way
// native by JavaScript, specified in the first instance
// the endpoint where our request will be made, while as a second
// parameter we specify by means of an object the method, the header and the
// body that will have the request.
fetch ( Endpoint , {
// /api/v1/chat/completions/
method : 'POST' ,
// We are sending a JSON, we specify the format
// in the request header
headers : { 'Content-Type' : 'application/json' } ,
body : JSON . stringify ( Data )
} )
// We transform the response into JSON
. then ( ( Response ) => Response . json ( ) )
// Once the response has been transformed to the desired format, we proceed
// to display the response from the AI in the console.
. then ( ( Response ) => console . log ( Response . Data . Answer ) )
// Consider that <Response> has the following structure
// Response -> { Data: { Answer: String }, Status: String(Success | ClientError) }
. catch ( ( RequestError ) => console . error ( RequestError ) ) ;如果您想使用axios进行通信,您可以考虑:
 const Axios = require ( 'axios' ) ;

const Data = {
    Model : 'GPT-3.5-Turbo' , // Recommended Model
    Provider : 'GetGpt' , // Recommended Provider, you can also use 'DeepAi'
    // GPT Role
    Role : 'User' ,
    Prompt : 'Hi Ada, Who are you?'
} ;

const Endpoint = 'https://lovelace-backend.codewithrodi.com/api/v1/chat/completions' ;

( async function ( ) {
    const Response = ( await Axios . post ( Endpoint , Data , { headers : { 'Content-Type' : 'application/json' } } ) ) . data ;
    console . log ( Response . Data . Answer ) ;
} ) ( ) ;您可以通过查看Client/src/Services/Chat/Context.jsx和Client/src/Services/Chat/Service.js文件来了解客户端如何通过 API 与后端通信,这就是魔法发生的地方。
从后端服务器来看,WebSocket 的服务器是在 SocketIO 的帮助下提供的,因此建议使用同一库提供的客户端,例如 NodeJS 中的npm i socket.io-client 。如果您想要“即时”响应,建议使用这种类型的通信,因为来自 AI 的响应与通过 API 进行通信不同,您不应该等待 AI 处理完响应才能显示。 。使用 WebSocket,来自 AI 的响应会分部分传输,从而立即生成与客户端的交互。
 const { io } = require ( 'socket.io-client' ) ;

// Using the NodeJS 'readline' module, like this
// allow <Prompts> to be created by the user
// to our console application.
const ReadLine = require ( 'readline' ) . createInterface ( {
    input : process . stdin ,
    output : process . stdout
} ) ;

// We store the address where the Lovelace backend is mounted.
// In case your instance is running locally
// you can change the value of <Endpoint> to something like <http://0.0.0.0:8000>.
const Endpoint = 'http://lovelace-backend.codewithrodi.com/' ;

( async function ( ) {
    const Socket = io ( Endpoint ) . connect ( ) ;
    console . log ( `Connecting to the server... [ ${ Endpoint } ]` ) ;

    Socket . on ( 'connect' , ( ) => {
        console . log ( 'Connected, happy hacking!' ) ;
        RunApplicationLoop ( ) ;
    } ) ;

    Socket . on ( 'disconnect' , ( ) => {
        console . log ( 'nDisconnected, bye bye...!' ) ;
        process . exit ( 0 ) ;
    } ) ;

    // We use <process.stdout.write(...)> instead of <console.log(...)> because
    // in this way we print directly to the console without each time
    // that a part of the response is received, a new line (n) is executed.
    Socket . on ( 'Response' , ( StreamedAnswer ) => process . stdout . write ( StreamedAnswer ) ) ;

    const BaseQuery = {
        // We indicate the model that we want to use to communicate with the AI
        // 'GPT-3.5-Turbo' - 'GPT-4'
        Model : 'GPT-3.5-Turbo' ,
        // Provider to use in the communication, keep in mind that not all
        // providers offer ChatGPT 3.5 or ChatGPT 4. You can make a request
        // [GET] to <https://lovelace-backend.codewithrodi.com/api/v1/chat/providers/>
        Provider : 'GetGpt' ,
        Role : 'User' ,
    } ;

    const HandleClientPrompt = ( ) => new Promise ( ( Resolve , Reject ) => {
        const HandleStreamedResponseEnd = ( MaybeError ) => {
            if ( MaybeError ) {
                return Reject ( MaybeError ) ;
            }
            Resolve ( ) ;
        } ;

        ReadLine . question ( 'Prompt > ' , ( Prompt ) => {
            // We issue <Prompt> to the server, where as the second parameter
            // send the Query to it, specifying the Model, Provider, Role and Prompt.
            // The last parameter corresponds to the Callback that will be called
            // once the transmission of the response is finished, consider that this
            // callback receives a parameter, which corresponds to whether there is an error
            // or not during transmission, its content is therefore the error.
            Socket . emit ( 'Prompt' , { Prompt , ... BaseQuery } , HandleStreamedResponseEnd ) ;
        } ) ;
    } ) ;

    const RunApplicationLoop = async ( ) => {
        while ( true ) {
            await HandleClientPrompt ( ) ;
            console . log ( 'n' ) ;
        }
    } ;
} ) ( ) ; 如果您想通过 WebSocket 以另一种语言与 Lovelace 后端建立通信,而不是所提供的语言,您可以考虑:
考虑一下,尽管后端使用了GPT4FREE python 库,但后者的提供程序与 Lovelace 提供的提供程序不同。您可以使用 API 获取可用提供商的列表,您将在其中获取诸如允许使用的模型、托管服务的网址以及与 AI 交互时必须指定的名称等信息你已经在例子中看到了。以前的(API、WS)。
您应该从https://lovelace-backend.codewithrodi.com/api/v1/chat/providers/获得的响应应该是:
{
   "Status" : " Success " ,
   "Data" :{
      "Providers" :{
        // List of providers available to use on WebSocket's
        "WS" :[
            {
                // Name to specify when making the query
                "Name" : " DeepAi " ,
                // Web address where the service is hosted
                "Website" : " https://deepai.org " ,
                // Available models
                "Models" :[ " gpt-3.5-turbo " ]

            },
            // ! Others WebSocket's providers...
            { "Name" : " Theb " , "Website" : " https://theb.ai " , "Models" :[ " gpt-3.5-turbo " ] },
            { "Name" : " Yqcloud " , "Website" : " https://chat9.yqcloud.top/ " , "Models" :[ " gpt-3.5-turbo " ] },
            { "Name" : " You " , "Website" : " https://you.com " , "Models" :[ " gpt-3.5-turbo " ] },
            { "Name" : " GetGpt " , "Website" : " https://chat.getgpt.world/ " , "Models" :[ " gpt-3.5-turbo " ] }
        ],
        // List of Providers available to be able to use through the API
        "API" :[
            {
                // Name to specify when making the query
                "Name" : " Aichat " ,
                // Web address where the service is hosted
                "Website" : " https://chat-gpt.org/chat " ,
                // Available models
                "Models" :[ " gpt-3.5-turbo " ]
            },
            // ! Others API providers...
            { "Name" : " ChatgptLogin " , "Website" : " https://chatgptlogin.ac " , "Models" :[ " gpt-3.5-turbo " ] },
            { "Name" : " DeepAi " , "Website" : " https://deepai.org " , "Models" :[ " gpt-3.5-turbo " ] },
            { "Name" : " Yqcloud " , "Website" : " https://chat9.yqcloud.top/ " , "Models" :[ " gpt-3.5-turbo " ] },
            { "Name" : " You " , "Website" : " https://you.com " , "Models" :[ " gpt-3.5-turbo " ] },
            { "Name" : " GetGpt " , "Website" : " https://chat.getgpt.world/ " , "Models" :[ " gpt-3.5-turbo " ] }
        ]
      }
   }
}
正如您所看到的,提供程序列表分为两部分,一部分用于通过 API 进行的查询,一部分用于使用 WebSocket 的查询。
与涉及对 Lovelace 后端服务器的请求的其他示例不同,获取提供商列表及其各自的可用模型是一项非常简单的任务,因为我们只需向/api/v1 /chat/providers/发送 [GET] 请求,其中响应将是之前向您显示的 JSON。
对于以下示例,我们将在 NodeJS 中使用 Axios,您可以使用npm i axios命令通过 NPM 包管理器进行安装。
 const Axios = require ( 'axios' ) ;

( async function ( ) {
    // Consider that, you can replace <https://lovelace-backend.codewithrodi.com> with
    // the address where your backend server is mounted. If t

