此專案可作為開發人員使用 Amazon Bedrock 代理程式跨各種大型語言模型 (LLM) 擴展其用例的基準。目標是展示利用 Bedrock 上的多個模型來創建適應不同場景的鍊式響應的潛力。除了生成基於文字的輸出之外,該應用程式還支援使用圖像生成和文字到圖像模型創建和檢查圖像。這種擴充功能的功能增強了應用程式的多功能性,使其適合更具創意和視覺效果的用例。
對於喜歡基礎架構即程式碼 (IaC) 方法的人,我們還提供了一個 AWS CloudFormation 模板,用於設定 Amazon Bedrock 代理、S3 儲存桶和 Lambda 函數等核心元件。如果您希望透過 AWS CloudFormation 部署此項目,請參閱此處的研討會指南。
或者,本自述文件將引導您完成透過 AWS 控制台手動設定和配置 Amazon Bedrock 代理程式的逐步流程,使您能夠靈活地試驗最新模型並充分釋放 Bedrock 代理的潛力。
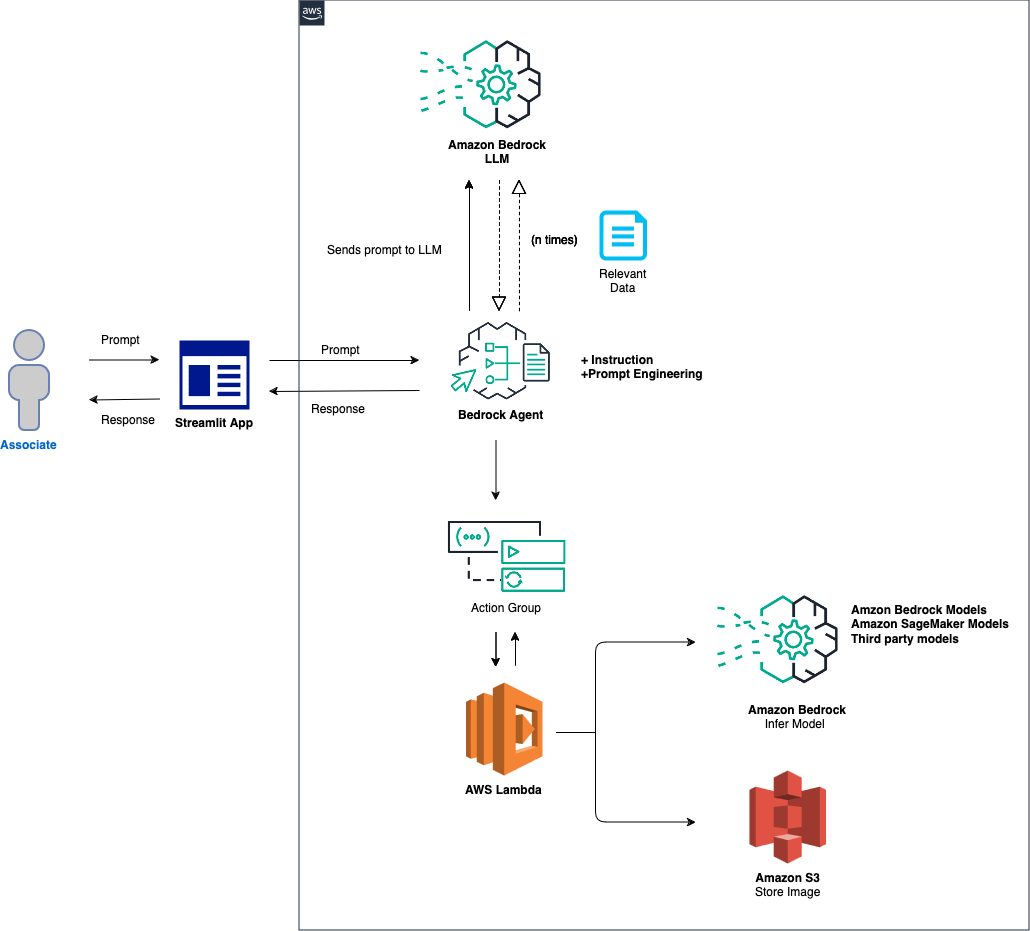
該解決方案的總體概述如下:
代理程式和環境設定:此解決方案首先配置 Amazon Bedrock 代理程式、AWS Lambda 函數和 Amazon S3 儲存桶。此步驟為模型互動和資料處理奠定了基礎,使系統準備好接收和處理來自前端應用程式的提示。提示處理與模型推理:當從前端應用程式收到提示時,Bedrock 代理程式會使用操作組機制評估提示並將其與指定的模型 ID 一起分派到 Lambda 函數。此步驟利用操作組的 API 模式進行精確的參數處理,促進基於輸入提示的有效模型推理。資料處理和回應產生:對於涉及圖像到文字或文字到圖像轉換的任務,Lambda 函數與 S3 儲存桶互動以對圖像執行必要的讀取或寫入操作。此步驟確保多媒體內容的動態處理,最終產生由初始提示指示的回應或轉換。
在以下部分中,我們將引導您完成:
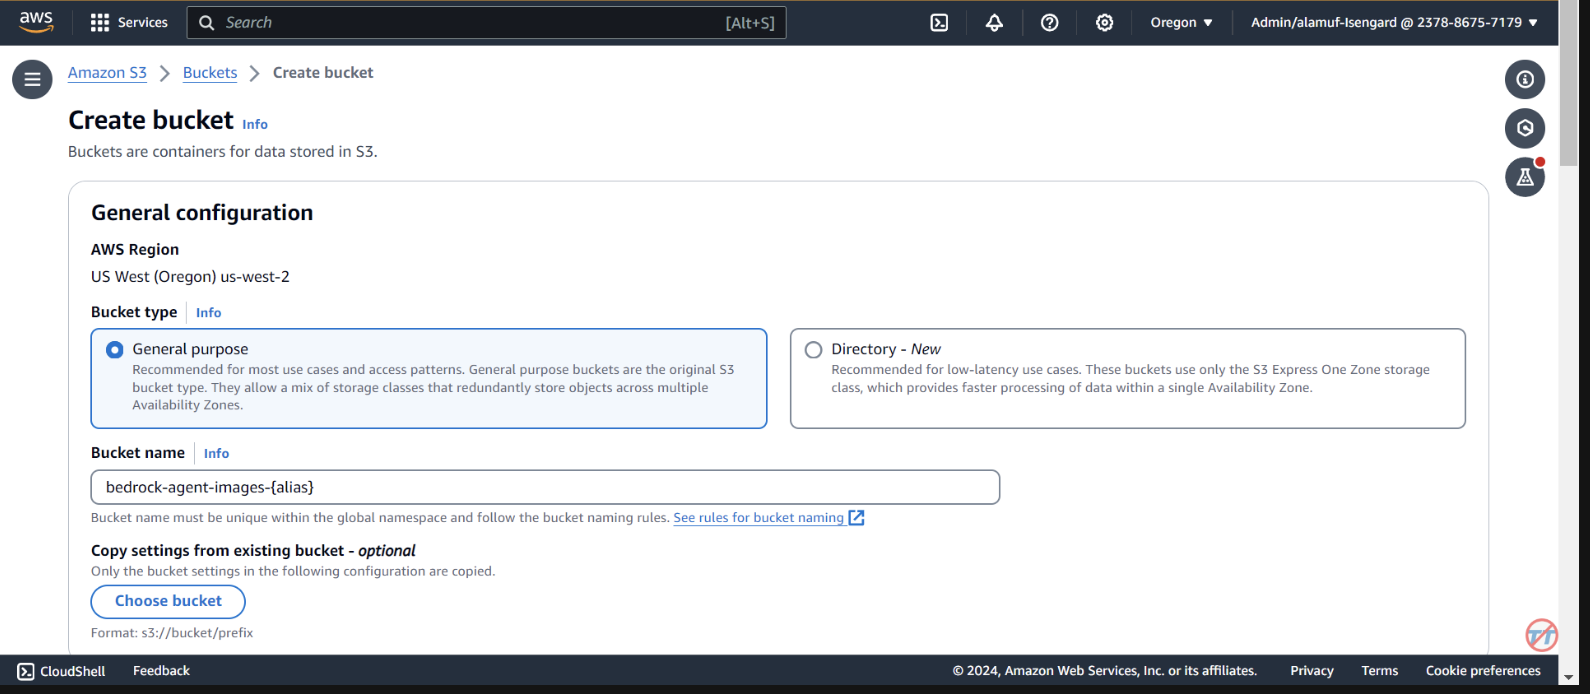
AWS SAM(無伺服器應用程式模型)是一個開源框架,可協助您在 AWS 上建立無伺服器應用程式。它簡化了無伺服器資源(例如 AWS Lambda、Amazon API Gateway、Amazon DynamoDB 等)的部署、管理和監控。以下是有關如何設定和使用 AWS SAM 的綜合指南。
該框架透過抽象雲端基礎架構的複雜性,簡化了創建、部署和管理無伺服器應用程式的過程。它提供了一種使用設定檔和一組命令來定義和管理無伺服器資源的統一方法。
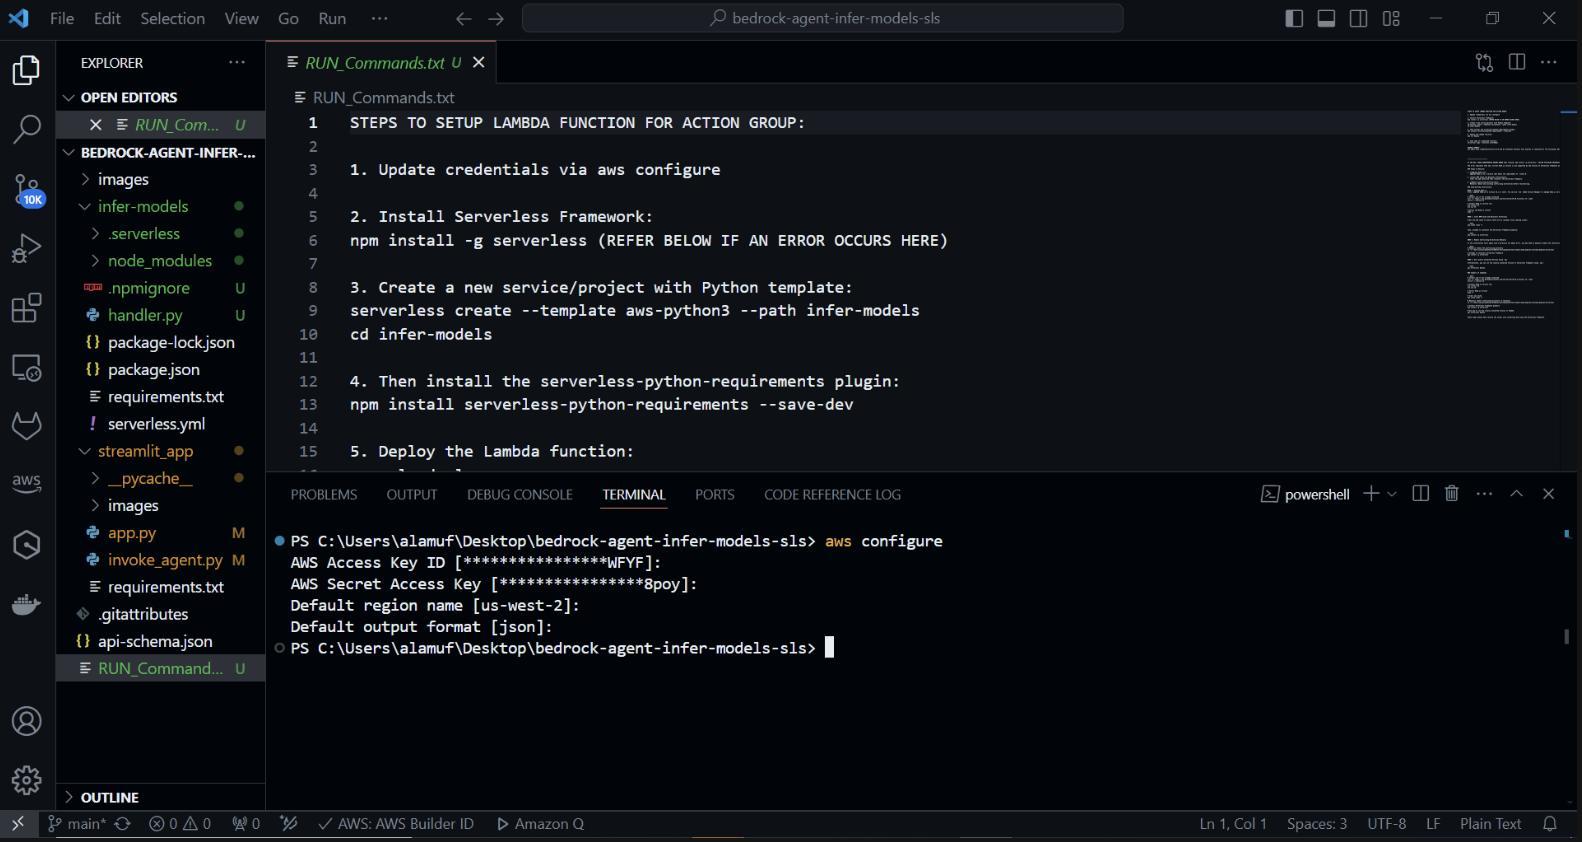
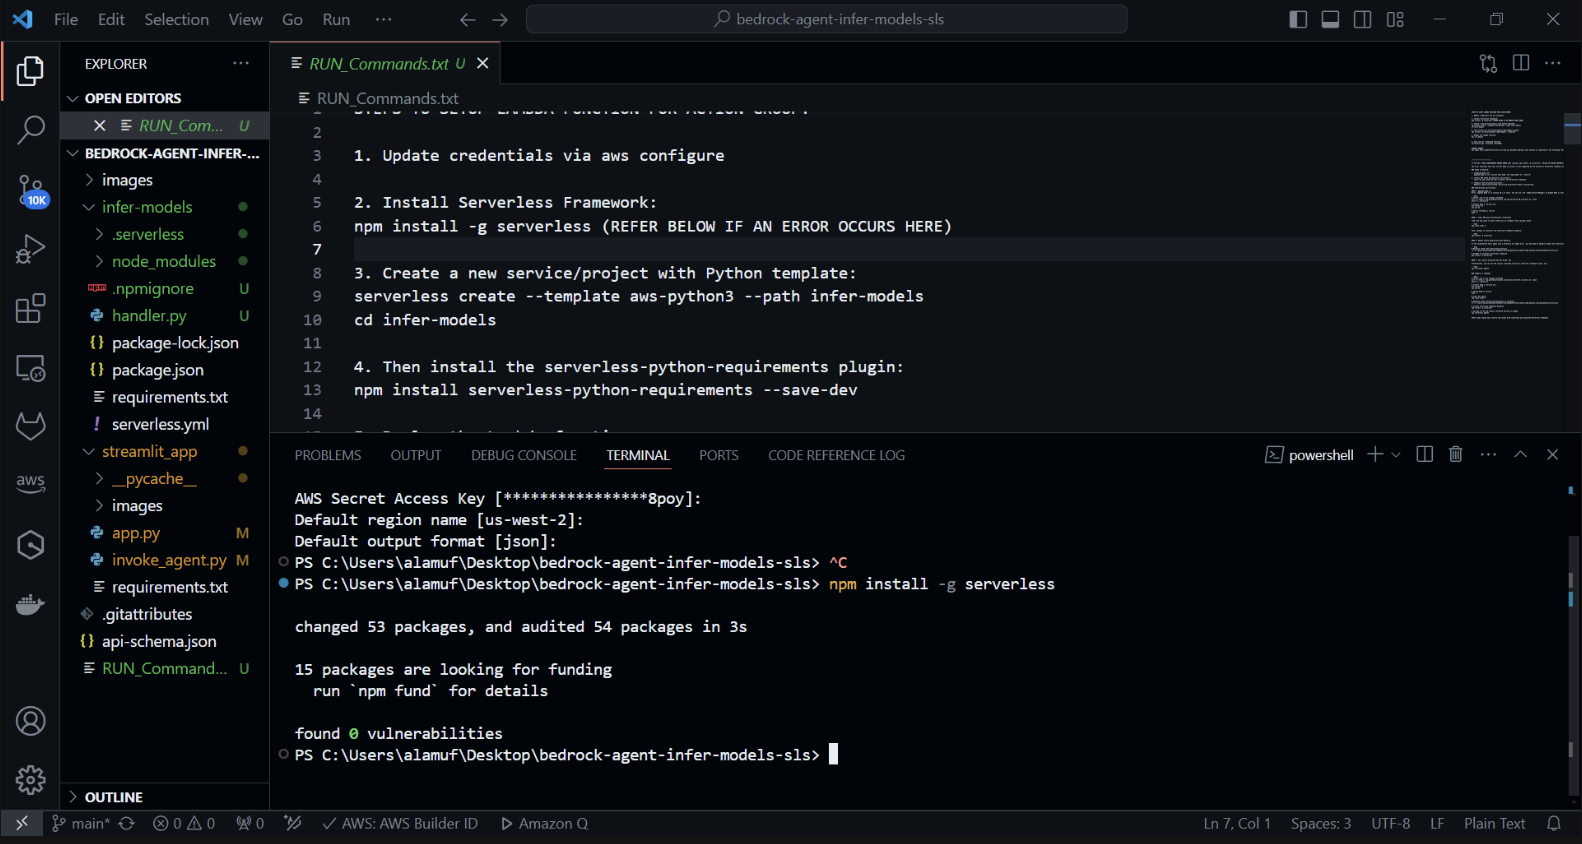
使用 Python 範本建立新的無伺服器專案。在終端機中執行: cd infer-models然後執行serverless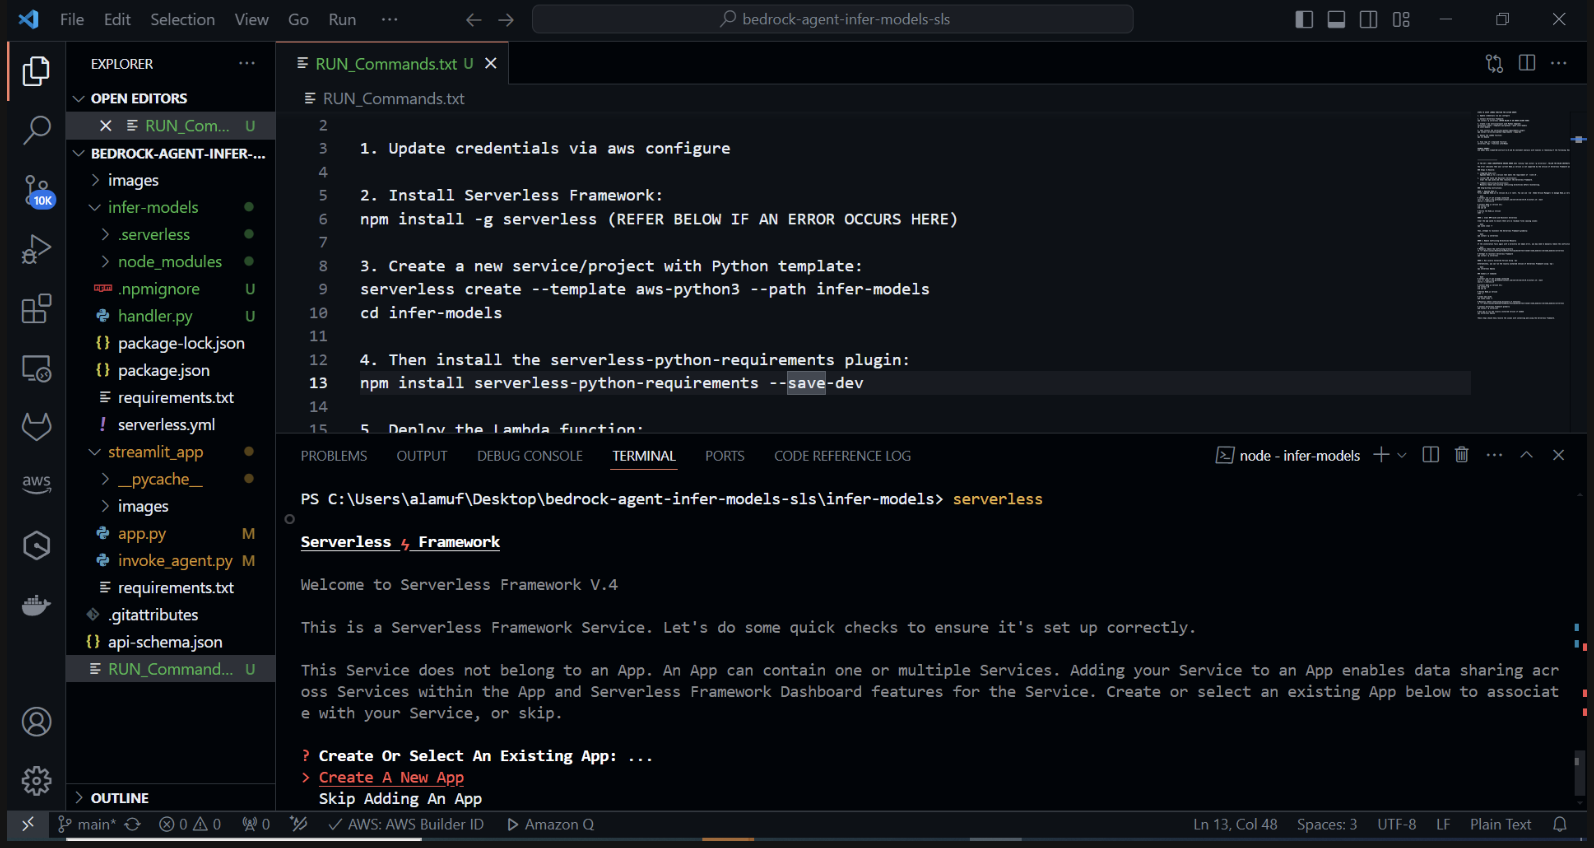
這將啟動無伺服器框架的互動式專案建立過程。選擇“aws-python3”模板並提供“infer-models”作為項目的名稱。
這將建立一個名為infer-models 的新目錄,其中包含基本的無伺服器專案結構和 Python 範本。
系統也可能提示您登入/註冊。選擇“登入/註冊”選項。這將開啟一個瀏覽器窗口,您可以在其中建立一個新帳戶或登入(如果您已有帳戶)。登入或建立帳戶後,選擇「框架開源」選項,可以免費使用。
如果您的堆疊部署失敗,請註解掉serverless.yml 檔案的第 2 行
執行 Serverless 指令並依照指示操作後,將會建立一個具有專案名稱(例如 infer-models)的新目錄,其中包含 Serverless 專案的樣板結構和設定檔。
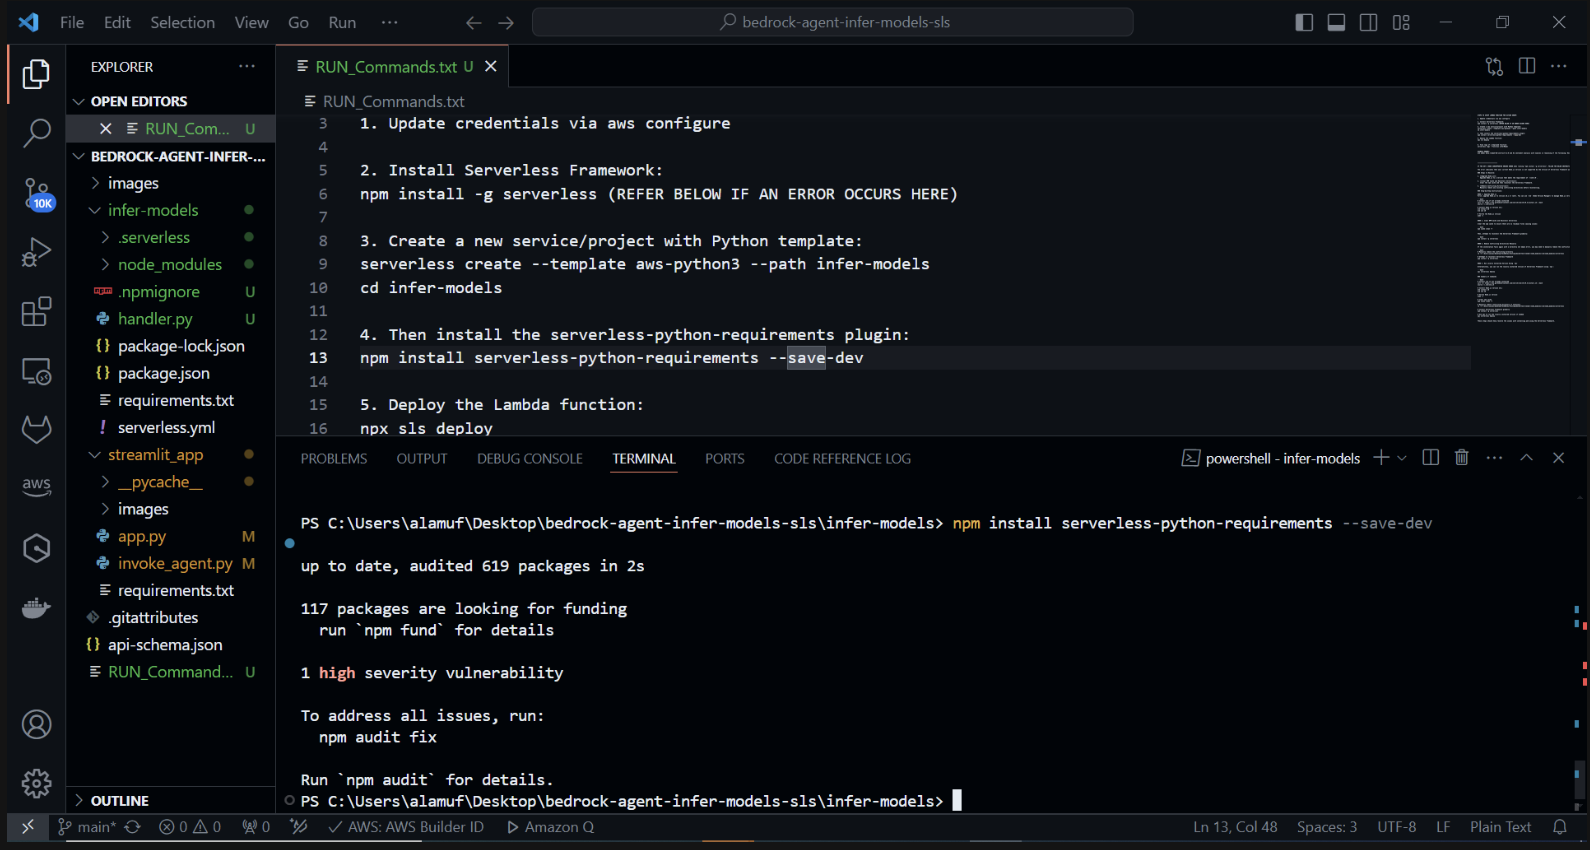
現在我們將安裝 serverless-python-requirements 外掛: serverless-python-requirements 外掛程式可協助管理無伺服器專案的 Python 依賴項。透過運行安裝它:
npm install serverless-python-requirements —save-dev
3.) npx sls deploy
(在運行上述命令之前,需要安裝並運行 Docker 引擎。更多資訊可以在此處找到)
(這將打包並部署AWS Lambda函數)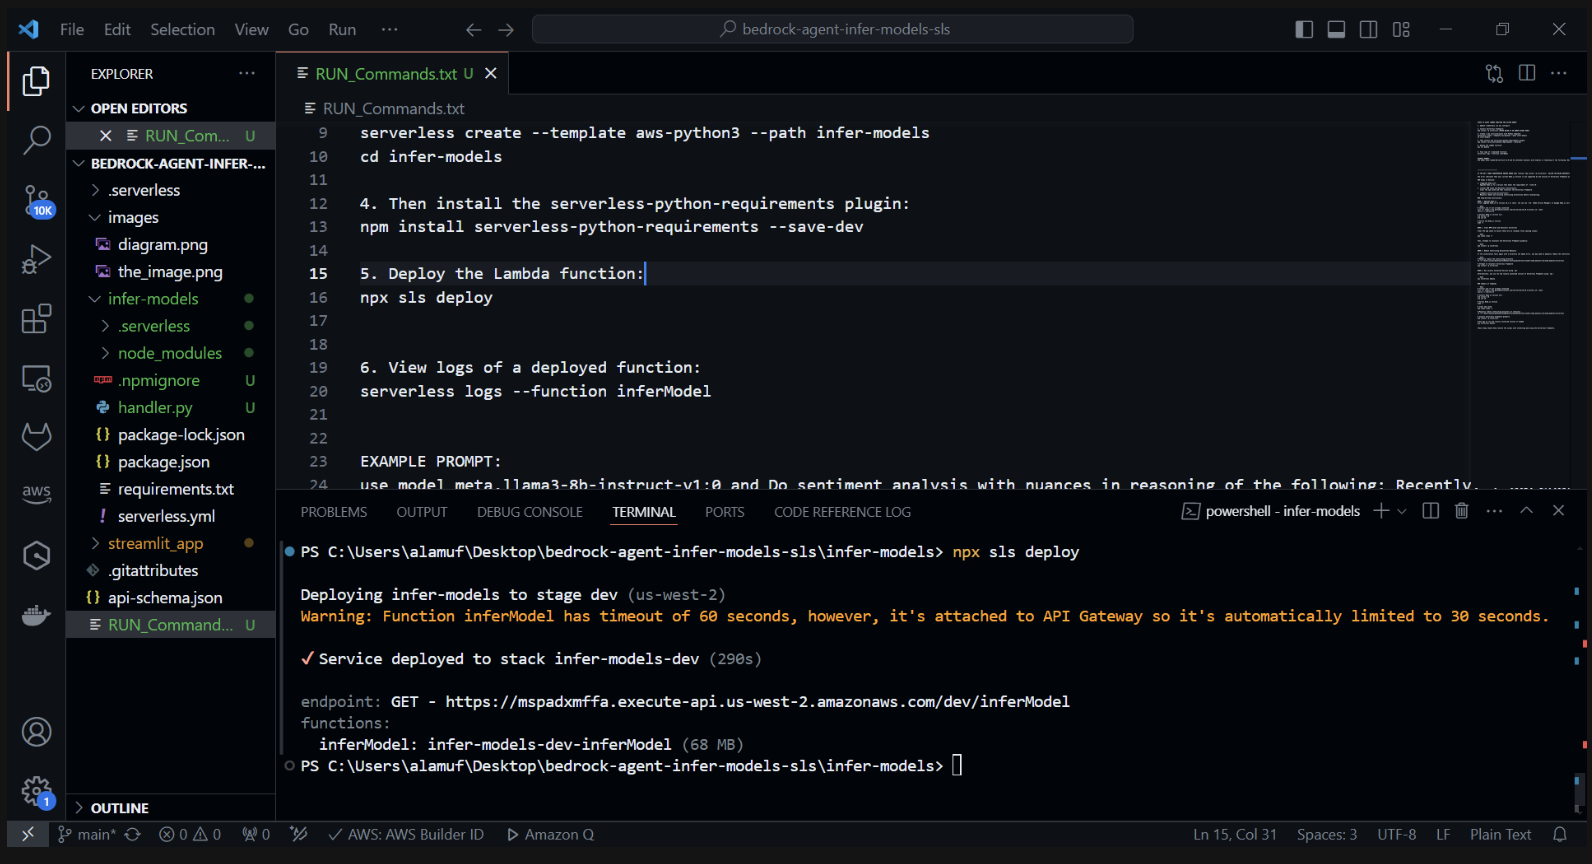
在 AWS 控制台中檢查 CloudFormation 內的部署
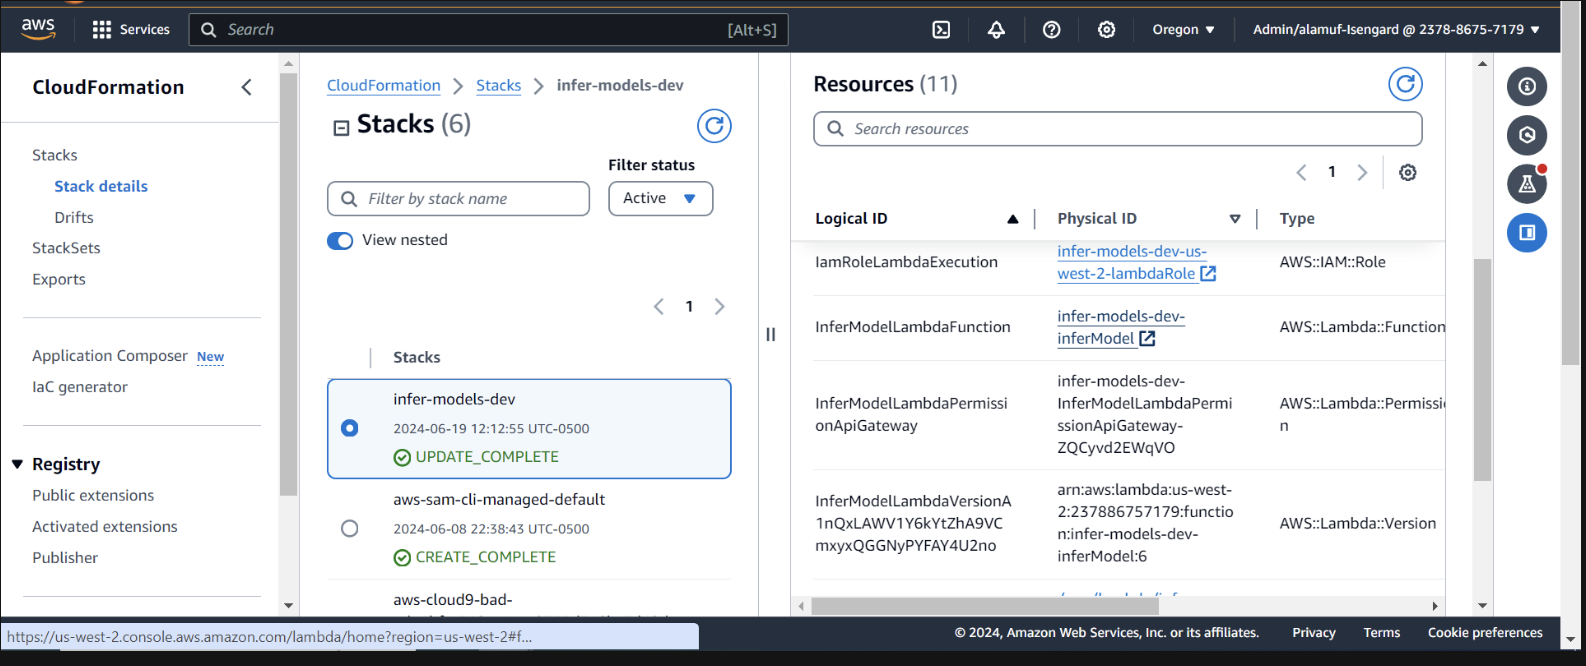

我們需要提供基岩代理權限來呼叫 lambda 函數。開啟 lambda 函數並向下捲動以選擇「配置」標籤。在左側,選擇權限。向下捲動到基於資源的策略語句並選擇新增權限。
在中間為您的策略聲明選擇AWS 服務。為您的服務選擇「其他」 ,並為 StatementID 輸入「allow-agent」 。對於校長,請輸入bedrock.amazonaws.com 。
輸入arn:aws:bedrock:us-west-2:{aws-account-id}:agent/* 。請注意,AWS 建議使用最低權限,因此只有允許的代理才能呼叫此 Lambda 函數。 ARN 末尾的 * 授予帳戶中的任何代理存取權限以呼叫此 Lambda。理想情況下,我們不會在生產環境中使用它。最後,對於操作,選擇lambda:InvokeFunction ,然後選擇儲存。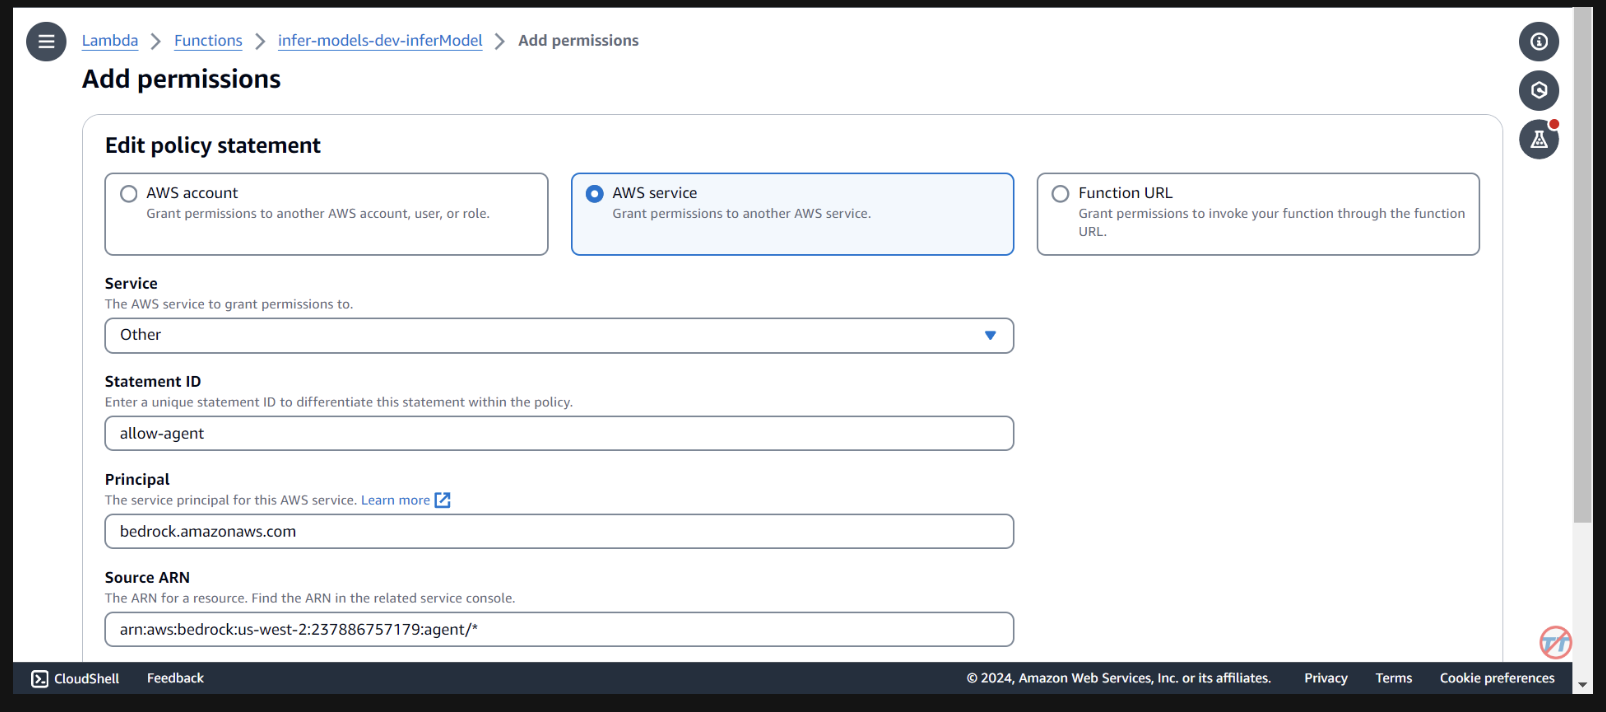
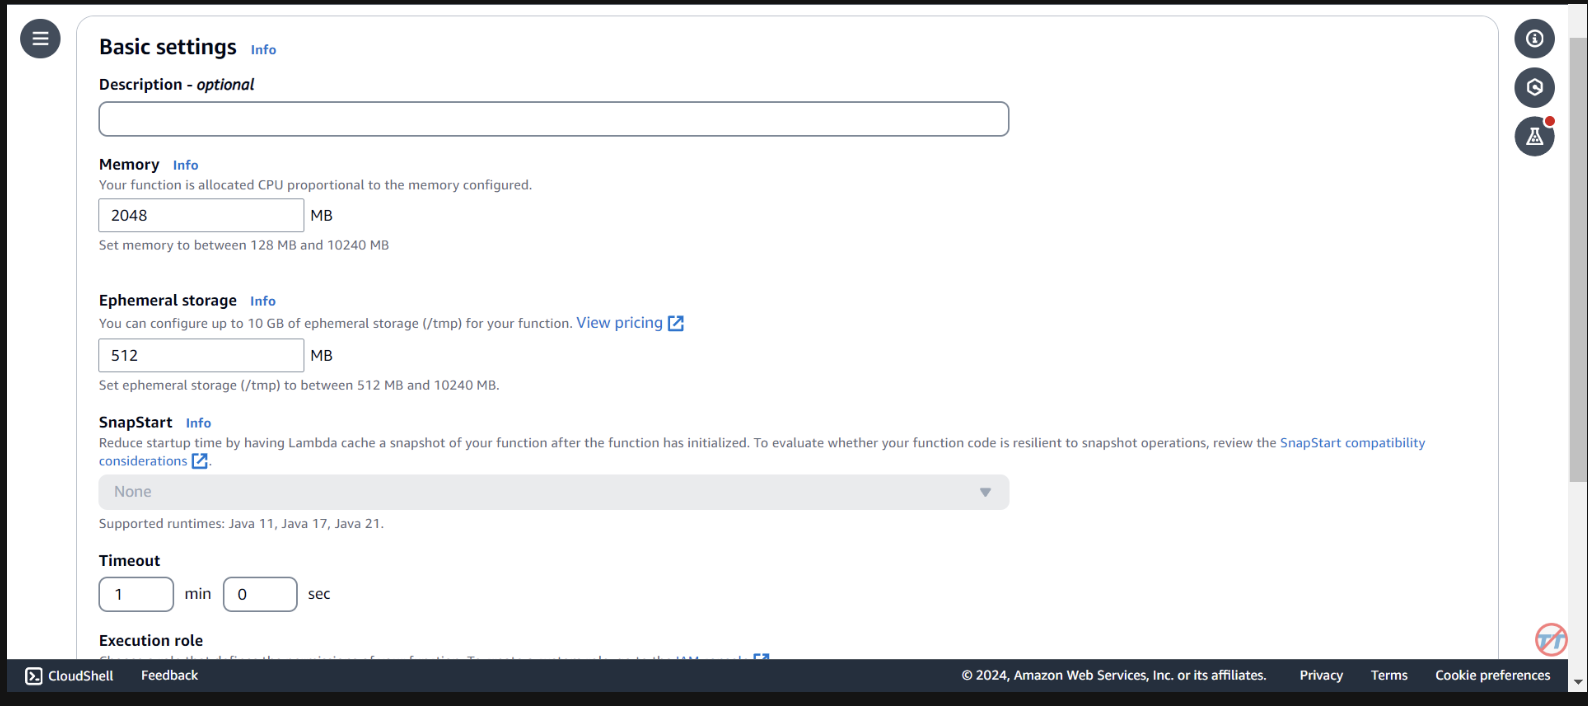
為了幫助推理,我們將增加 Lambda 函數的 CPU/記憶體。我們還將增加超時,以使函數有足夠的時間來完成呼叫。選擇左側的常規配置,然後選擇右側的編輯。
將記憶體變更為2048 MB ,並將逾時變更為1 分鐘。向下捲動,然後選擇儲存。
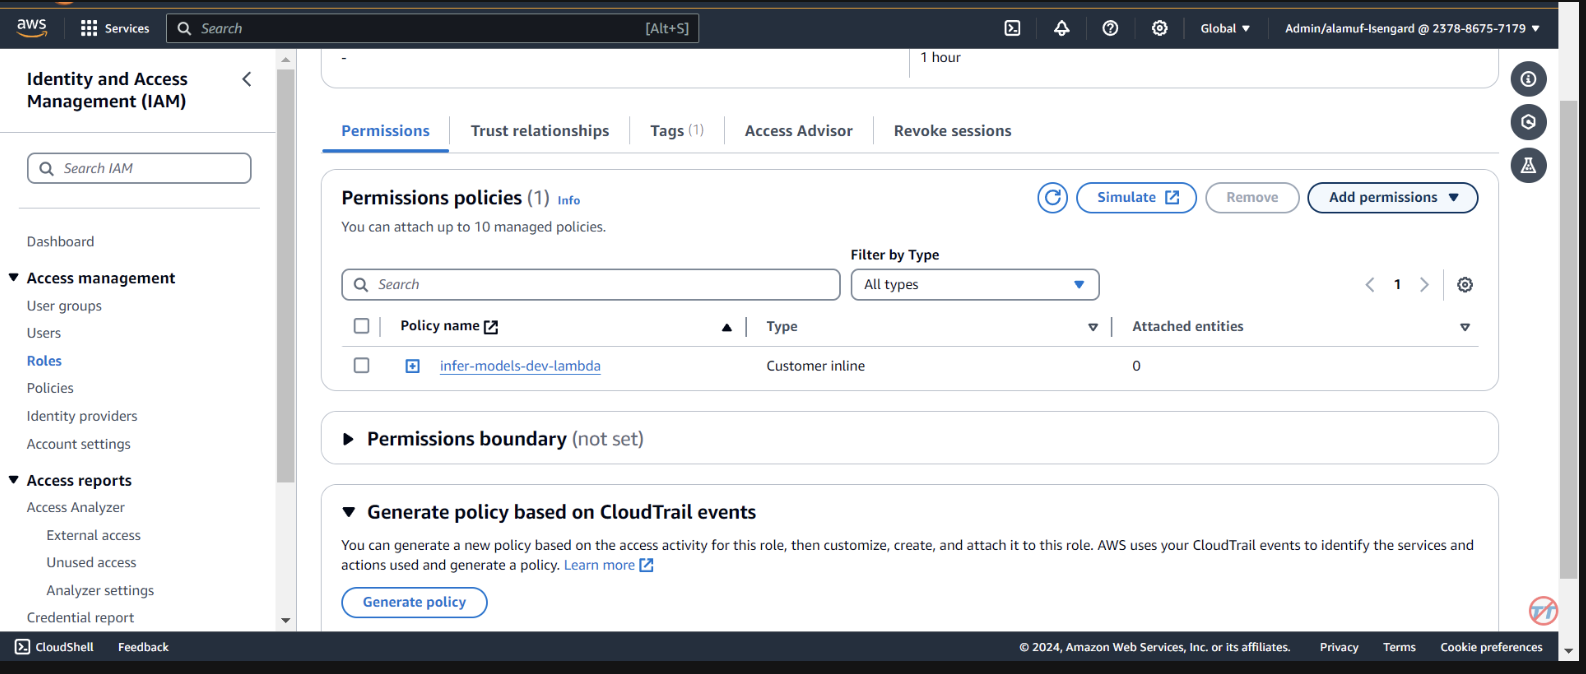
Agents 。提供代理名稱,例如multi-model-agent,然後建立代理。 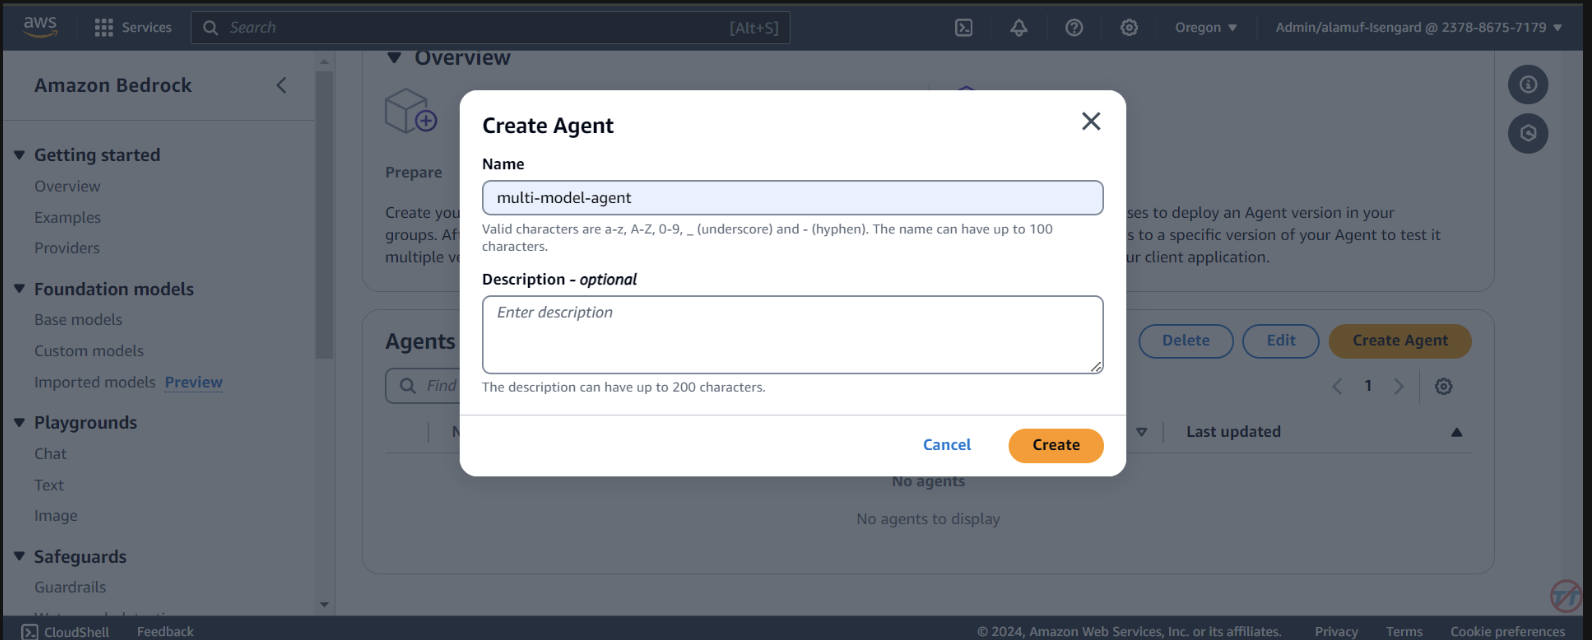
You are a research agent that interacts with various large language models. You pass the model ID and prompt from requests to large language models to create and store images. Then, the LLM will return a presigned URL to the image similar to the URL example provided. You also call LLMS for text and code generation, summarization, problem solving, text-to-sql, response comparisons and ratings. Remeber. you use other large language models for inference. Do not decide when to provide your own response, unless asked.
之後,請確保捲動到頂部並選擇“儲存”按鈕,然後再進行下一步。
接下來,我們將新增一個操作組。向下捲動到Action groups然後選擇新增。呼叫操作組call-model 。
對於操作組類型,選擇使用 API 架構定義
下一部分,我們將選擇現有的 Lambda 函數infer-models-dev-inferModel 。
對於 API 架構,我們將選擇Define with in-line OpenAPI schema editor 。將下面的架構複製並貼上到內聯 OpenAPI 架構編輯器中,然後選擇新增: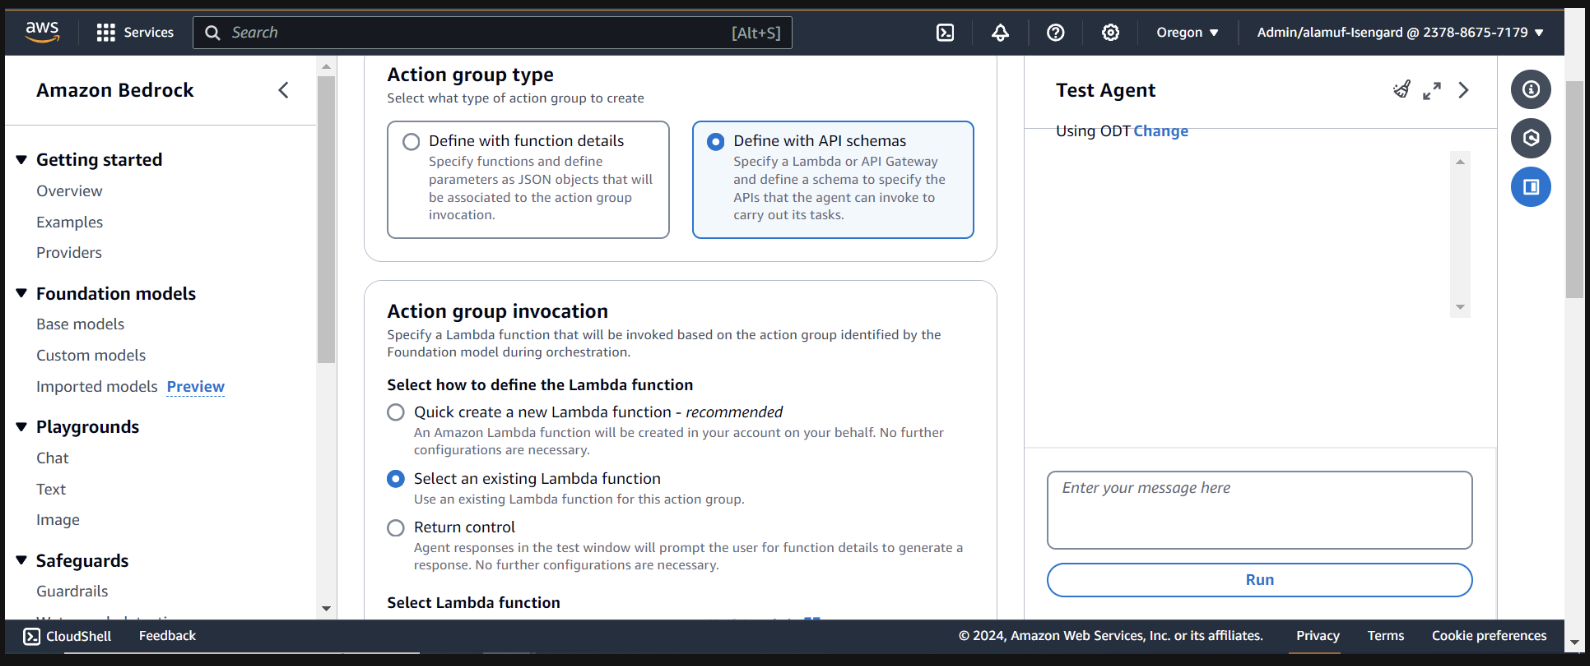
(This API schema is needed so that the bedrock agent knows the format structure and parameters required for the action group to interact with the Lambda function.)
 {
  "openapi": "3.0.0",
  "info": {
    "title": "Model Inference API",
    "description": "API for inferring a model with a prompt, and model ID.",
    "version": "1.0.0"
  },
  "paths": {
    "/callModel": {
      "post": {
        "description": "Call a model with a prompt, model ID, and an optional image",
        "parameters": [
          {
            "name": "modelId",
            "in": "query",
            "description": "The ID of the model to call",
            "required": true,
            "schema": {
              "type": "string"
            }
          },
          {
            "name": "prompt",
            "in": "query",
            "description": "The prompt to provide to the model",
            "required": true,
            "schema": {
              "type": "string"
            }
          }
        ],
        "requestBody": {
          "required": true,
          "content": {
            "multipart/form-data": {
              "schema": {
                "type": "object",
                "properties": {
                  "modelId": {
                    "type": "string",
                    "description": "The ID of the model to call"
                  },
                  "prompt": {
                    "type": "string",
                    "description": "The prompt to provide to the model"
                  },
                  "image": {
                    "type": "string",
                    "format": "binary",
                    "description": "An optional image to provide to the model"
                  }
                },
                "required": ["modelId", "prompt"]
              }
            }
          }
        },
        "responses": {
          "200": {
            "description": "Successful response",
            "content": {
              "application/json": {
                "schema": {
                  "type": "object",
                  "properties": {
                    "result": {
                      "type": "string",
                      "description": "The result of calling the model with the provided prompt and optional image"
                    }
                  }
                }
              }
            }
          }
        }
      }
    }
  }
}
Orchestration下,啟用Override orchestration template defaults選項。 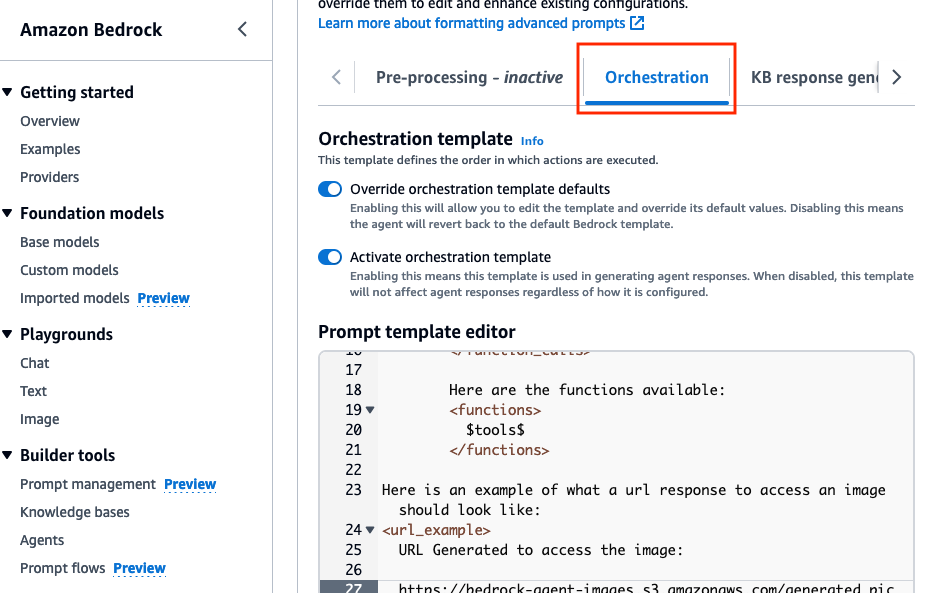
 Here is an example of what a url response to access an image should look like:
<url_example>
  URL Generated to access the image:

  https://bedrock-agent-images.s3.amazonaws.com/generated_pic.png?AWSAccessKeyId=123xyz&Signature=rlF0gN%2BuaTHzuEDfELz8GOwJacA%3D&x-amz-security-token=IQoJb3JpZ2msqKr6cs7sTNRG145hKcxCUngJtRcQ%2FzsvDvt0QUSyl7xgp8yldZJu5Jg%3D%3D&Expires=1712628409
</url_example>
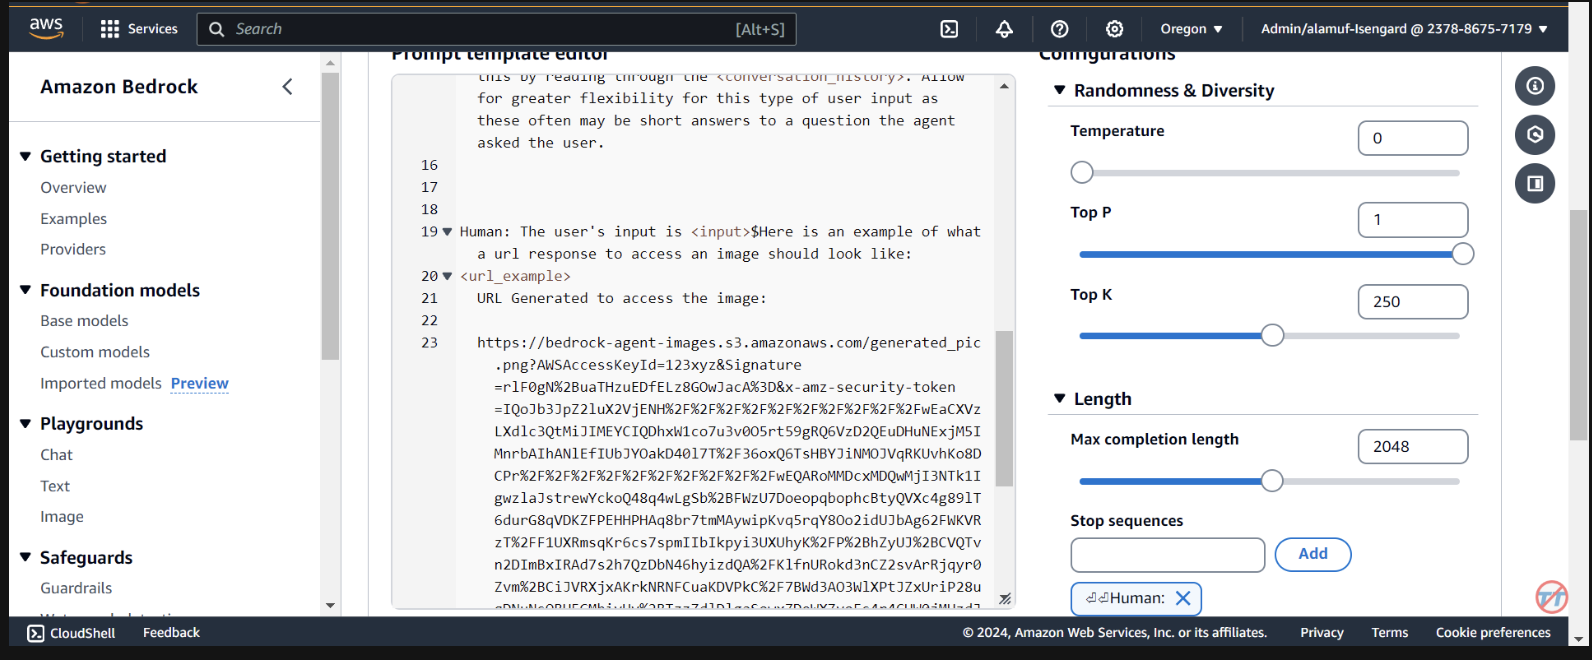
在 S3 儲存桶中產生映像後,此提示有助於為代理程式提供格式化預簽章 URL 回應的範例。此外,也可以選擇使用自訂解析器 Lambda 函數來進行更精細的格式化。
捲動到底部並選擇Save and exit按鈕。
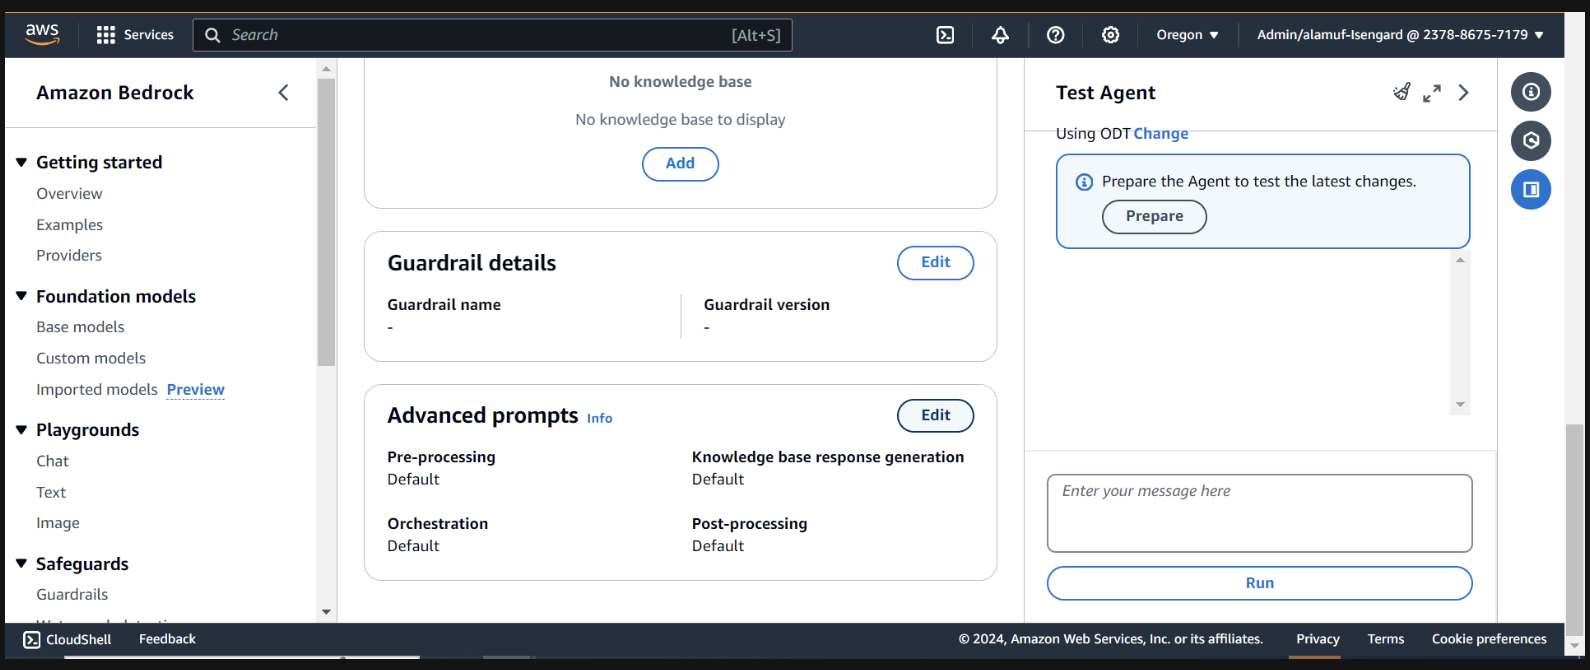
之後,請確保再次點擊頂部的Save and exit按鈕,然後點擊右側測試代理 UI 頂部的「準備」按鈕。這將使我們能夠測試最新的變更。
(繼續之前,請確保透過 Amazon Bedrock 控制台啟用您計劃測試的所有模型。)
要開始測試,請透過在代理構建器頁面上找到準備按鈕來準備代理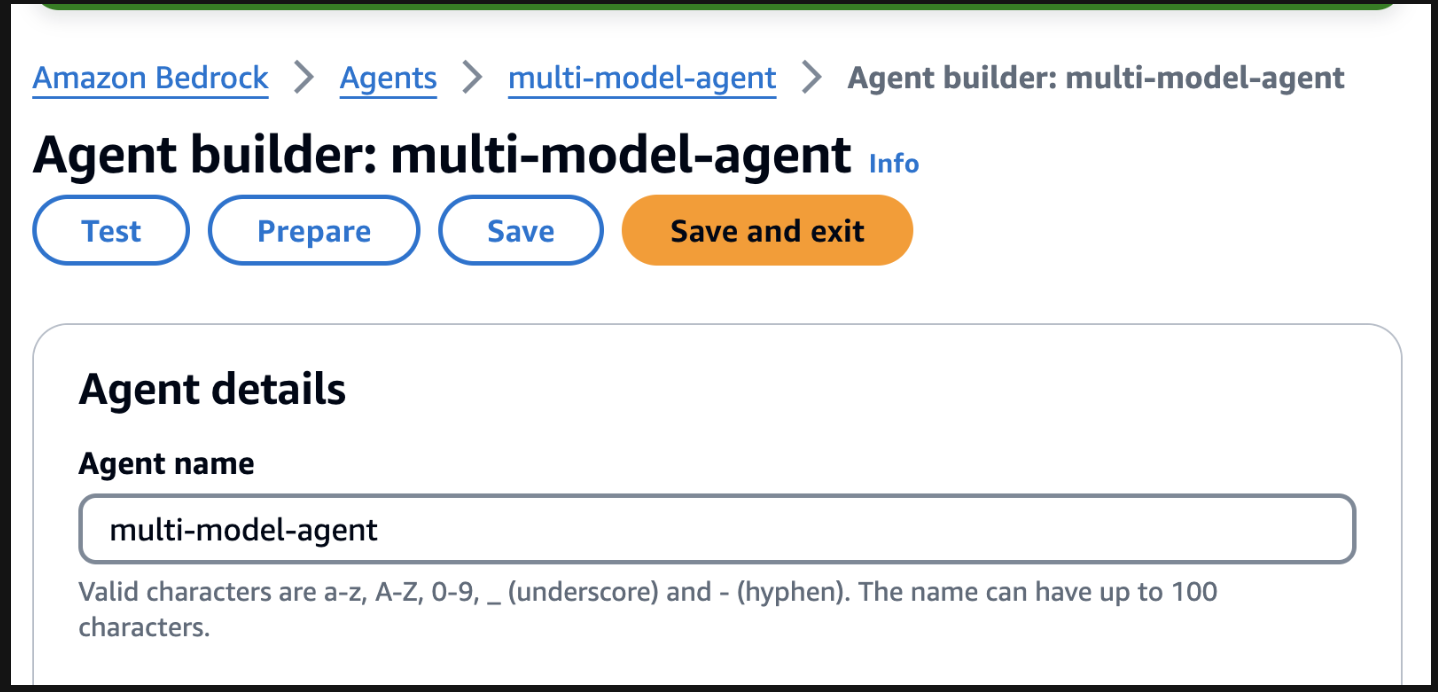
在右側,您應該會看到一個使用使用者輸入欄位測試代理的選項。以下是您可以測試的一些提示。然而,我們鼓勵您發揮創意並測試提示的變化。
測試前需要注意一件事。當您執行文字到圖像或圖像到文字時,項目程式碼會靜態引用相同的 .png 檔案。在理想的環境中,該步驟可以配置得更動態。
Use model amazon.titan-image-generator-v1 and create me an image of a woman in a boat on a river.
Use model anthropic.claude-3-haiku-20240307-v1:0 and describe to me the image that is uploaded. The model function will have the information needed to provide a response. So, dont ask about the image.
Use model stability.stable-diffusion-xl-v1. Create an image of an astronaut riding a horse in the desert.
Use model meta.llama3-70b-instruct-v1:0. You are a gifted copywriter, with special expertise in writing Google ads. You are tasked to write a persuasive and personalized Google ad based on a company name and a short description. You need to write the Headline and the content of the Ad itself. For example: Company: Upwork Description: Freelancer marketplace Headline: Upwork: Hire The Best - Trust Your Job To True Experts Ad: Connect your business to Expert professionals & agencies with specialized talent. Post a job today to access Upwork's talent pool of quality professionals & agencies. Grow your team fast. 90% of customers rehire. Trusted by 5M+ businesses. Secure payments. - Write a persuasive and personalized Google ad for the following company. Company: Click Description: SEO services
(如果您想對此項目進行 UI 設置,請繼續執行步驟 6)
您需要有一個agent alias ID以及此步驟的agent ID 。前往 Bedrock 管理控制台,然後選擇您的多模型代理程式。從Agent overview部分的右上角複製Agent ID 。然後,向下捲動到“別名”並選擇“建立” 。將別名命名為a1 ,然後建立代理程式。儲存產生的別名 ID ,而不是別名。 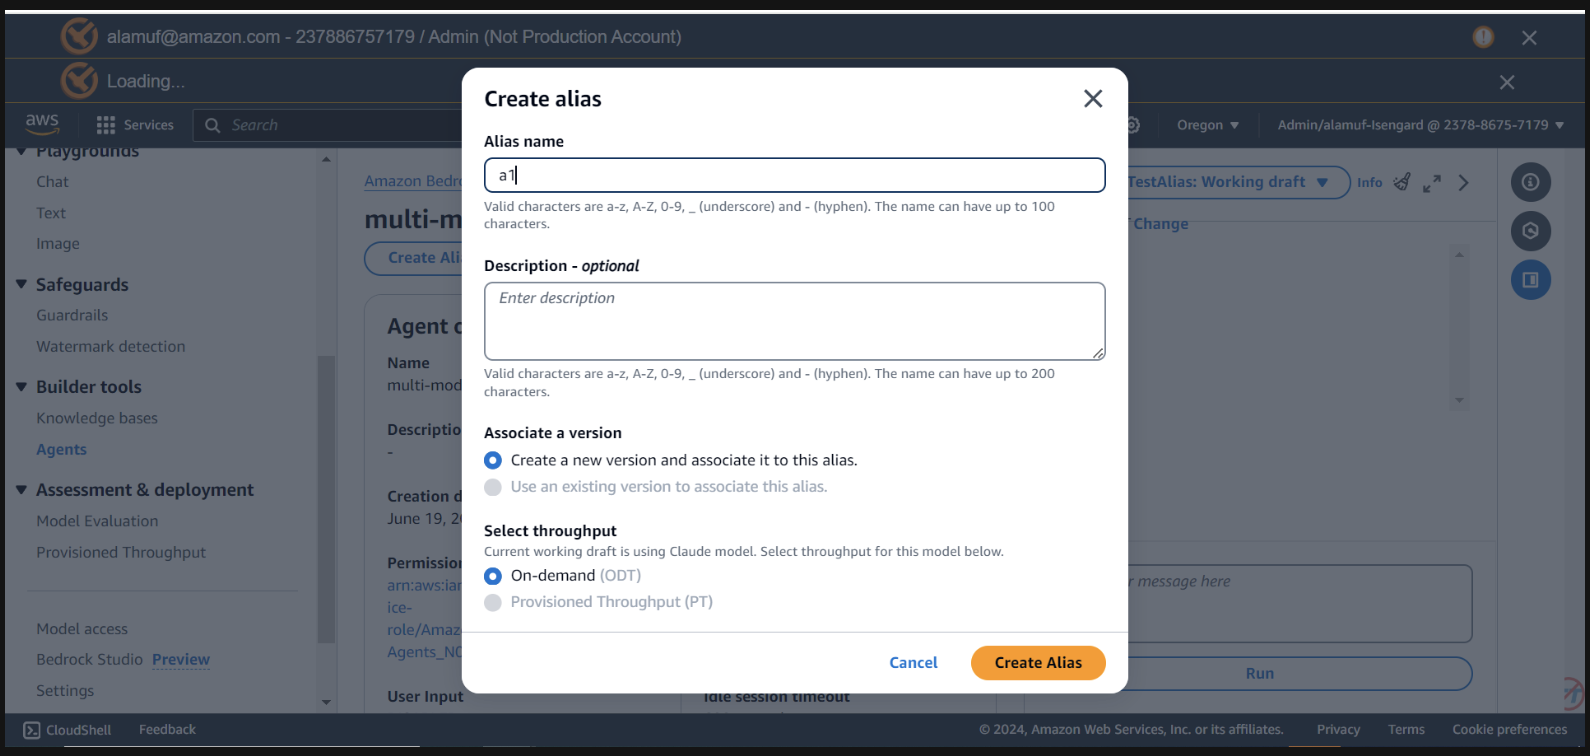
現在,導航回用於開啟專案的 IDE。
導航到streamlit_app目錄:
更新配置:
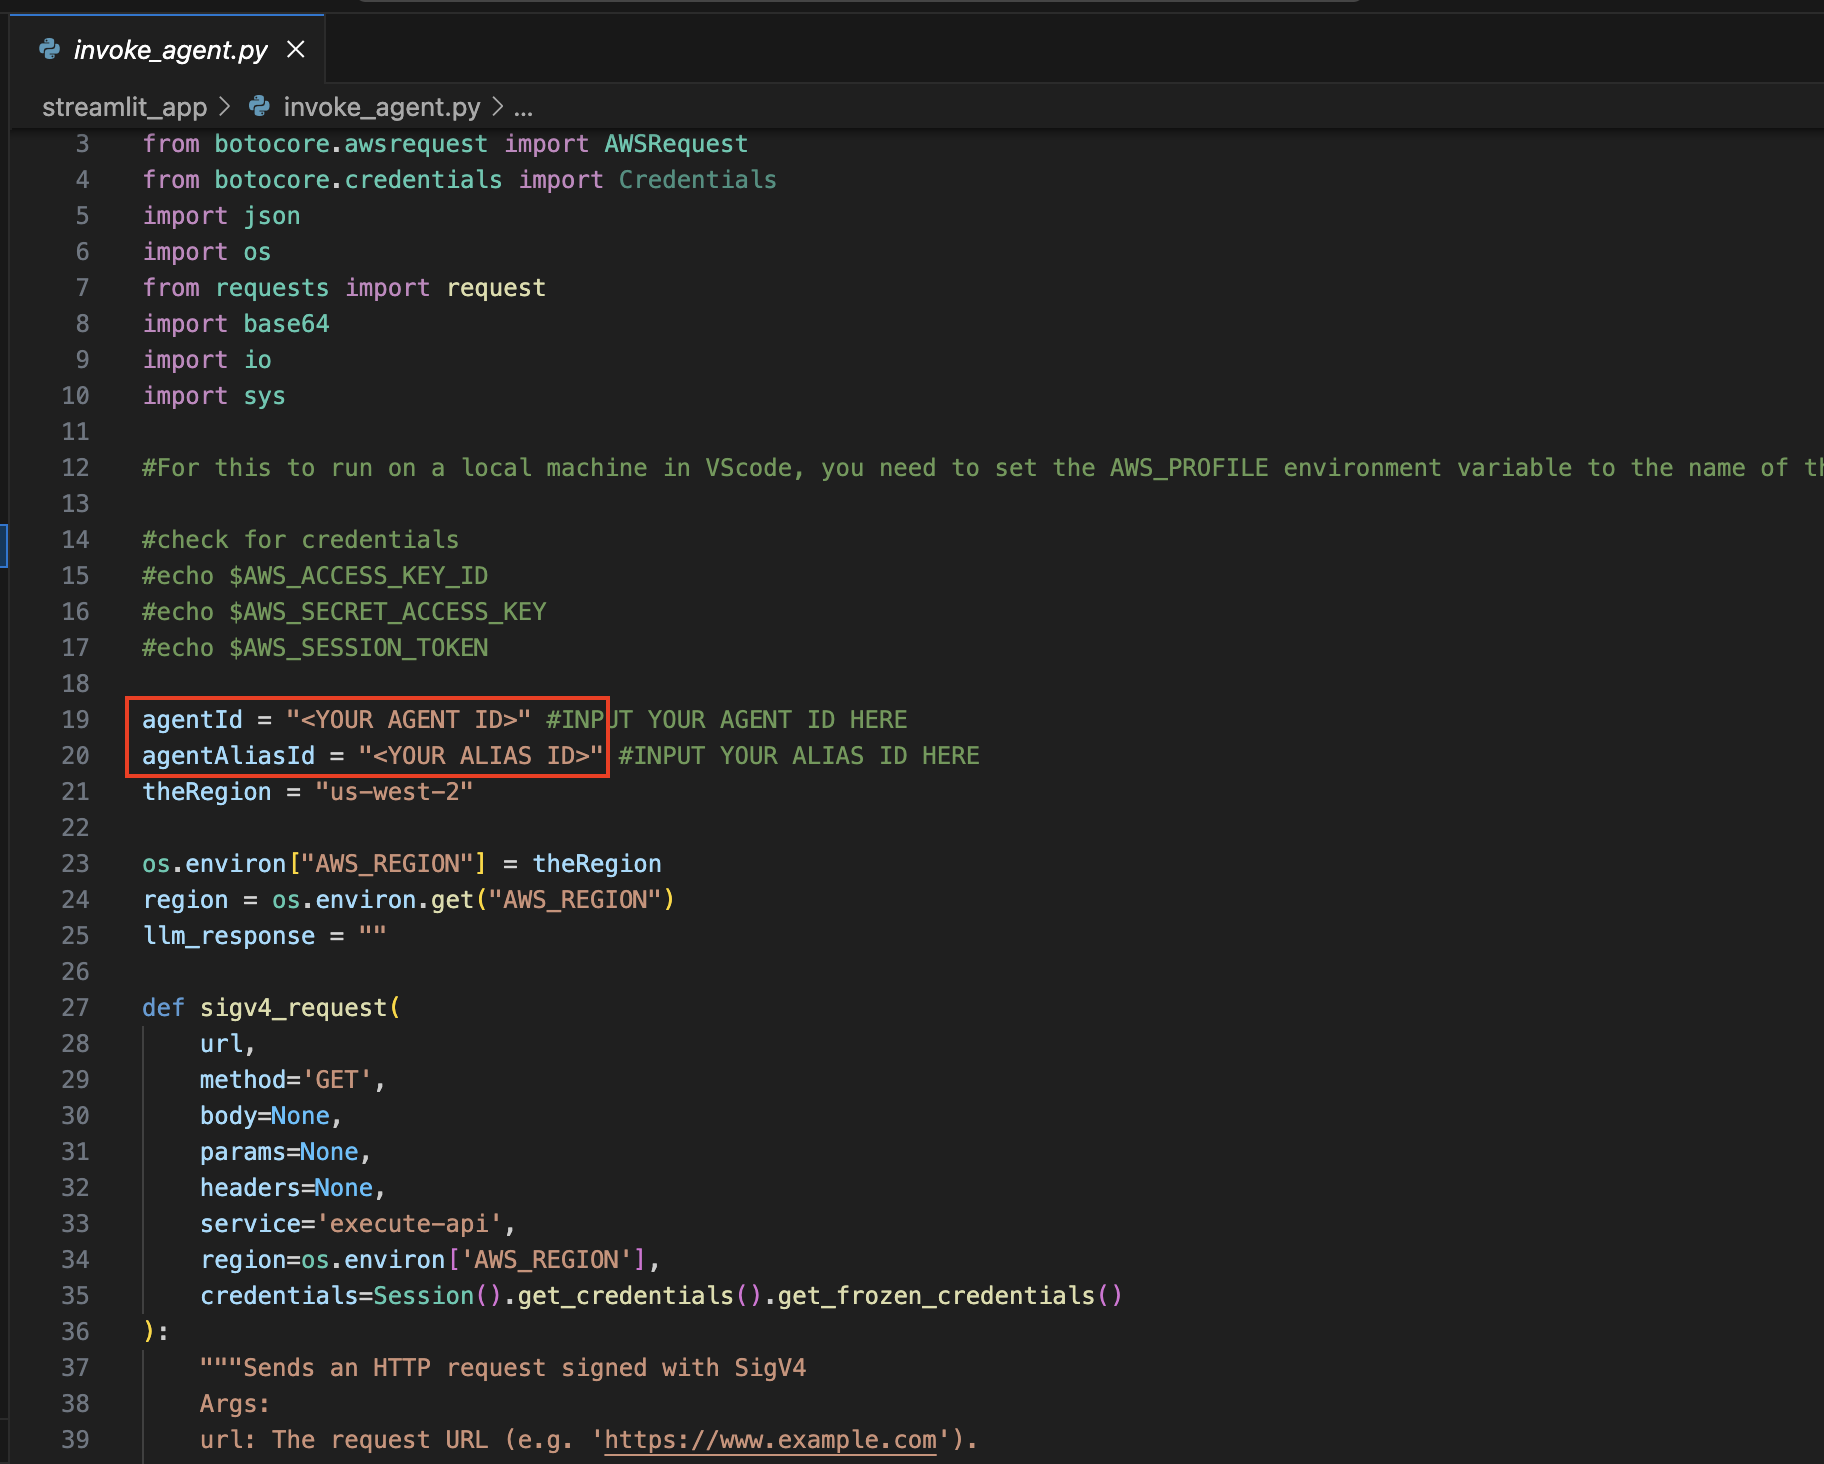
開啟invoke_agent.py檔。
在第 19 行和第 20 行,使用適當的值更新agentId和agentAliasId變量,然後儲存。
安裝 Streamlit (如果尚未安裝):
執行以下命令來安裝所需的所有依賴項:
pip install streamlit boto3 pandas運行 Streamlit 應用程式:
streamlit_app目錄中執行以下命令: streamlit run app.py
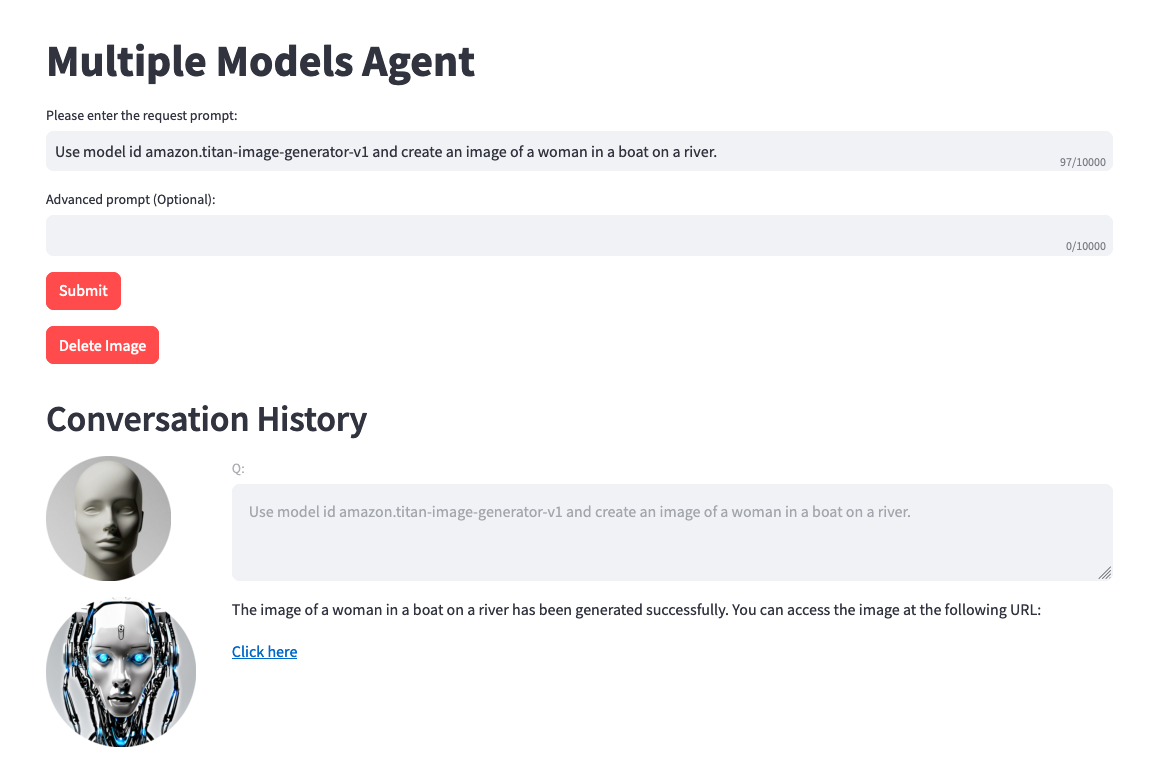
請記住,您可以使用 Amazon Bedrock 中的任何可用模型,並且不限於上面的清單。如果未列出模型 ID,請參閱此處 Amazon Bedrock 文件頁面上的最新可用模型 (ID)。
您可以利用提供的專案根據您自己的資料集和用例對該解決方案進行微調和基準測試。探索不同的模型組合,突破可能性的界限,並在不斷發展的生成人工智慧領域推動創新。
請參閱貢獻以獲取更多資訊。
該庫根據 MIT-0 許可證獲得許可。請參閱許可證文件。