| |
| |
| |
|
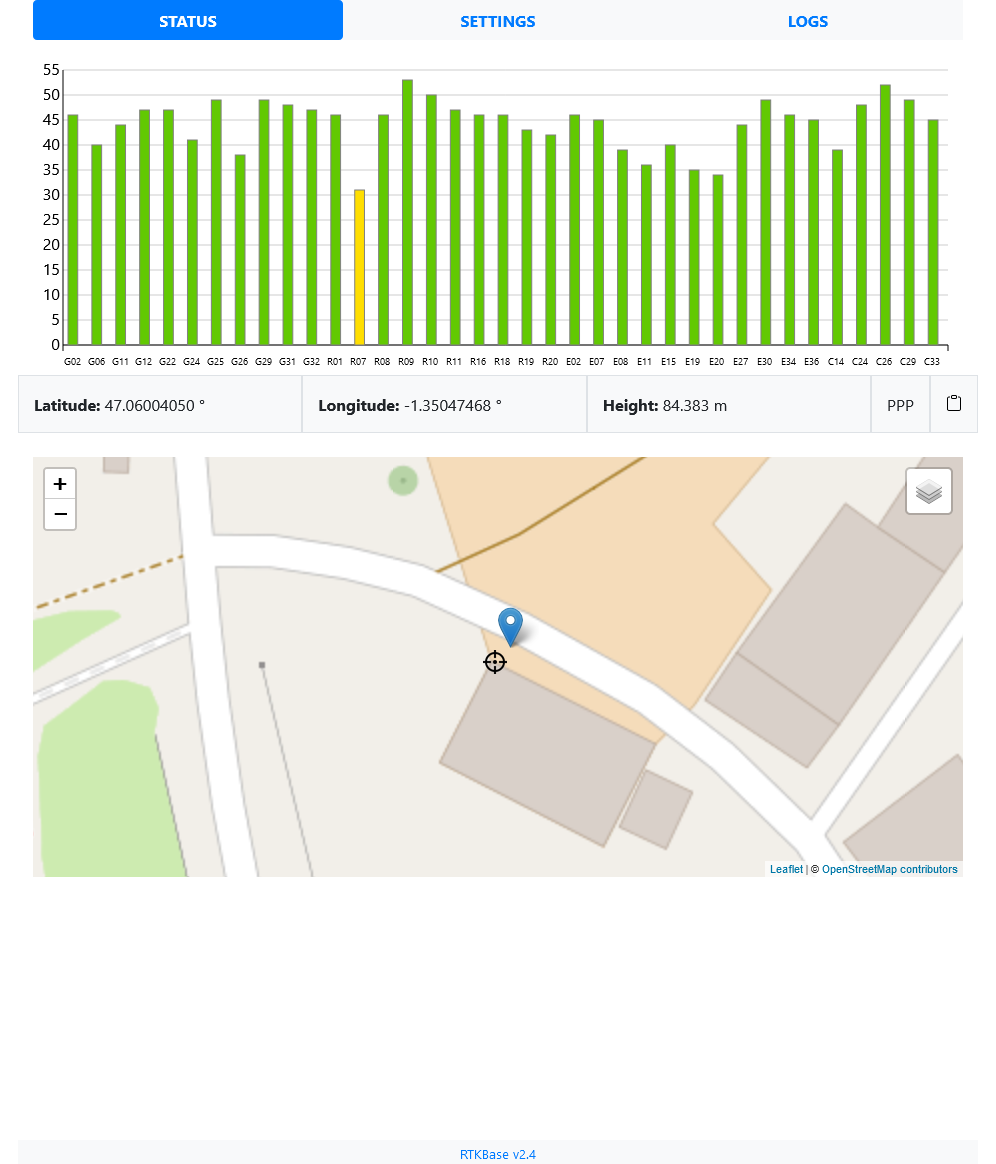
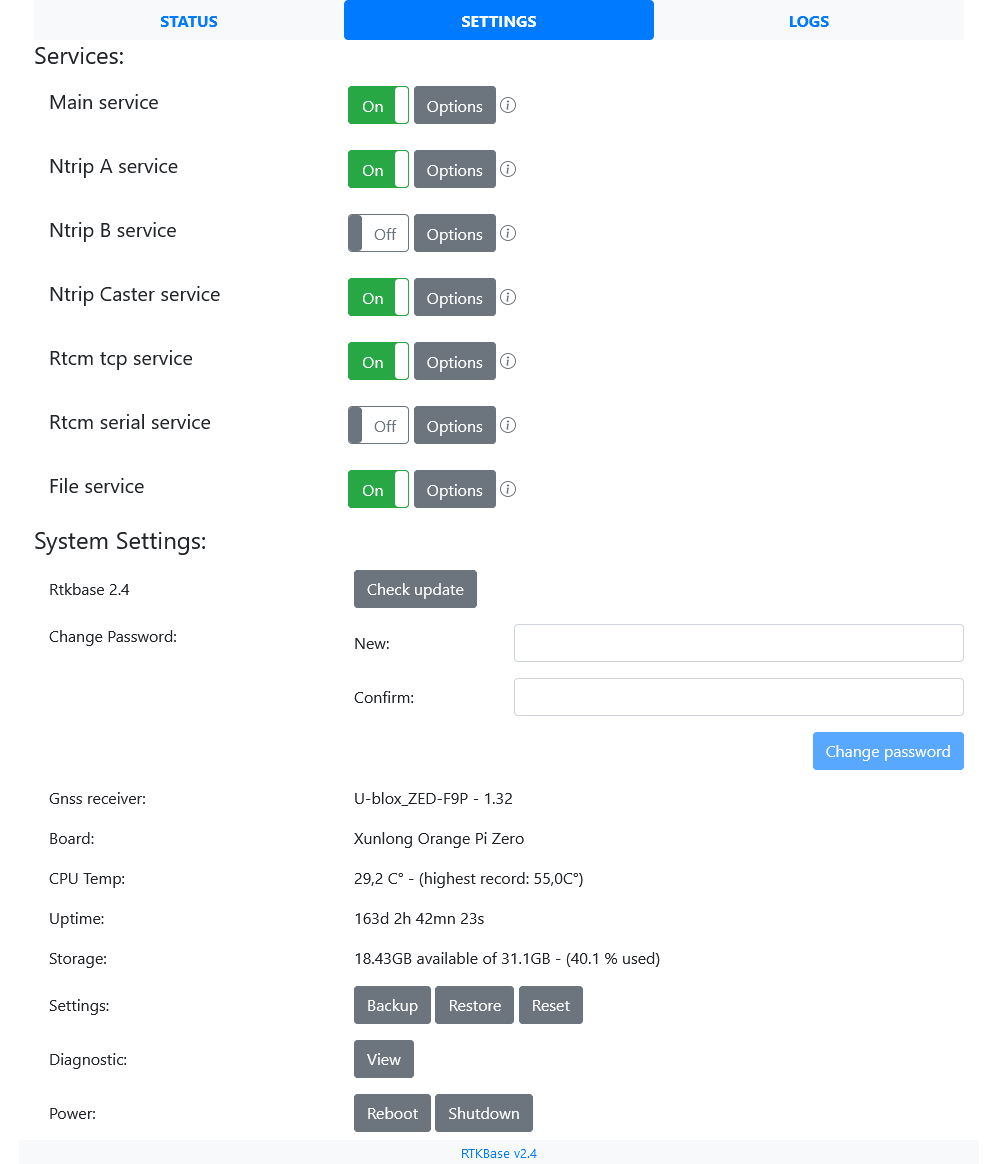
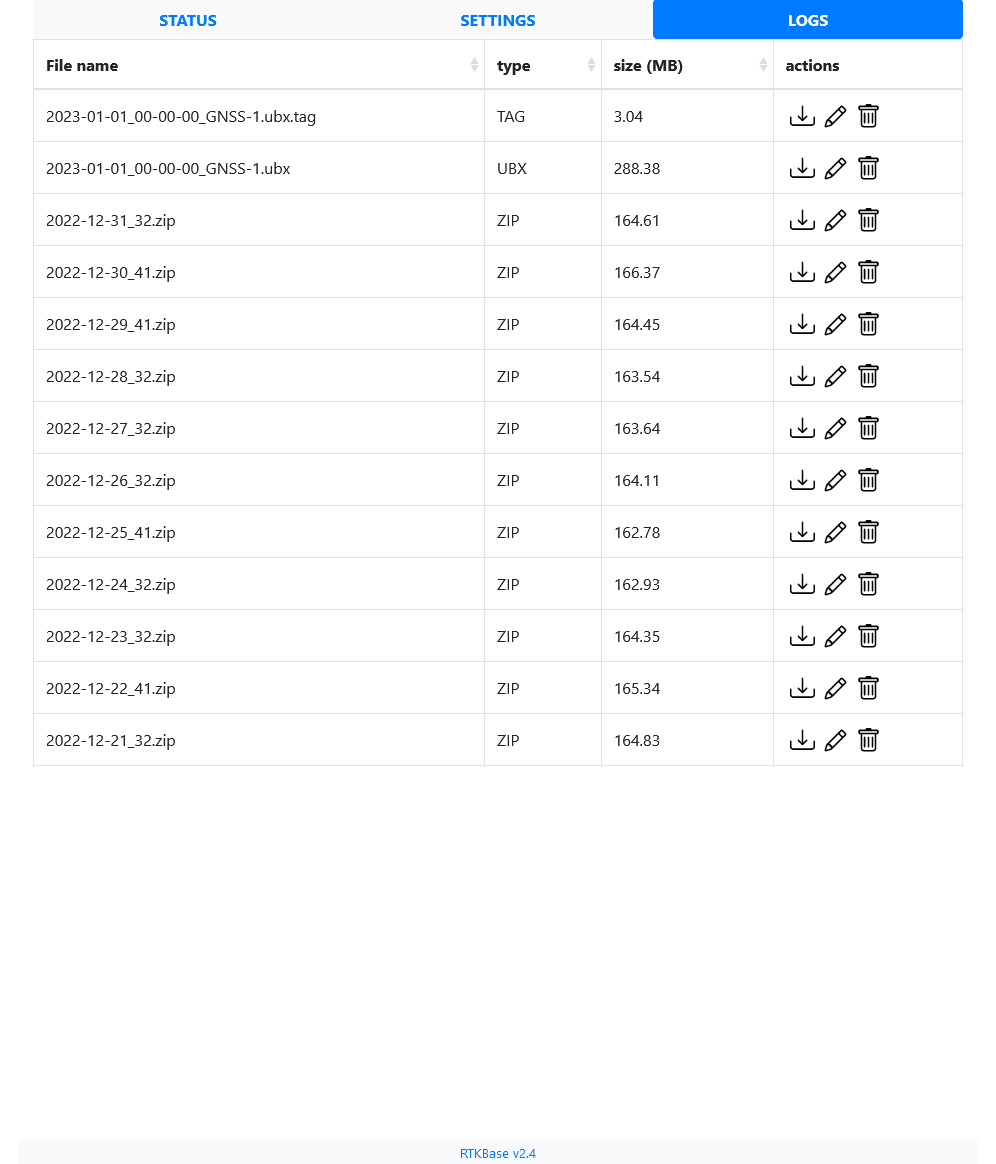
Frontend's main features are:
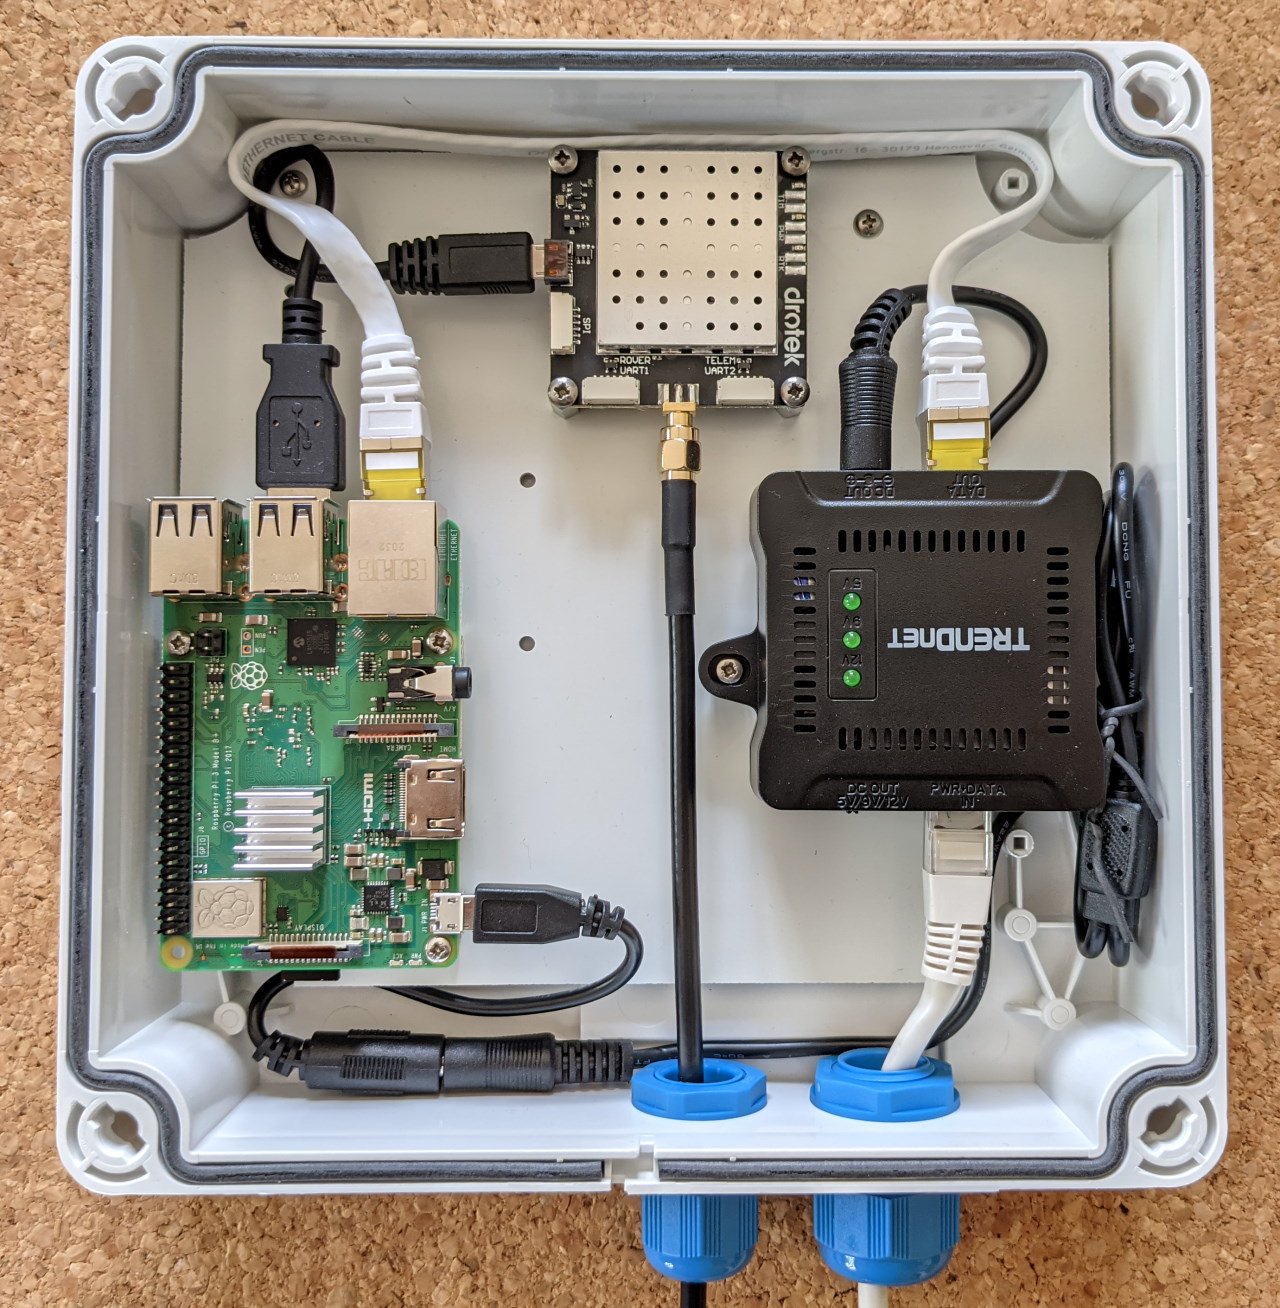
Other images are available in the ./images folder.
A ready to flash image is available for Orange Pi Zero, Orange Pi Zero 2, Orange Pi Zero 3 SBC : Armbian_RTKBase
If you use a Raspberry Pi, thanks to jancelin, you can download a ready to flash iso file here.
Connect your gnss receiver to your raspberry pi/orange pi/....
Open a terminal and:
cd ~
wget https://raw.githubusercontent.com/Stefal/rtkbase/master/tools/install.sh -O install.sh
chmod +x install.sh
sudo ./install.sh --all release
Go grab a coffee, it's gonna take a while. The script will install the needed software, and if you use a Usb-connected U-Blox ZED-F9P receiver, it'll be detected and set to work as a base station. If you don't use a F9P, you will have to configure your receiver manually (see step 7 in manual installation), and choose the correct port from the settings page.
Open a web browser to http://ip_of_your_sbc (the script will try to show you this ip address). Default password is admin. The settings page allows you to enter your own settings for the base coordinates, ntrip credentials and so on...

If you don't already know your base precise coordinates, it's time to read one of these tutorials:
The install.sh script can be used without the --all option to split the installation process into several different steps:
    ################################
    RTKBASE INSTALLATION HELP
    ################################
    Bash scripts to install a simple gnss base station with a web frontend.


    * Before install, connect your gnss receiver to raspberry pi/orange pi/.... with usb or uart.
    * Running install script with sudo

    Easy installation: sudo ./install.sh --all release

    Options:
            -a | --all <rtkbase source>
                             Install all you need to run RTKBase : dependencies, RTKlib, last release of Rtkbase, services,
                             crontab jobs, detect your GNSS receiver and configure it.
                             <rtkbase source> could be:
                                 release  (get the latest available release)
                                 repo     (you need to add the --rtkbase-repo argument with a branch name)
                                 url      (you need to add the --rtkbase-custom-source argument with an url)
                                 bundled  (available if the rtkbase archive is bundled with the install script)

            -u | --user
                             Use this username as User= inside service unit and for path to rtkbase:
                             --user=john will install rtkbase in /home/john/rtkbase

            -d | --dependencies
                             Install all dependencies like git build-essential python3-pip ...

            -r | --rtklib
                             Get RTKlib 2.4.3b34g from github and compile it.
                             https://github.com/rtklibexplorer/RTKLIB/tree/b34g

            -b | --rtkbase-release
                             Get last release of RTKBase:
                             https://github.com/Stefal/rtkbase/releases

            -i | --rtkbase-repo <branch>
                             Clone RTKBASE from github with the <branch> parameter used to select the branch.

            -j | --rtkbase-bundled
                             Extract the rtkbase files bundled with this script, if available.

            -f | --rtkbase-custom <source>
                             Get RTKBASE from an url.

            -t | --unit-files
                             Deploy services.

            -g | --gpsd-chrony
                             Install gpsd and chrony to set date and time
                             from the gnss receiver.

            -e | --detect-gnss
                             Detect your GNSS receiver. It works only with receiver like ZED-F9P.

            -n | --no-write-port
                             Doesn'''t write the detected port inside settings.conf.
                             Only relevant with --detect-gnss argument.

            -c | --configure-gnss
                             Configure your GNSS receiver.

            -s | --start-services
                             Start services (rtkbase_web, str2str_tcp, gpsd, chrony)

            -h | --help
                              Display this help message.
So, if you really want it, let's go for a manual installation with some explanations:
Install dependencies with sudo ./install.sh --dependencies, or do it manually with:
 sudo apt update
 sudo apt install -y  git build-essential pps-tools python3-pip python3-dev python3-setuptools python3-wheel libsystemd-dev bc dos2unix socat zip unzip pkg-config psmisc
Install RTKLIB with sudo ./install.sh --rtklib, or:
get RTKlib
cd ~
wget -qO - https://github.com/rtklibexplorer/RTKLIB/archive/refs/tags/b34j.tar.gz | tar -xvz
compile and install str2str:
Optionally, you can edit the CTARGET line in makefile in RTKLIB/app/str2str/gcc
cd RTKLIB/app/str2str/gcc
nano makefile
For an Orange Pi Zero SBC, i use:
CTARGET = -mcpu=cortex-a7 -mfpu=neon-vfpv4 -funsafe-math-optimizations
Then you can compile and install str2str:
make
sudo make install
Compile/install rtkrcv and convbin the same way as str2str.
Get latest rtkbase release sudo ./install.sh --rtkbase-release, or:
wget https://github.com/stefal/rtkbase/releases/latest/download/rtkbase.tar.gz -O rtkbase.tar.gz
tar -xvf rtkbase.tar.gz
If you prefer, you can clone this repository to get the latest code.
Install the rtkbase requirements:
python3 -m pip install --upgrade pip setuptools wheel  --extra-index-url https://www.piwheels.org/simple
python3 -m pip install -r rtkbase/web_app/requirements.txt  --extra-index-url https://www.piwheels.org/simple
Install the systemd services with sudo ./install.sh --unit-files, or do it manually with:
rtkbase/unit/) to replace {user} with your username.archive_and_clean.sh will do it for you. The default settings compress the previous day data and delete all archives older than 90 days. To automate these 2 tasks, enable the rtkbase_archive.timer. The default value runs the script every day at 04H00./etc/systemd/system/ then enable the web server, str2str_tcp and rtkbase_archive.timer:sudo systemctl daemon-reload
sudo systemctl enable rtkbase_web
sudo systemctl enable str2str_tcp
sudo systemctl enable rtkbase_archive.timerInstall and configure chrony and gpsd with sudo ./install.sh --gpsd-chrony, or:
Install chrony with sudo apt install chrony then add this parameter in the chrony conf file (/etc/chrony/chrony.conf):
refclock SHM 0 refid GPS precision 1e-1 offset 0.2 delay 0.2
Edit the chrony unit file. You should set After=gpsd.service
Install a gpsd release >= 3.2 or it won't work with a F9P. Its conf file should contains:
   # Devices gpsd should connect to at boot time.
   # They need to be read/writeable, either by user gpsd or the group dialout.
   DEVICES="tcp://localhost:5015"

   # Other options you want to pass to gpsd
   GPSD_OPTIONS="-n -b"
Edit the gpsd unit file. You should have something like this in the "[Unit]" section:
   [Unit]
   Description=GPS (Global Positioning System) Daemon
   Requires=gpsd.socket
   BindsTo=str2str_tcp.service
   After=str2str_tcp.service
   sudo systemctl daemon-reload
   sudo systemctl enable chrony
   sudo systemctl enable gpsd
Connect your gnss receiver to raspberry pi/orange pi/.... with usb or uart, and check which com port it uses (ttyS1, ttyAMA0, something else...). If it's a U-Blox F9P receiver (usb or uart) or a Septentrio Mosaic-X5 (usb), you can use sudo ./install.sh --detect-gnss. Write down the result, you may need it later.
If you didn't have already configure your gnss receiver, you must set it to output raw data:
If it's a U-Blox ZED-F9P (usb or uart), or a Septentrio Mosaic-X5 (usb) you can use
sudo ./install.sh --detect-gnss --configure-gnssIf you need to use a config tool from another computer (like U-center), you can use socat:
sudo socat tcp-listen:128,reuseaddr /dev/ttyS1,b115200,raw,echo=0Change the ttyS1 and 115200 value if needed. Then you can use a network connection in U-center with the base station ip address and the port n°128.
Now you can start the services with sudo ./install.sh --start-services, or:
sudo systemctl start rtkbase_web
sudo systemctl start str2str_tcp
sudo systemctl start gpsd
sudo systemctl start chrony
sudo systemctl start rtkbase_archive.timer
Everything should be ready, now you can open a web browser to your base station ip address.
RTKBase use several RTKLIB str2str instances started with run_cast.sh as systemd services. run_cast.sh gets its settings from settings.conf
str2str_tcp.service is the main instance. It is connected to the gnss receiver and broadcast the raw data on TCP for all the others services.str2str_ntrip_A.service get the data from the main instance, convert the data to rtcm and stream them to a Ntrip caster.str2str_ntrip_B.service get the data from the main instance, convert the data to rtcm and stream them to another Ntrip caster.str2str_local_ntrip_caster.service get the data from the main instance, convert the data to rtcm, and act as a local Ntrip caster.str2str_rtcm_svr.service get the data from the main instance, convert the data to rtcm and stream them to clientsstr2str_rtcm_serial.service get the data from the main instance, convert the data to rtcm and stream them to a serial port (radio link, or other peripherals)str2str_file.service get the data from the main instance, and log the data to files.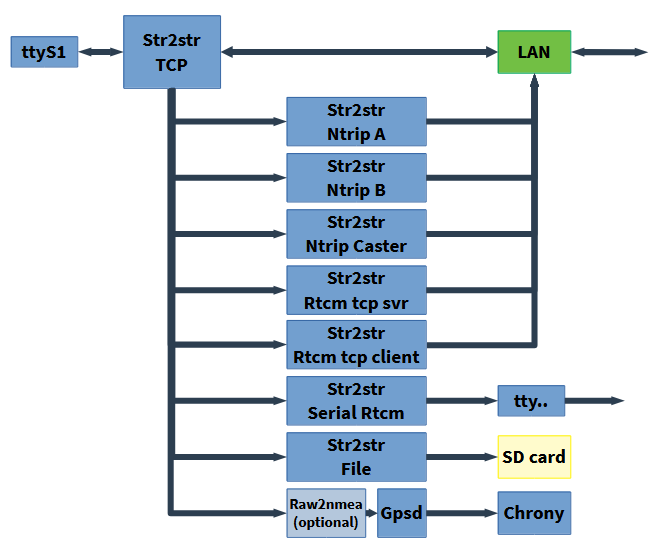
The web GUI is available when the rtkbase_web service is running.
Offline base station without U-Blox receiver, how to get date and time:
If gpsd can't understand the raw data from your gnss receiver, you can enable the raw2nmea service. It will convert the raw data to the tcp port set in settings.conf (nmea_port) and gpsd will use it to feed chrony. systemctl enable --now rtkbase_raw2nmea
Aerial images:
The default map background is OpenStreetMap, but you can switch to a worldwide aerial layer if you have a Maptiler key. To enable this layer, create a free account on Maptiler, create a key and add it to settings.conf inside the [general] section:
maptiler_key=your_key
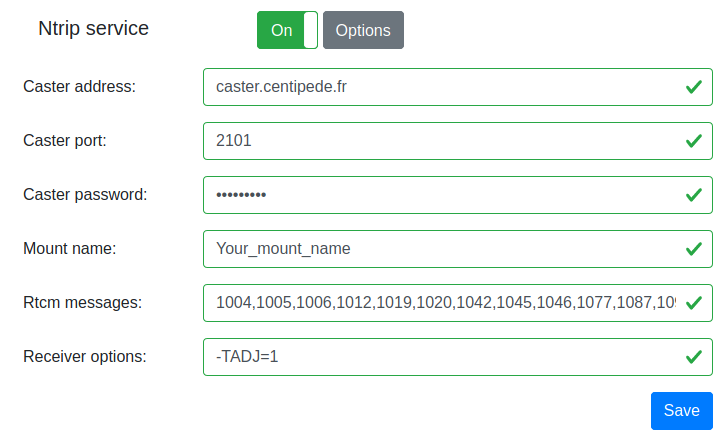
Receiver options: str2str accept some receiver dependent options. If you use a U-Blox, the -TADJ=1 parameter is recommended as a workaround to non-rounded second values in Rtcm and Ntrip outputs. You can enter this parameter inside the settings forms. More information here and here.
If you want to install RTKBase from the dev branch, you can do it with these commands:
cd ~
wget https://raw.githubusercontent.com/Stefal/rtkbase/dev/tools/install.sh -O install.sh
chmod +x install.sh
sudo ./install.sh --all repo --rtkbase-repo devA gnss receiver with a timepulse output is a very accurate stratum 0 clock thus, your gnss base station could act as a stratum 1 ntp peer for your local network and/or the ntp pool. There are a few steps to do this:
Connect the timepulse output + GND to some GPIO inputs on your SBC.
Configure this input as PPS in your operating system.
Raspberry Pi example:
dtoverlay=pps-gpio,gpiopin=18 on a new line. '18' is the input used for timepulse.pps-gpio on a new line, if it is not already present.Orange Pi Zero example, inside /boot/armbianEnv.txt:
pps-gpio to the overlays line.param_pps_pin=PA19 <- change 'PA19' to your input.Set gpsd and chrony to use PPS
gpsd: comment the DEVICE line in /etc/defaut/gpsd and uncomment #DEVICES="tcp:\127.0.0.1:5015 devpps0. Edit the port if you use the rtkbase_raw2nmea service.
chrony: inside /etc/chrony/chrony.conf uncomment the refclock pps line and add noselect to the 'refclock SHM 0`. You should have something like this:
   refclock SHM 0 refid GPS precision 1e-1 offset 0 delay 0.2 noselect
   refclock PPS /dev/pps0 refid PPS lock GPS
chronyc sources -v You should read something like this, notice the '*' before 'PPS': basegnss@orangepizero:~$ chronyc sources -v
210 Number of sources = 6
.-- Source mode '^' = server, '=' = peer, '#' = local clock.
/ .- Source state '*' = current synced, '+' = combined , '-' = not combined,
| / '?' = unreachable, 'x' = time may be in error, '~' = time too variable.
|| .- xxxx [ yyyy ] +/- zzzz
|| Reachability register (octal) -. | xxxx = adjusted offset,
|| Log2(Polling interval) --. | | yyyy = measured offset,
|| | | zzzz = estimated error.
|| | |
MS Name/IP address Stratum Poll Reach LastRx Last sample
===============================================================================
#? GPS 0 4 377 17 +64ms[ +64ms] +/- 200ms
#* PPS 0 4 377 14 +363ns[ +506ns] +/- 1790ns
^- ntp0.dillydally.fr 2 6 177 16 -12ms[ -12ms] +/- 50ms
^? 2a01:e35:2fba:7c00::21 0 6 0 - +0ns[ +0ns] +/- 0ns
^- 62-210-213-21.rev.poneyt> 2 6 177 17 -6488us[-6487us] +/- 67ms
^- kalimantan.ordimatic.net 3 6 177 16 -27ms[ -27ms] +/- 64ms
Debian base distro >= 11 (Bullseye) Python >= 3.8
See the changelog
RTKBase is licensed under AGPL 3 (see LICENSE file).
RTKBase uses some parts of other software:
RTKBase uses OpenStreetMap tiles. Thank you to all the contributors!