voice overlay ios
1.0.0
음성 오버레이를 사용하면 사용자의 음성을 텍스트 로 변환하여 필요한 권한을 처리하는 동시에 세련된 UX를 제공할 수 있습니다.
음성을 텍스트로 변환하기 위해 내부적으로 기본 SFSpeechRecognizer 사용합니다.
pod install 수행한 다음 프로젝트를 실행하여 데모 프로젝트를 복제하고 실행할 수 있습니다.
Swift Package Manager는 Swift 코드 배포를 관리하는 도구입니다. 이는 Swift 빌드 시스템과 통합되어 종속성 다운로드, 컴파일 및 연결 프로세스를 자동화합니다.
SwiftPM을 사용하려면 Xcode 11+를 사용하여 프로젝트를 열어야 합니다. File -> Swift Packages -> Add Package Dependency 클릭하고 InstantSearch VoiceOverlay 저장소의 URL을 입력하세요.
프레임워크 작성자이고 VoiceOverlay를 종속성으로 사용하는 경우 Package.swift 파일을 업데이트하세요.
 let package = Package (
    // 1.1.0 ..< 2.0.0
    dependencies : [
        . package ( url : " https://github.com/algolia/voice-overlay-ios " , from : " 1.1.0 " )
    ] ,
    // ...
) InstantSearchVoiceOverlay CocoaPods를 통해 사용할 수 있습니다. 설치하려면 Podfile에 다음 줄을 추가하세요.
pod 'InstantSearchVoiceOverlay' , '~> 1.1.0'Carthage는 Cocoa를 위한 간단하고 분산된 종속성 관리자입니다.
InstantSearchVoiceOverlay를 설치하려면 Cartfile에 다음 줄을 추가하세요.
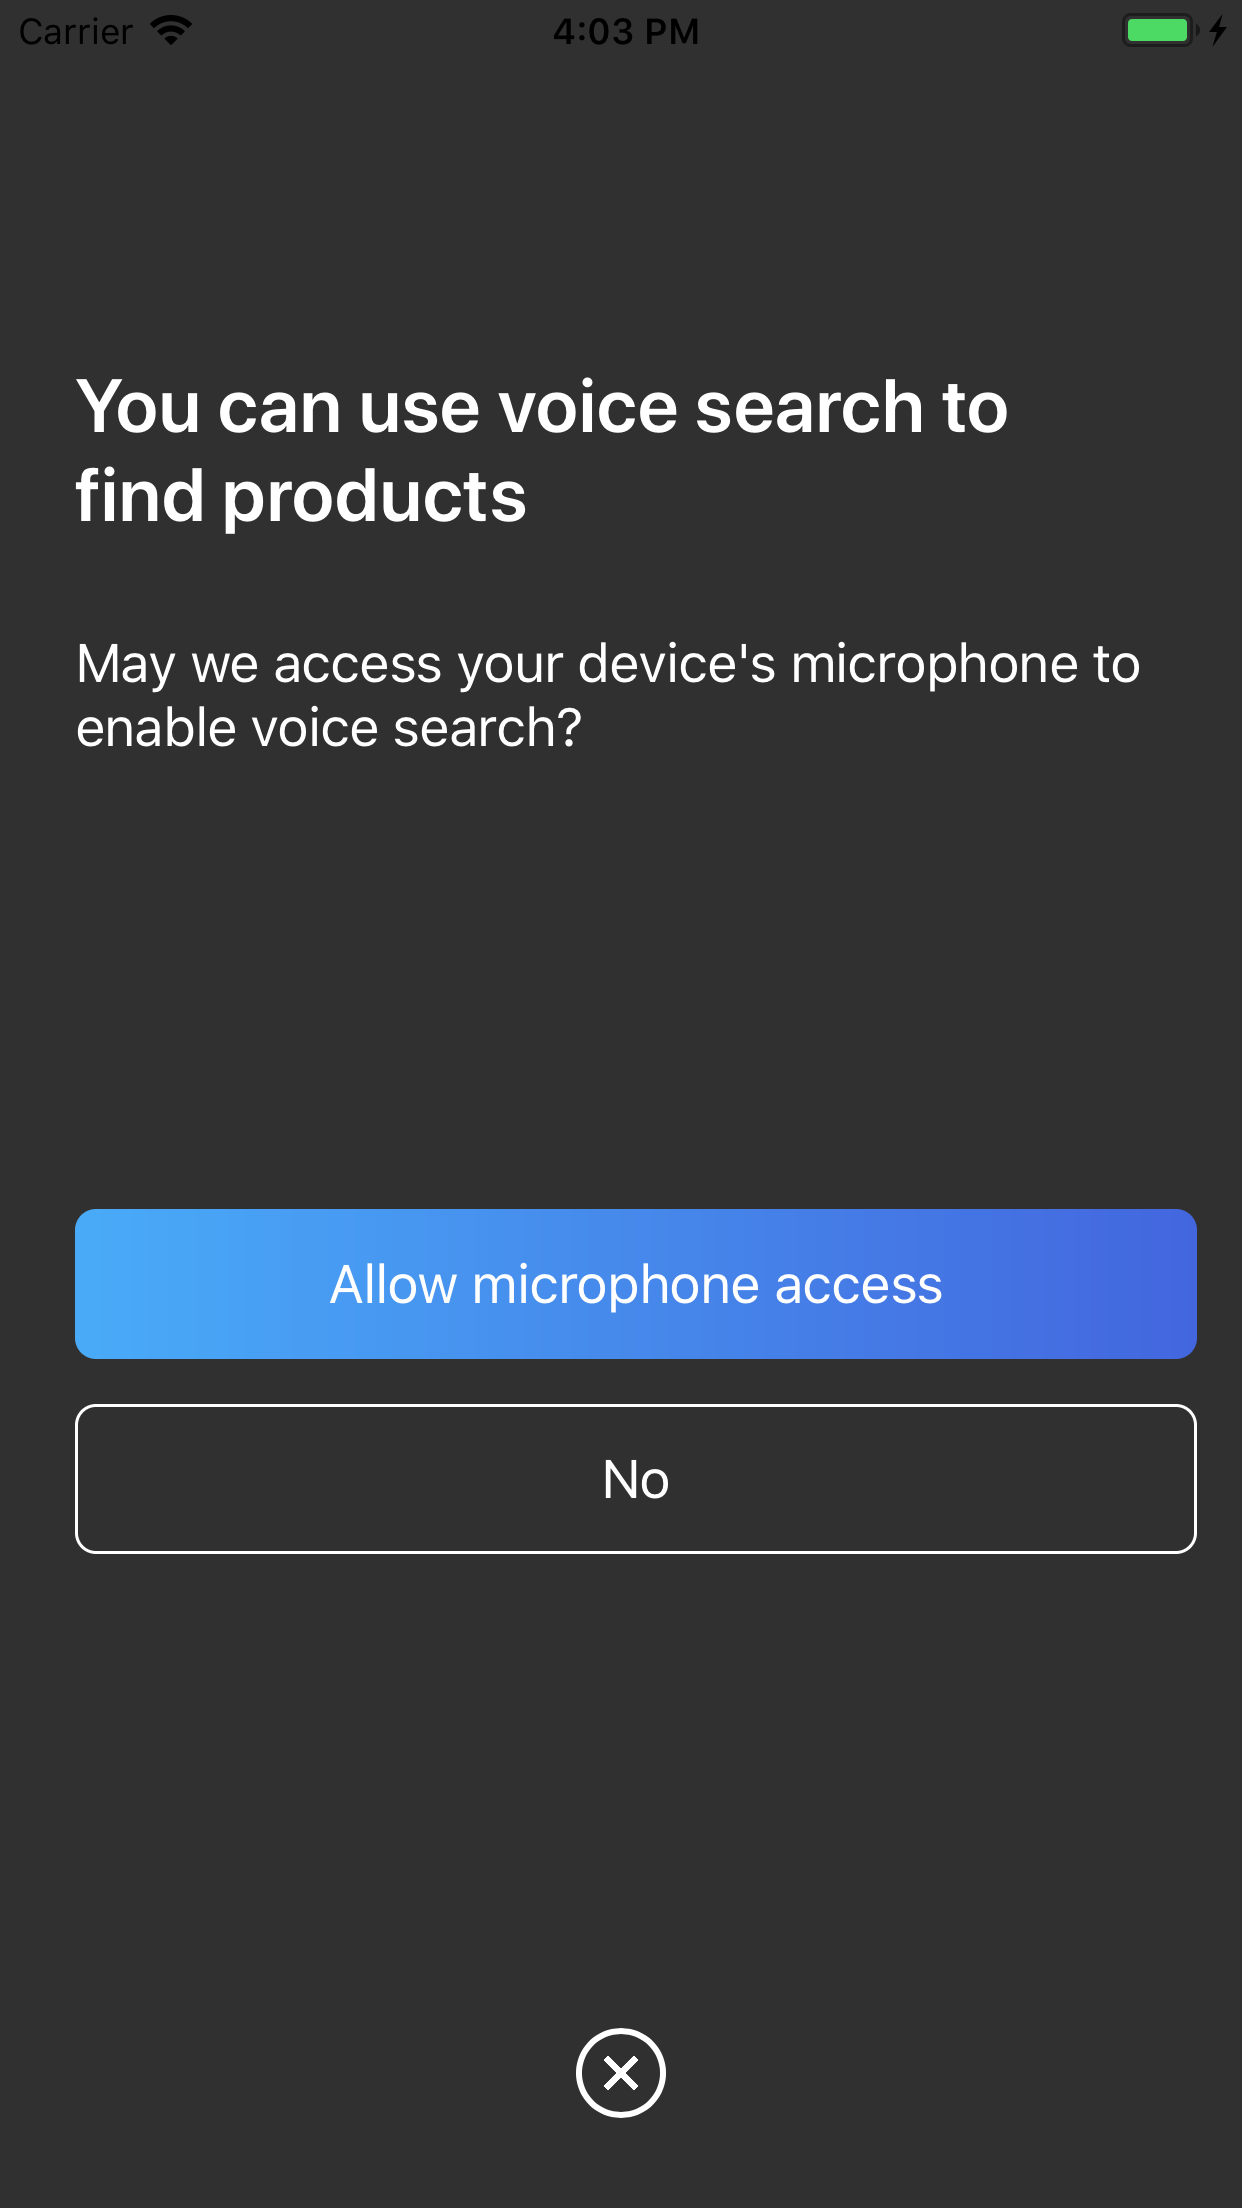
github "algolia/voice-overlay-ios" ~> 1.1 . 0Info.plist 에서 설명과 함께 다음 2개의 문자열 속성을 추가하세요.Privacy - Microphone Usage Description : Need the mic for audio to textPrivacy - Speech Recognition Usage Description 다음과 같은 설명이 있습니다. Need the speech recognition capabilities for searching tags 
import InstantSearchVoiceOverlay
class ViewController : UIViewController {
let voiceOverlayController = VoiceOverlayController ( )
@ objc func voiceButtonTapped ( ) {
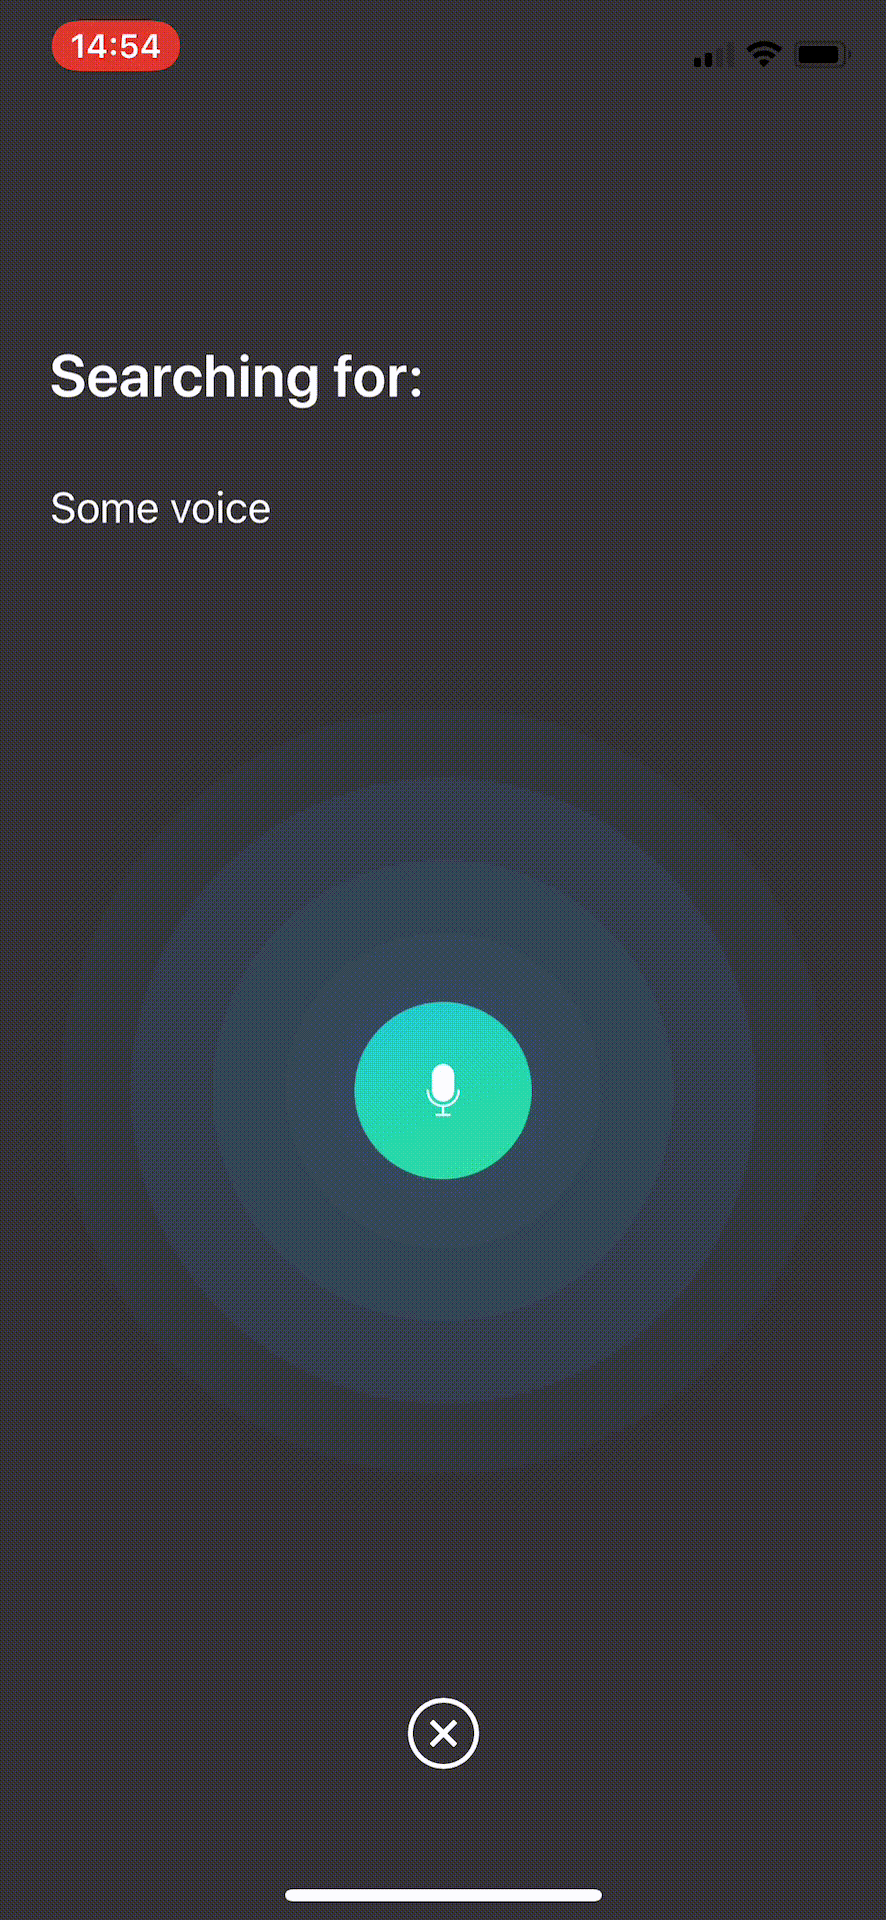
voiceOverlayController . start ( on : self , textHandler : { ( text , final ) in
print ( " voice output: ( String ( describing : text ) ) " )
print ( " voice output: is it final? ( String ( describing : final ) ) " )
} , errorHandler : { ( error ) in
print ( " voice output: error ( String ( describing : error ) ) " )
} )
}
voiceOverlayController의 settings 속성을 수정하여 음성 오버레이를 사용자 정의할 수 있습니다.
/// Specifies whether the overlay directly starts recording (true),
/// or if it requires the user to click the mic (false). Defaults to true.
voiceOverlayController . settings . autoStart = true
/// Specifies whether the overlay stops recording after the user stops talking for `autoStopTimeout`
/// seconds (true), or if it requires the user to click the mic (false). Defaults to true.
voiceOverlayController . settings . autoStop = true
/// When autoStop is set to true, autoStopTimeout determines the amount of
/// silence time of the user that causes the recording to stop. Defaults to 2.
voiceOverlayController . settings . autoStopTimeout = 2
/// The layout and style of all screens of the voice overlay.
voiceOverlayController . settings . layout . < someScreen > . < someConstant >
// Use XCode autocomplete to see all possible screens and constants that are customisable.
// Examples:
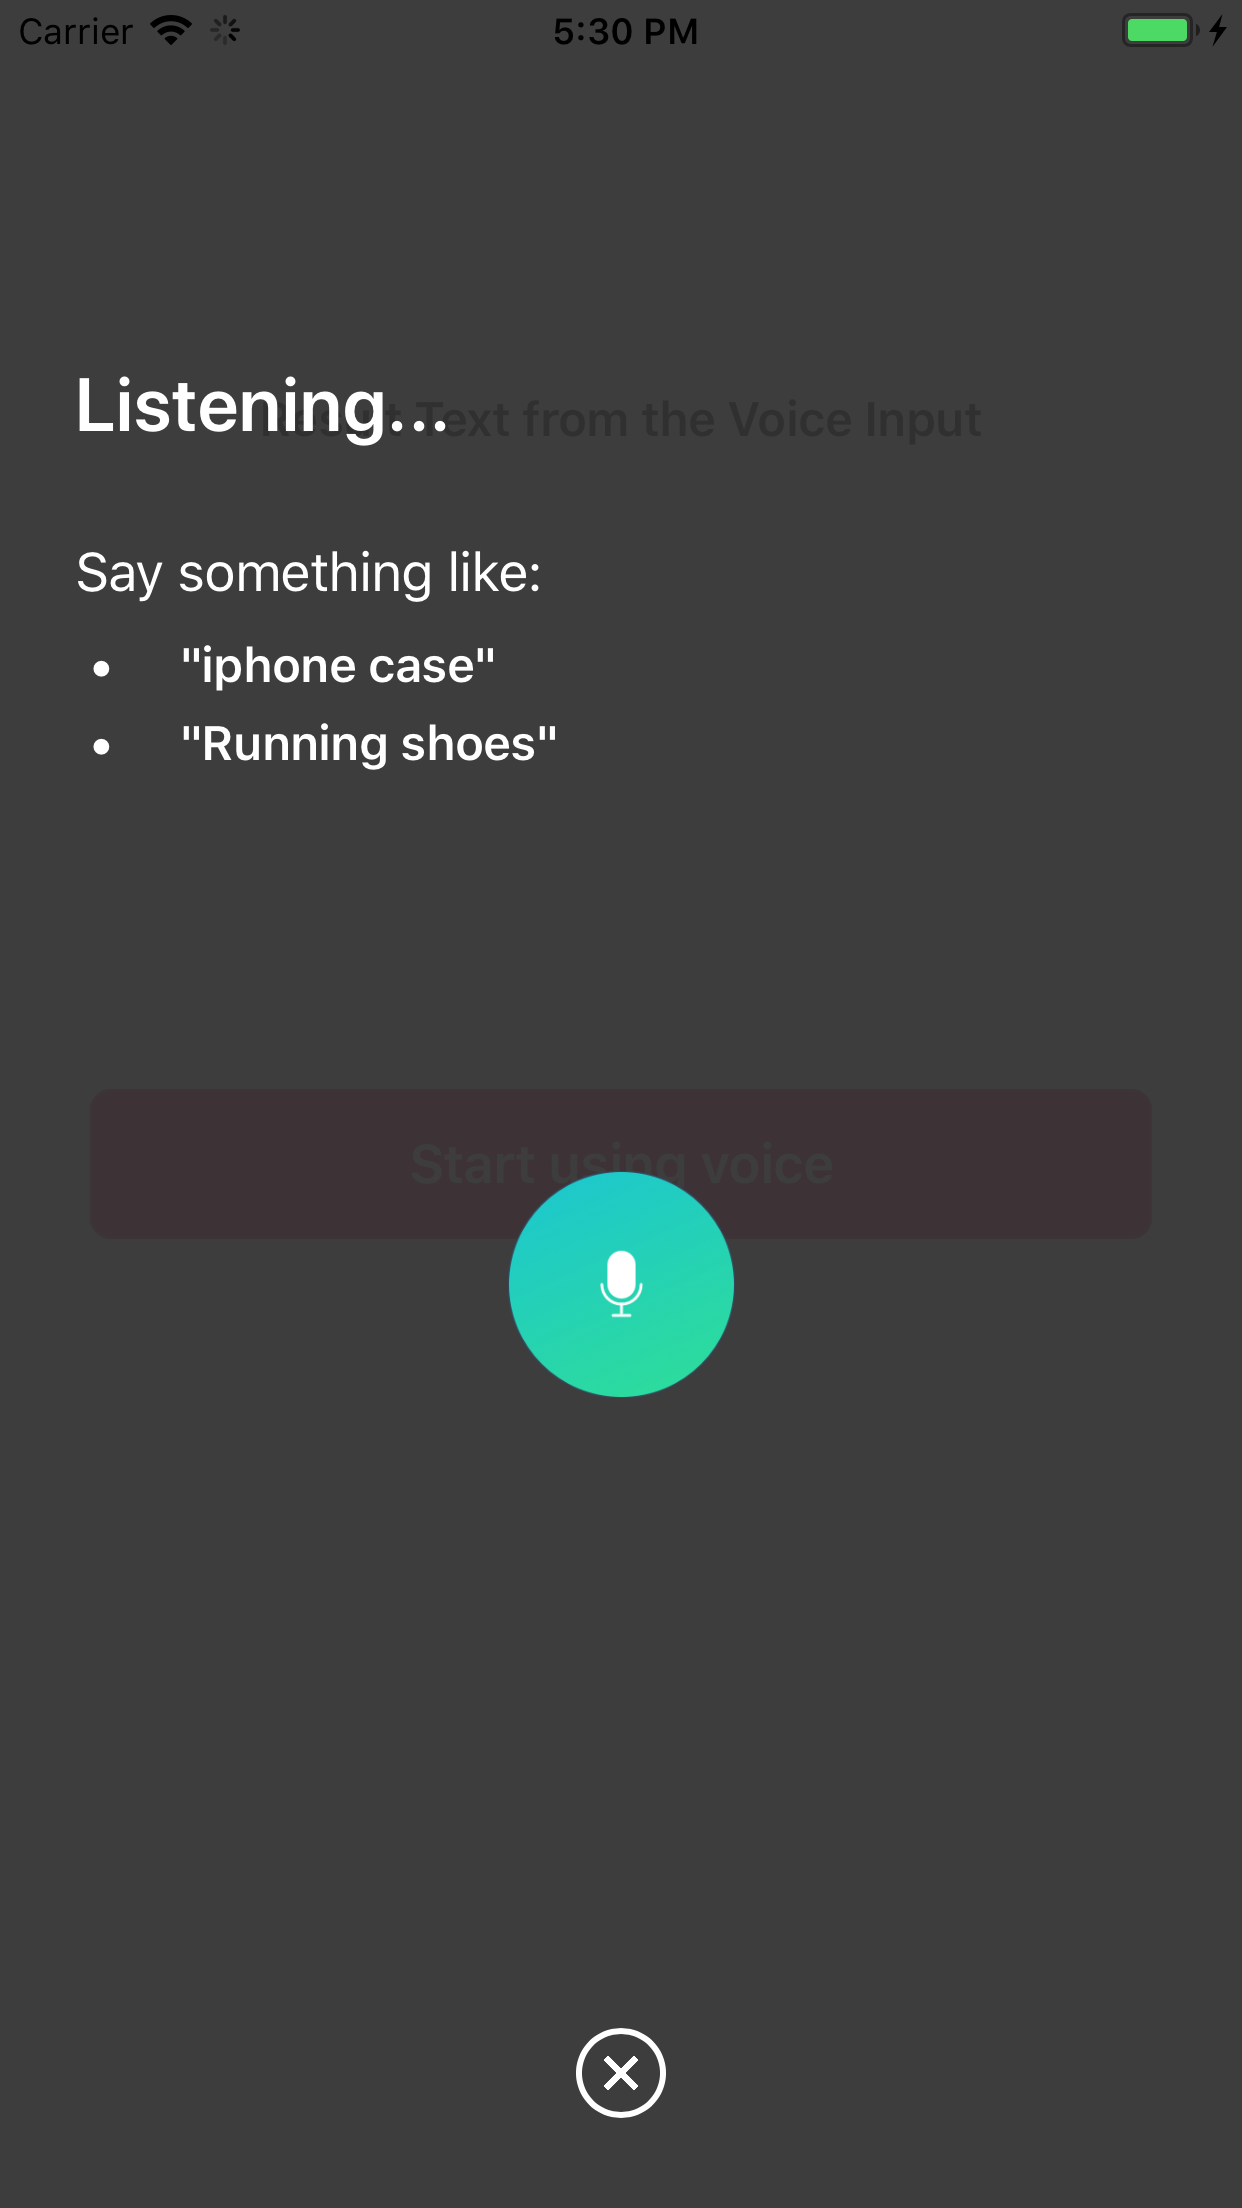
/// The voice suggestions that appear in bullet points
voiceOverlayController . settings . layout . inputScreen . subtitleBulletList = [ " Suggestion1 " , " Sug2 " ]
/// Change the title of the input screen when the recording is ongoing.
voiceOverlayController . settings . layout . inputScreen . titleListening = " my custom title "
/// Change the background color of the permission screen.
voiceOverlayController . settings . layout . permissionScreen . backgroundColor = UIColor . red
/// And many more...다음과 같이 voiceOverlayController를 초기화할 때 로캘이나 SpeechController를 변경할 수 있습니다.
lazy var voiceOverlayController : VoiceOverlayController = {
  let recordableHandler = {
    return SpeechController ( locale : Locale ( identifier : " en_US " ) )
  }
  return VoiceOverlayController ( speechControllerHandler : recordableHandler )
} ( )
Recordable 프로토콜을 구현하여 사용자 정의 SpeechController 클래스를 만들 수 있습니다.
Swift 4에서는 Locale.current.languageCode 사용하여 현재 로케일을 가져올 수 있습니다.
선택적으로 텍스트 및 오류 이벤트를 듣기 위해 VoiceOverlayDelegate 프로토콜의 방법을 따를 수 있습니다.
// Second way to listen to recording through delegate
func recording ( text : String ? , final : Bool ? , error : Error ? ) {
if let error = error {
print ( " delegate: error ( error ) " )
}
if error == nil {
print ( " delegate: text ( text ) " )
}
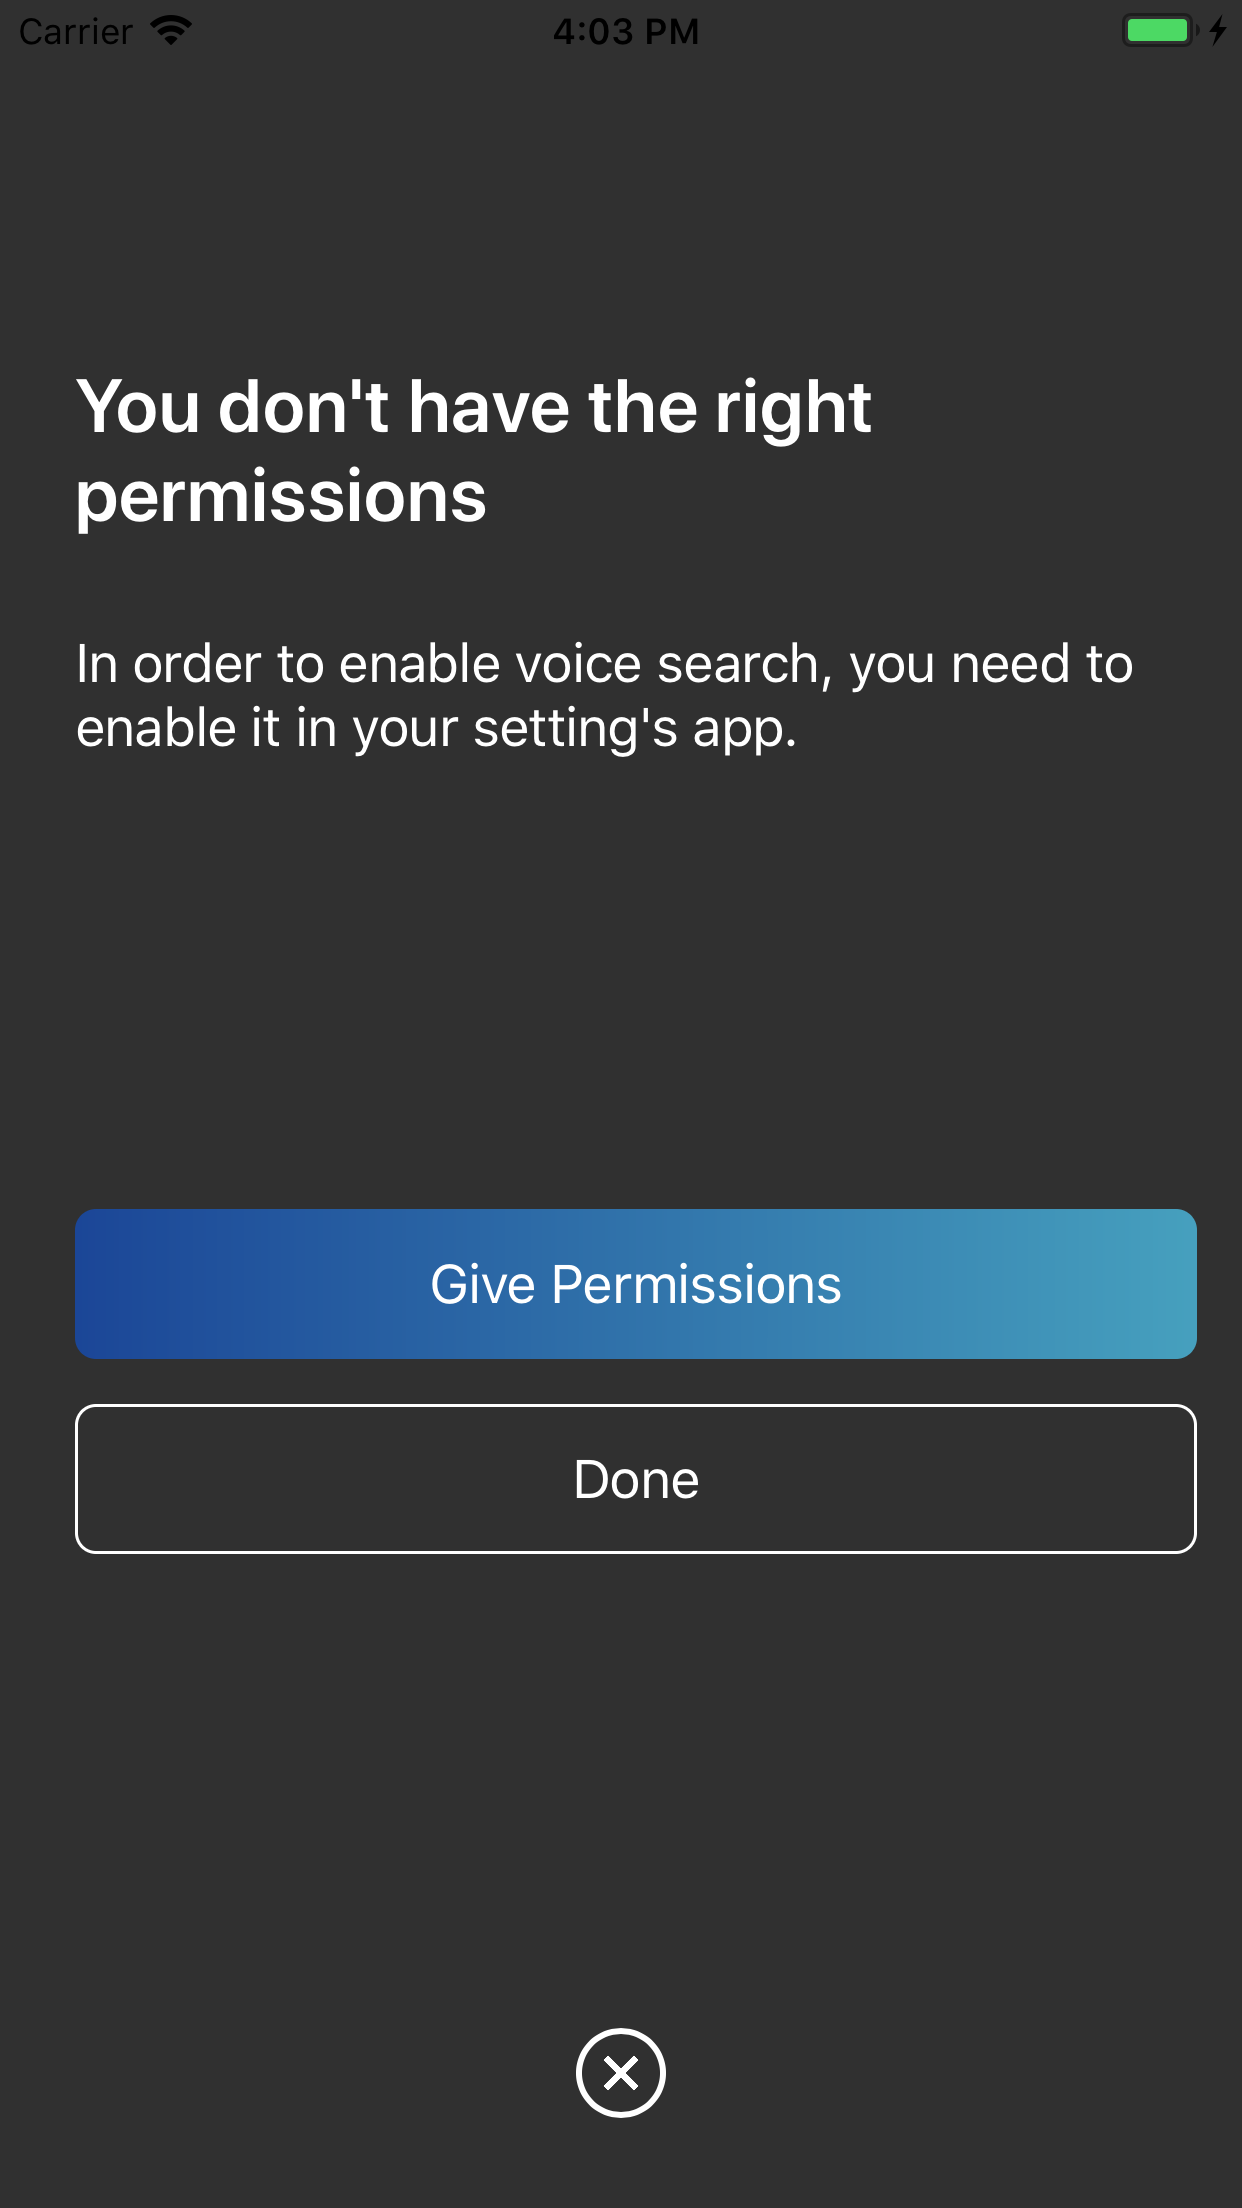
} 권한이 누락된 경우 음성 오버레이가 사용자를 설정 앱의 올바른 섹션으로 안내합니다.
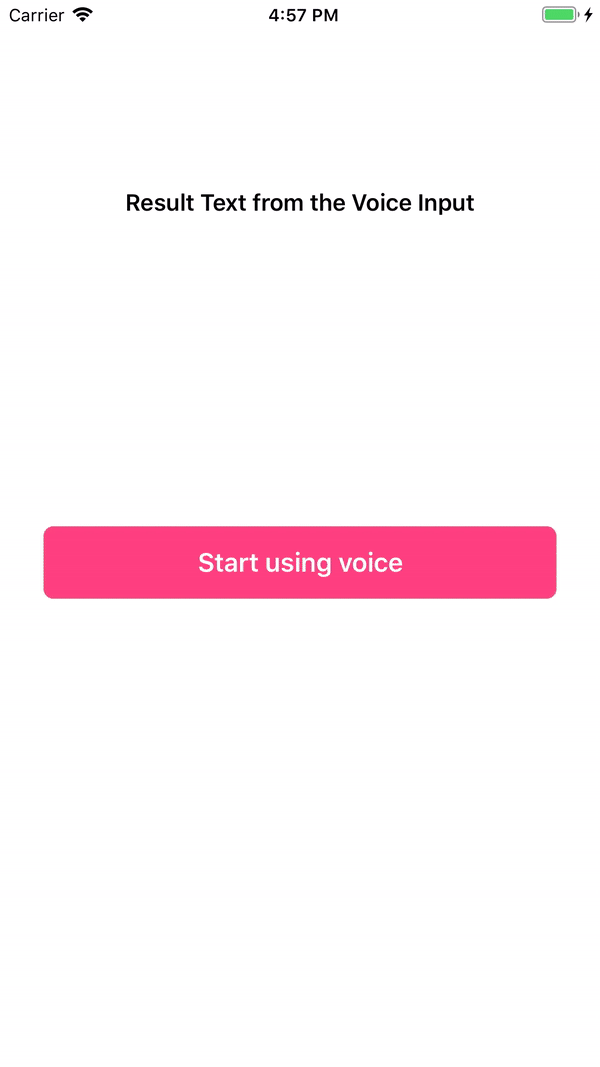
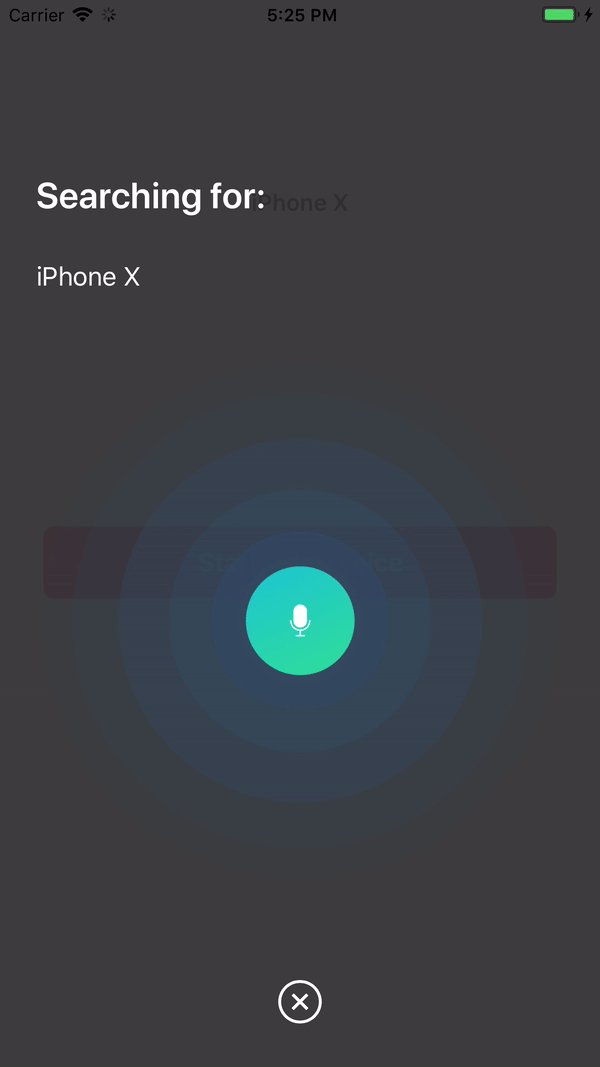
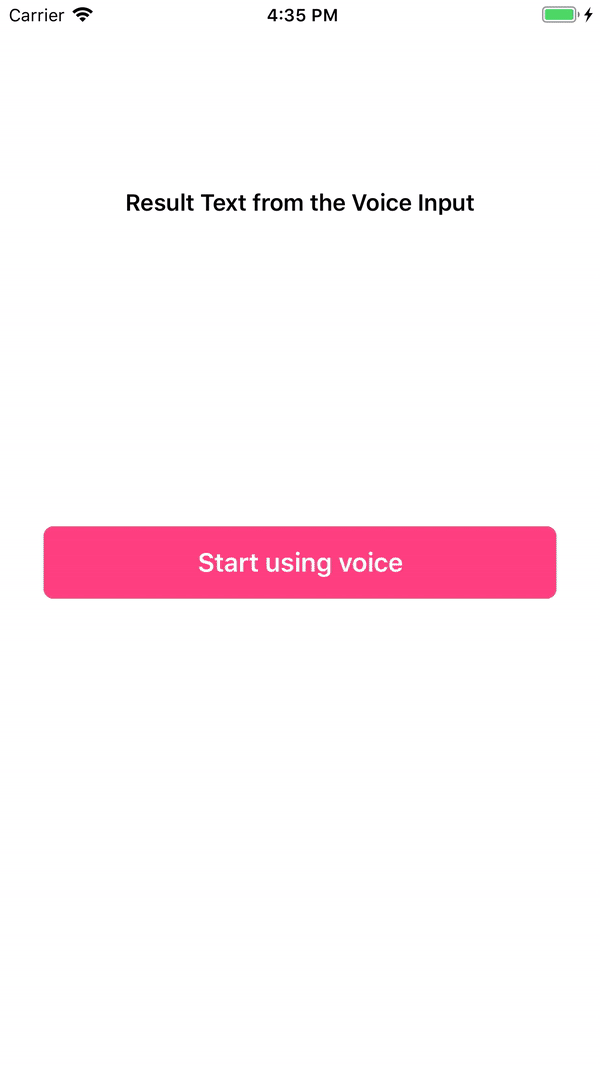
showResultScreen 이 true로 설정되면 결과 화면이 나타납니다.
 /// Whether or not to show a result screen after the recording is finished.
voiceOverlayController . settings . showResultScreen = true

/// Timeout for showing the result screen in case no resultScreenText is provided on time.
voiceOverlayController . settings . showResultScreenTimeout = 2

/// Time for showing the result screen with the provided resultScreenText.
voiceOverlayController . settings . showResultScreenTime = 4

/// The processed result screen text that should be appear in the result screen.
voiceOverlayController . settings . resultScreenText = NSAttributedString ( string : myString , attributes : myAttributes )
위젯은 결과 화면이 닫힐 때를 위한 resultScreenHandler 를 제공합니다("다시 시작" 버튼을 클릭하지 않은 경우). 핸들러는 resultScreenText 에 미리 설정된 텍스트를 제공합니다.
voiceOverlayController . start ( on : self , textHandler : { ( text , final ) in
    print ( " getting ( String ( describing : text ) ) " )
    print ( " is it final? ( String ( describing : final ) ) " )

    if final {
        // Process the result to post in the result screen.
        // The timer here simulates a network processing call that took 1.5 seconds.
        Timer . scheduledTimer ( withTimeInterval : 1.5 , repeats : false , block : { ( _ ) in
            let myString = text
            let myAttribute = [ NSAttributedString . Key . foregroundColor : UIColor . red ]
            let myAttrString = NSAttributedString ( string : myString , attributes : myAttribute )

            self . voiceOverlayController . settings . resultScreenText = myAttrString
        } )
    }
} , errorHandler : { ( error ) in
    print ( " error ( String ( describing : error ) ) " )
} , resultScreenHandler : { ( text ) in
    print ( " Result Screen: ( text ) " )
} ) InstantSearchVoiceOverlay는 MIT 라이선스에 따라 사용할 수 있습니다. 자세한 내용은 LICENSE 파일을 참조하세요.


