Picture Factory is a picture editing software that is very suitable for novices. Many friends may not know how to compress pictures in Picture Factory. The following is a tutorial on how to compress pictures in Picture Factory . Friends who need it, please come and take a look.

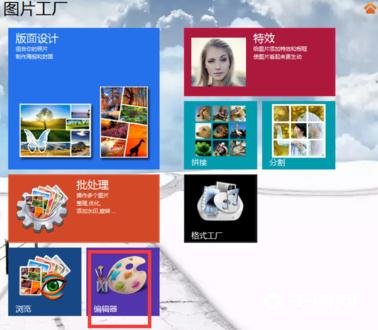
1. Click the editor in the lower right corner to open a picture.

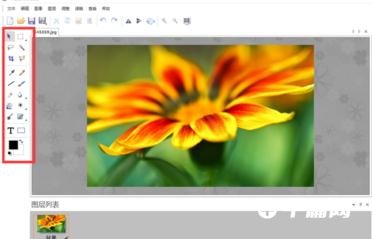
2. There is a column of toolbars on the left.

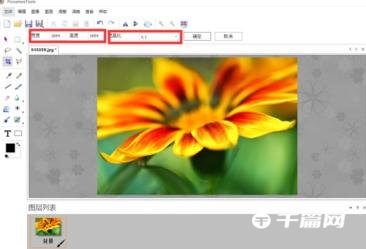
3. Click the cut icon, and a cut edit box will appear above the image. You can manually fill in the cut size, or select the cut ratio to get pictures of different proportions. Note: Generally, if you want to get a square picture, such as a 300*300 picture, you must first crop the original picture into a square and then compress it.

4. The picture below is a picture cropped to 1:1. You can see that the height and width of the picture are both 1694. The following describes how to compress it into a 300*300 picture.

5. After saving the above picture, close the software, the main interface of the picture factory will pop up, and click Batch Processing in the lower left corner.
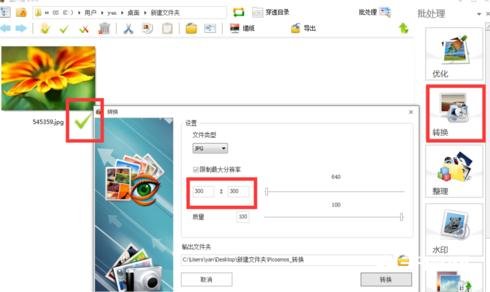
6. Open the path where you saved the image. On the left is the image we saved, and on the right is the toolbar.

7. Select the picture, click Convert, change the resolution to 300*300, and you will get a 300*300 picture.
