The display attribute is one of the most important attributes in CSS. It is mainly used to control the layout of elements. Through the display attribute, you can set whether and how the element is displayed.
1. The role of the display attribute
1. The display attribute can set the internal and external display type of the element.
(1) External display type:
a. The external display types of elements include block, inline, etc.
b. The external display type will determine the performance of the element in the fluid layout.
(2) Internal display type:
Internal display types include flex layout, grid layout, fluid layout, etc.
An element's internal display type controls how its children are laid out.
2. Fluid layout (document flow or regular flow):
"Document flow" or "fluid layout" is the way that "block" and "inline" elements are displayed on the page before any changes are made to the layout (by default).
To put it simply and straightforwardly, it is a typesetting method that stipulates how block-level and inline elements are typed and displayed on the page.
(1) In flow layout - block-level element layout method:
Block-level boxes are arranged vertically in order, starting at the top of the containing block.
The vertical distance between boxes of the same level will be determined by the "margin" attribute.
The vertical spacing between two adjacent block-level boxes will be collapsed according to the margin folding principle.
(2) In fluid layout - inline element layout method:
The boxes will be arranged horizontally in order starting from the top of the containing block.
Only horizontal margins, borders, and padding are preserved.
The boxes can be aligned vertically in different ways: bottom or top, or text-bottom aligned
2. Element external display type
1. splay specifies the display type of the element through the following attribute values
(1) block block level
(2) inline-block inline block
(3) inline
2. Element display types are divided into: block level and inline, etc.
3. Inline (inline) elements are divided into: inline inline elements and inline-block inline block elements
(1) diblock block-level elements
1. Common block-level elements are:
<p>, <div>, <ul>, <ol>, <li>, <h1>~<h6>, <dl>, etc.
2. Characteristics of block-level elements:
(1) Exclusive line
(2) You can set the width and height attributes.
(3) If the width is not set, the width defaults to the width of the content area of the parent element.
(4) Any type of elements can be placed in block-level elements, but other block elements cannot be placed in text element tags.
(5) p and div tags cannot be placed in the p tag.
(6) p and div tags cannot be placed in h1-h6 tags.
(2) inline-block inline block elements
1. The following elements have the characteristics of inline block elements:
<img>, form elements, <video>, <audio>, etc. These elements are essentially called replaceable elements (classified as inline elements)
2. Characteristics of inline block elements:
(1) Adjacent inline block (or inline) elements will be displayed on one line. If they cannot be placed, they will wrap to another line.
(2) There will be blank gaps between adjacent inline block elements.
(3) The width and height attributes can be set. The default width of an element is the width of its own content.
(3) inline inline (inline) elements
1. Common inline elements include:
<a>, <strong>, <span>, <i>, <del>, etc.
2. Characteristics of inline elements:
Adjacent inline elements will be displayed on one line. If they cannot fit, they will be displayed in a new line.
Setting the width and height properties is invalid. Its width and height expand according to the size of its content.
Only text or other inline elements can be placed inside inline elements.
3. Note:
The <a> tag cannot be placed inside the <a> tag, but block-level elements can be placed inside the <a> tag.
In actual development, the <a> tag will be converted into a block-level element in some cases.
Comparison of three element types
3. Conversion between inline elements and block-level elements
We only need to add the corresponding display attribute value to the corresponding element to convert the element to the corresponding element type.
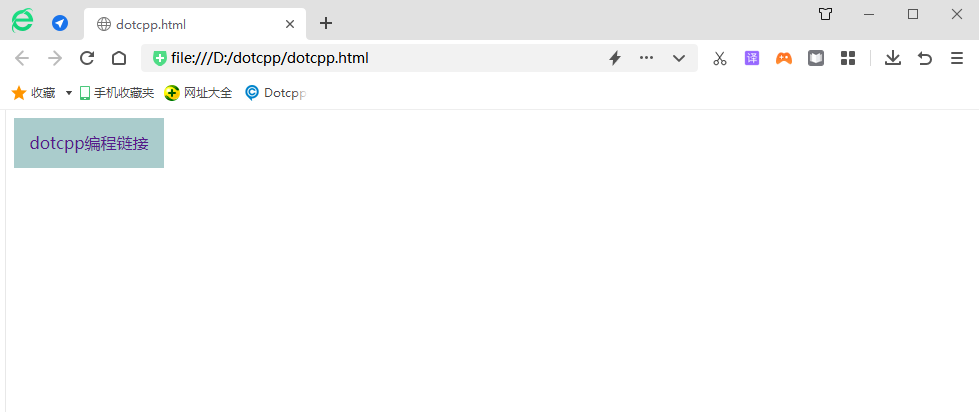
(1) Use display: block; to convert elements into block-level elements.
Example:
<!DOCTYPEhtml><html><head><style>a{display:block;width:150px;height:50px;background-color:#ACC;line-height:50px;text-align:center;text-decoration: none;}</style></head><body><ahref=>dotcpp programming link</a></body></html>Running results:

(2) Use display: inline; to convert elements into inline elements. However, there are few applications of converting elements into inline elements.
(3) Use display: inline-block; to convert elements into inline block elements
4. Hidden element method
Replenish:
(1) Display values other than none are display elements.
(2) visibility:visible; is the display element
Example:
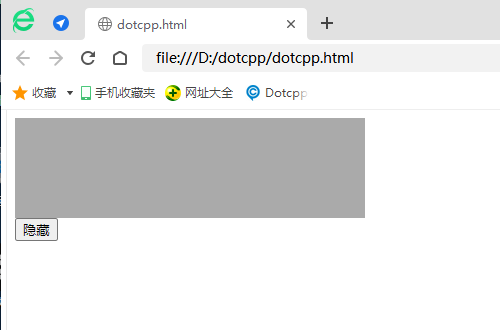
The attribute value none of display can be used to hide elements. It has a similar function to visibility: hidden;. The difference is that display: none; while hiding the element, it will also hide the position occupied by the element. display: none; is usually used in conjunction with JavaScript to hide or show an element. Here is an example to demonstrate:
<!DOCTYPEhtml><html><head><style>div{width:350px;height:100px;background-color:#AAA;}</style></head><body><divid=box></div ><buttononclick=change_box(this)>Hide</button><script>functionchan ge_box(obj){varbox=document.getElementById('box');if(box.style.display=='none'){box.style.display=;obj.innerHTML=hide;}else{box.style. display=none;obj.innerHTML=display;}}</script></body></html>Running results:


5. The difference between the two hiding methods
6. Remove the default white space of inline block elements
Gaps are created by default between inline block elements.
Reasons for gaps:
(1) When elements are formatted as inline elements, whitespace characters (spaces, carriage returns, line feeds, etc.) between elements will be processed by the browser.
(2) According to the processing method of white-space (the default is normal, which merges excess whitespace), the carriage return and line feed in the original HTML code is converted into a whitespace character, so gaps appear between elements.
(3) The spacing between these elements will change with the size of the font
Solution:
(1) Add the parent element and rewrite the font-size of the child element at the same time
The font-size attribute has inheritance, so the parent element font-size:0; will be inherited to the child element span, and the child element needs to reset the font-size size.
(2) Add float to the element
After adding float to an element, it will break away from the document flow. When the height of the parent element is not added, there will be a height collapse problem, and the problem caused by the float needs to be cleared.
(3) In the gap between pictures, add display:block;
After adding display:block, the image becomes a block-level element and occupies an exclusive line.